Before working in any GE Healthcare MR suite or performing any GE Healthcare service procedure, you must:
Have read and understood all hazard conditions and safety requirements in the latest revision of the GE Healthcare MR Service Safety Manual (5452735).
Have successfully completed all relevant GE Healthcare Environmental Health and Safety (EHS) courses (or for non-GE employees, equivalent workplace training courses).
Comply with all site-specific training and workplace safety requirements.
If you have any safety concerns at any time, do not begin work or immediately stop work and move to a safe location. Immediately contact your supervisor or site safety officer for instructions on how to proceed.
About this task
The Echo Planar Test (EPT) combines the functionality of the EPI white pixel, B0 dither calibration and group delay calibration into a single tool with a simple user interface. The output is suitable for remote support access, trending, and automatic checking of results against acceptance limits. EPT automatically updates the Echo Planar Image (EPI) calibration files.
Procedure
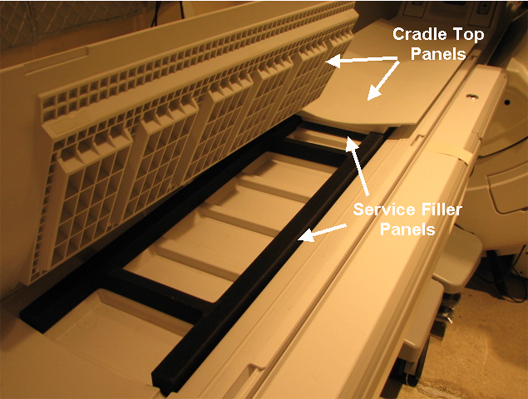
(For curved table) Install a service filler panel under both cradle top panels.
Figure 1. Service Filler Panel on Curved Table
Position and connect an empty head coil, and then landmark on the center line.
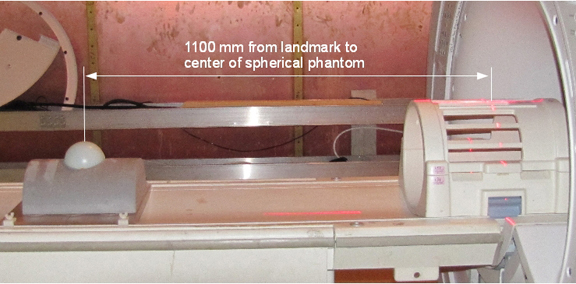
(For curved table) Place an EPI Grafidy foam positioner and a 100 mm sphere in the positioner. Move the table into the bore to 1100 mm from landmark. Slide the Grafidy base plate so the center of the 100 mm sphere is at the axial alignment light, and then press the MOVE TO SCAN button.