
- Optima MR450w BASE 1.5T System Service Methods
- 5690012-2EN Revision 3
- 00000018WIA30C3BE20GYZ
- id_131065343.1
- Jul 30, 2020 3:40:07 PM
Cradle/LPCA release adjustment
Prerequisites
| Personnel requirements | |||
|---|---|---|---|
| Required persons | Preliminary requirements | Procedure | Finalization |
| 1 | - | 15 minutes | 5 minutes |
| Tools and test equipment | |||
|---|---|---|---|
| Item | Quantity | Part number | Manufacturer |
| Non-ferrous standard head screwdriver | 1 | - | - |
About this task
The actuator on the LPCA must be set so that it presses a button on the cradle to mechanically release the cradle from the patient table, allowing it to move forward into the magnet bore.
Procedure
- Remove the LPCA cover.
Figure 1. LPCA Cover Screws 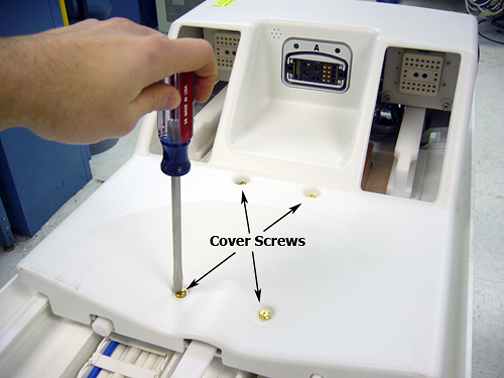
- To properly adjust the cradle release, loosen the lock screw
on the plunger.
Figure 2. Adjusting the plunger 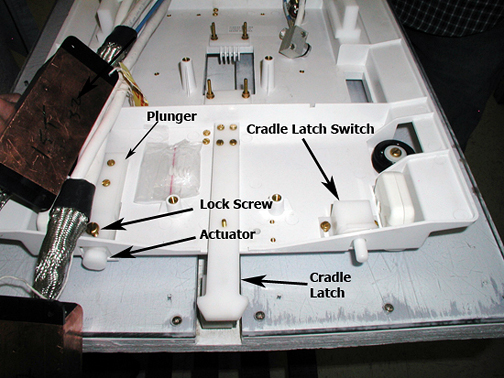
Figure 3. Cradle release button 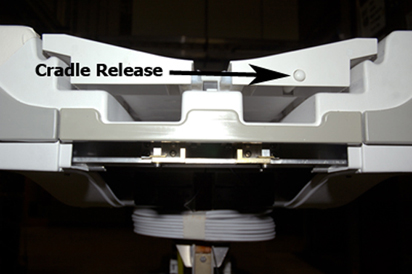
Figure 4. Distance between cradle release button and actuator 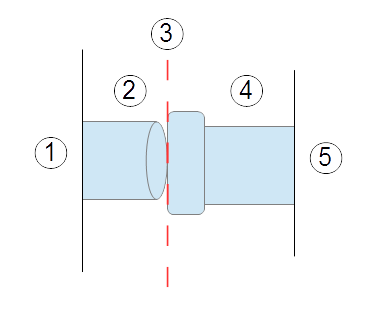
Item Description 1 Cradle 2 Cradle release button 3 Distance between cradle release button and actuator end is 1 mm ± 1 mm when table is docked 4 Actuator 5 LPCA Note: The actuator must be positioned 1 mm ± 1 mm from the front surface of the cradle when the LPCA is attached to the cradle. If the actuator is positioned too far away from the cradle, it will not sufficiently engage the cradle release button and the cradle will not move. Likewise, if the actuator is positioned too far into the cradle, the LPCA will bind with the cradle, resulting in a loud noise whenever the LPCA detaches from the cradle as the table is lowered. Fine-adjust the actuator as necessary.
Finalization
- Dock the table.
- Confirm that the cradle release functions properly.
- Confirm that the LPCA connects to the cradle and that the cradle can move into the bore.