
- SIGNA™ Hero 3.0T Service Methods
- 5852800-8EN Revision 1.0
- 00000018WIA305B7F20GYZ
- id_131064804.9
- Feb 8, 2022 9:59:43 PM
Setting up and calibrating the Global Operator Cabinet (GOC) monitor
Set up and calibrate the monitor for your system.
Setting up and calibrating the HP LCD monitor
Setting up the HP LCD monitor
- Complete LOTO for the Global Operator Cabinet (GOC).
- Disconnect the DVI or DisplayPort cable and the power cable from the LCD monitor, and remove the LCD monitor from the operator workspace table.
- Remove the new LCD monitor from its box and its packing, and set the LCD monitor on the operator workspace table.
- Connect the DVI-D or (For T5820 GOC) DisplayPort and power cables to the LCD monitor.
Route these cables neatly to the back of the monitor base and the operator workspace.
Figure 1. HP HC240 power cable connections 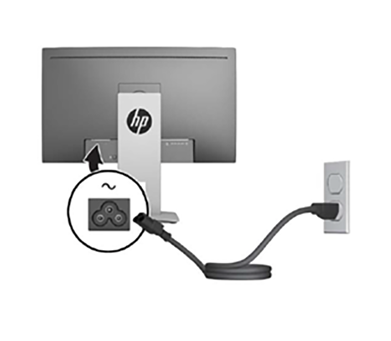
Figure 2. Power adapter supplied with HP monitor (5412946-2) 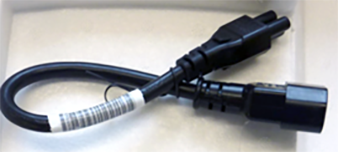
- Position the monitor no closer than 16 inches (41 cm) and no farther than 28 inches (71 cm) from the viewing position. The optimal distance is 24 inches (61 cm) for either of the monitors.
Calibrating the HP LCD monitor
- Restore power to the GOC and boot up as normal.
- Make sure the main LCD monitor power is on.
If LCD power is not on, press the Power On/Off button on the front panel (see below).
- Use the On-Screen Display (OSD) to adjust the display settings screen image based on the sites preferences, follow the OSD adjustments on the display’s front panel.
- To access the OSD menu, press one of the five front bezel Function buttons (except Power button) and then press Menu button to open the OSD.
- Use the five Function buttons to navigate, select, and adjust the menu choices. The button labels are variable depending on the menu or sub-menu that is active.
Table 1. HP LCD Monitor HC240 Controls Main Menu Description Luminance Adjusts the brightness level of the screen. Color Control Selects and adjusts the screen color. Input Control Selects the video input signal. Image Control Adjusts the screen image. PIP Control Selects and adjusts the PIP image. Power Control Adjusts the power settings. OSD Control Adjusts the on-screen display (OSD) and Function button controls. Management Enables/disables DDC/CI support and returns all OSD menu settings to the factory default settings. Language Selects the language in which the OSD menu is displayed. The factory default is English. Exit Exits the OSD menu screen. - This display has been certified as a DICOM (Digital Imaging and Communication in Medicine) Part 14 compliant product. The display is factory calibrated and the default color setting is DICOM.Note: When viewing medical images make sure the display color setting is set to DICOM.
- To change the color setting to another preset or custom setting:
- Press the Menu button on the front panel of the display to open the OSD menu.
- Navigate and highlight the Color menu and select the desired color setting.
- Click button Okay to select and click Save and Return.
Setting up and calibrating the Eizo EV2430 24-inch monitor
Setting Up the Eizo EV2430 24-inch monitor
- Remove the new monitor from its box and its packing and set the monitor on the operator workspace table.Note: Only use the DVI-D and AC power cables. The other items are not used. Dispose of unused items locally.
- Connect the DVI-D cable from the GOC to the DVI-D port on the monitor.
- Connect the power cables to the monitor.
- Route cables neatly to the back of the monitor base and the operator workspace.
Figure 3. Video cable connection – Eizo monitor 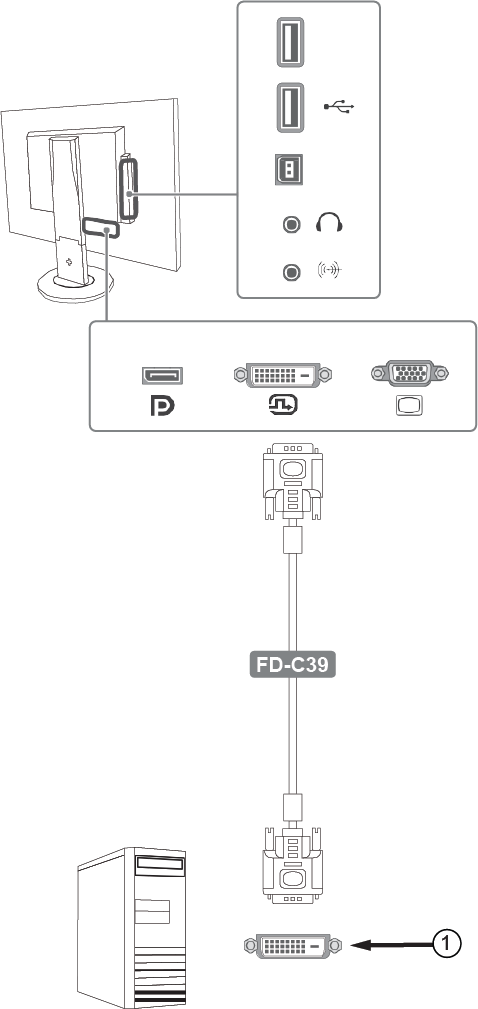
1 DVI Port Figure 4. Power cable connection – Eizo Monitor 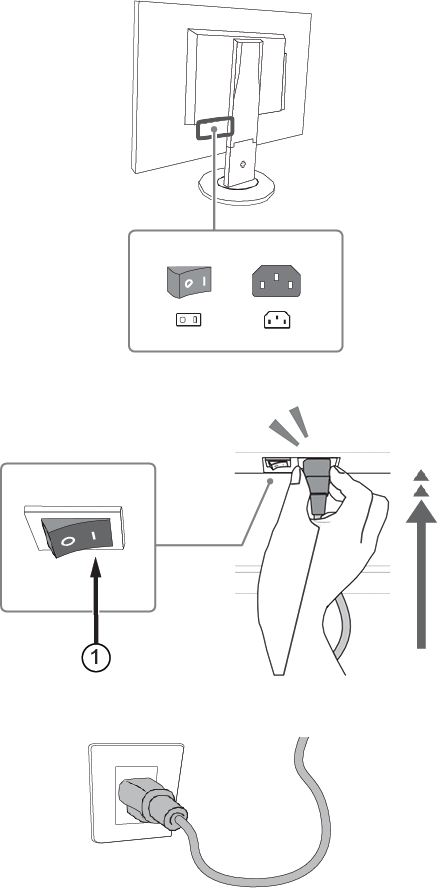
1 Factory preset is set to on. Note: Ensure that only GEHC product video hardware is connected to the GOC so that the software properly installs. - Turn on the monitor if not already on. Check that the main LCD monitor power is on. If not, press the Power On/Off button on the front panel.
- Position the monitor no closer than 16 in (41 cm) and no farther than 28 in (71 cm) from the eyes. The optimal distance is 24 in (61 cm) for either of the monitors.Note: Allow the monitor to warm up for 20 minutes before performing any adjustments.
- Boot up the GOC and log in as
root.Note: It is possible that the customer changed the default password. If you cannot log in, contact the customer for the correct password. - Open Guided Install and select Basic Configuration > System Configure
- Refer to the figure below and verify the following:
- Make sure the correct video card is selected.
- If not, choose the correct video card model from the Video Card menu.
- If the correct video card is not listed, make sure the most recent MrApps software and Service Packs are loaded.
- Select LCD Monitor - Other as the Display Type.
- If this option is not available, use NEC LCD2490WUXi2.
Figure 5. System Configuration Panel – Example 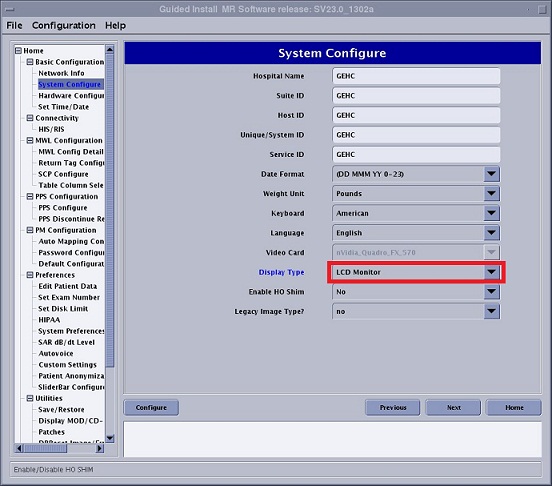
- Make sure the correct video card is selected.
- Click Configure. Default gamma tables will be installed on the system.
- When complete, exit Guided Install and reboot the system.
- Log in as
root.Note: It is possible that the customer changed the default password. If you cannot log in, contact the customer for the correct password. - Adjust the monitor to customer preference. For details and recommended settings refer to LCD Monitor Screen Adjustments
Calibrating the Eizo EV2430 24-inch monitor
Follow the directions below to calibrate the Eizo EV2430 24-inch monitor
- Refer to the figure and table below for locations and descriptions of the Eizo monitor controls.
Figure 6. Front panel controls 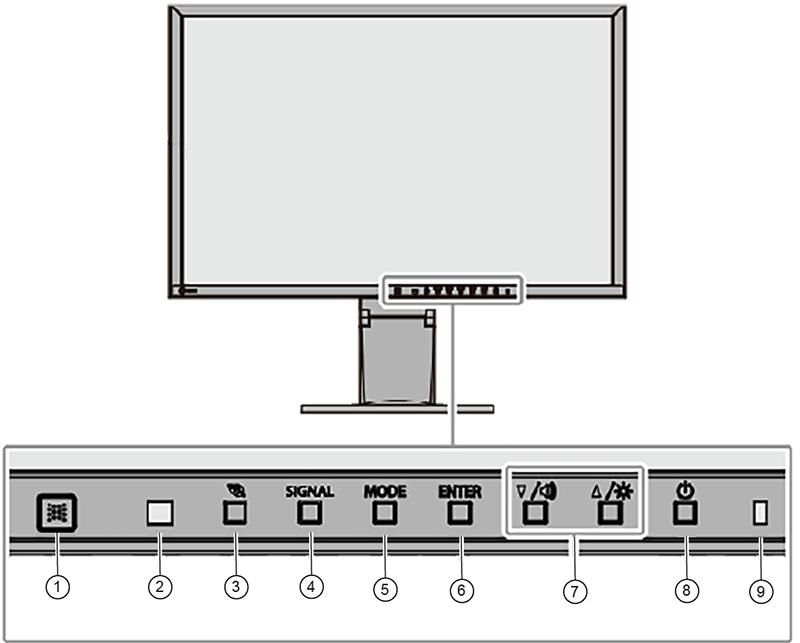
1 EcoView sense sensor Detects movement of a person in front of the monitor 2 Ambient light sensor Detects ambient brightness 3  button
Displays the power saving setting menu 4 SIGNAL button Switches input signals for display 5 MODE button Switches the color mode 6 ENTER button Displays the Settings menu, selects an item on the menu, and saves. 7 ▲ / [Volume icon] , ▼/ [Brightness icon] - Controls navigation and adjusts settings
- ▲ / [Volume icon]: Displays the volume adjustment menu
- ▼ / [Brightness icon]: Displays the brightness adjustment menu
8  button
Turns power on or off 9 Power indicator Indicates Monitors operation status - White: Operating
- Orange: Power saving mode
- Off
Figure 7. Rear Panel Controls 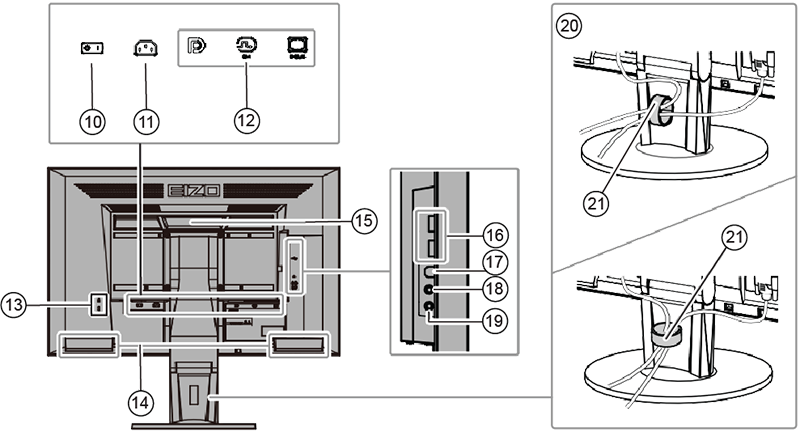
10 Main power switch Turns the main power on ( | ) or off ( O ). 11 Power connector Connects the power cord 12 Input signal connector Left: DisplayPort
Center: DVI-D
Right: D-Sub mini15-pin
13 Security lock slot Complies with Kensington’s MicroSaver security system 14 Speaker Outputs audio 15 Handle Handle used for transportation
16 USB downstream port Connects a peripheral USB device. 17 USB upstream port Connects the USB cable for using the USB Hub function 18 Headphone jack Connects the headphones 19 Analog audio input connector Outputs external audio from the monitor 20 Stand Adjusts the height and angle (tilt and swivel) of the monitor 21 Cable holder Manages cables - Display the settings menu.
- Press Enter to display the setting menu.
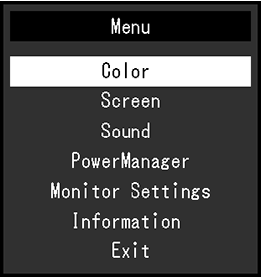
Note: Default display settings for Eizo EV2430Color sRGB Color Temperature 6500K Display Transfer function Gamma2.2 Brightness Preset at 80% - Press Enter to display the setting menu.
- Adjust settings
- Select a setting to adjust with ▲▼ and then press Enter. The setting submenu displays.
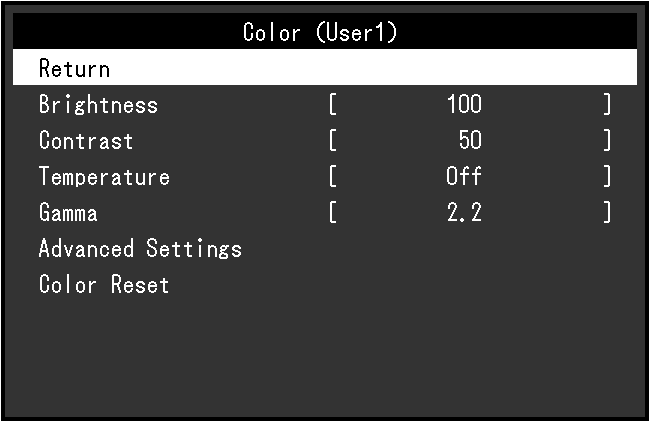
- On the submenu, select a setting to adjust with ▲▼ and then press Enter. The adjustment menu displays.
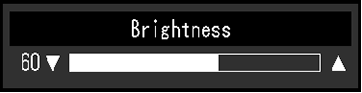
- Use ▲▼ to adjust settings as needed and then press Enter to set.
- Select a setting to adjust with ▲▼ and then press Enter. The setting submenu displays.
- Exit menu
- Select Return from the submenu and then press Enter.
- Select Exit and then press Enter.
Finalization
- Do a check scan to ensure the system is working properly.
- If the system has a camera and the customer wants to match the camera image to the new monitor image, the customer must notify the camera vendor that a new monitor type has been installed and camera adjustments are required.