- id_13106133
- Version: 2.4
- Date: Jul 5, 2019 11:18:59 PM
MCQA Setup - AA
Prerequisites
| Required persons | Preliminary requirements | Procedure | Finalization |
|---|---|---|---|
| 1 | Not Applicable | 30 minutes | Not Applicable |
The 1.5T GEM Coil MCQA will use the 1.5T phantoms, which are green in color. The 3.0T GEM Coil MCQA will use the 3.0T phantoms, which are pink in color.
note:
Coils do not ship with phantoms. Phantoms come in a Unified Phantom set with the MR System.
| Item | Quantity | Effectivity | Part number | Manufacturer |
|---|---|---|---|---|
| PA Phantom Positioner (For both 1.5T and 3.0T) | 1 | - |
5405748 |
- |
Procedure
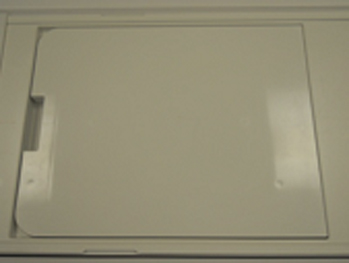
- Place the Flat Filler Panel (shown below) on the table.
Figure 1. Flat Filler Panel
- Perform the following steps.
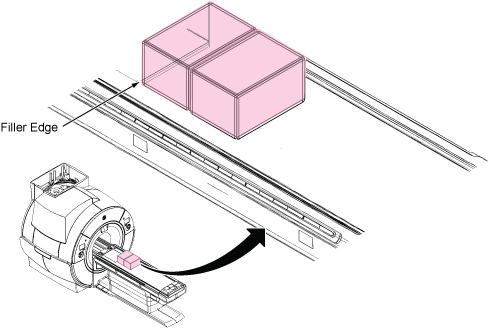
- Place two TL Unified Phantoms. Phantom aligns with the edge
of the flat filler panel as shown.note:
Phantom positioner spacer is not needed for MCQA AA setup.
Figure 2. TL Unified Phantoms
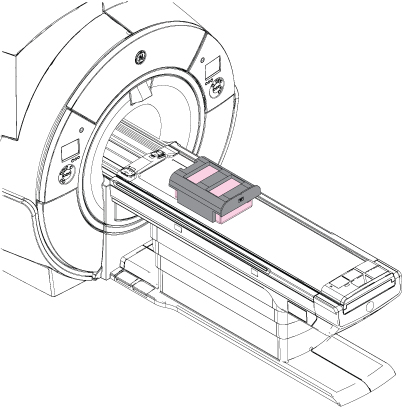
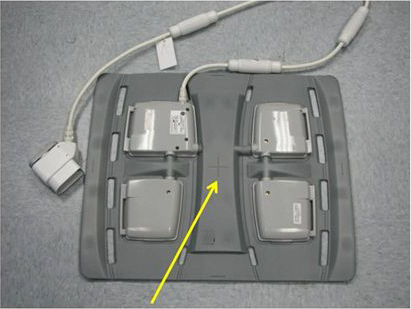
- Place PA Phantom Positioner onto two TL Unified Phantoms as
illustration below.
Figure 3. Positioning of PA Phantom Positioner
- Place two TL Unified Phantoms. Phantom aligns with the edge
of the flat filler panel as shown.
- Setup AA Coil per following steps.
- Place the AA Coil on top of the PA Phantom Positioner, and secure to each other with Velcro® straps as shown.
- Connect the coil to the P2 port.
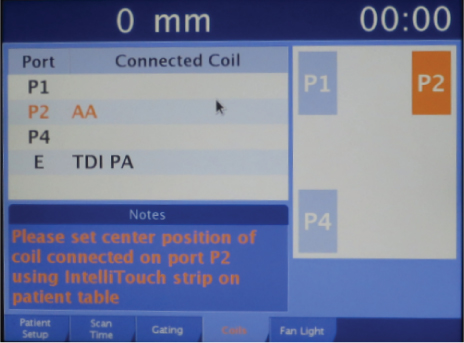
- Set center position of the AA Coil connected on Port2 using
the Touch and Go strips on the side of the table.
Figure 4. Setting Center Position of AA coil Using Touch and Go
- Landmark on the AA Coil crosshairs as shown, and press Advance to Scan.
Figure 5. Landmarking on AA Coil
- Run the Multi-Coil Quality Assurance Tool.note:
Select “3.0T_16Ch_AA_by_GE” for Current Coil field.
Figure 6. MCQA Tool Menu

Finalization
No finalization steps.