- Discovery MR750 3.0T System Service Methods
- 5690009-2EN Revision 4
- 00000018WHA3014C6GYZ
- id_20018546.60
- Nov 3, 2021 6:28:32 PM
Configuring for LVShim
About this task
| Notice | |
|---|---|
The configuring process is different depending on the type of software you are using. Please select the appropriate procedure for configuring for LVShim.
Configuring for LVShim
Procedure
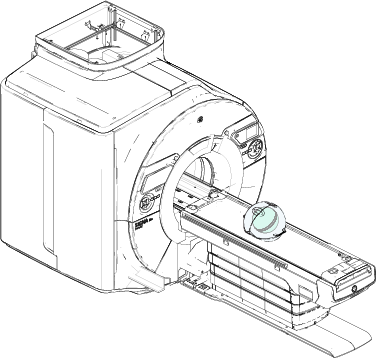
- Set up and align the LVShim phantom. Align the phantom so that:
- The phantom’s seam is oriented perpendicular to the table.
- The phantom’s z-axis is along the length of the cradle.
- The phantom is centered left to right with respect to the cradle top.
Note: This image is a representative example. Actual systems may vary.Figure 1. Placing the LVShim phantom on the patient table