
- SIGNA MR355 / SIGNA MR360
- Service Manual
- 5856356-3EN Revision 5.0
- Basic Service Documentation. Copyright General Electric Company.
- 00000018WIA30C28F20GYZ
- id_131067552.0
- Jul 19, 2019 11:00:08 AM
SPT Head SNR Check
Prerequisites
| Required persons | Preliminary requirements | Procedure | Finalization |
|---|---|---|---|
| 1 | Not Applicable | 0.5 hours | Not Applicable |
| Item | Quantity | Effectivity | Part number | Manufacturer |
|---|---|---|---|---|
| Head coil | 1 | - | - | - |
| Head sphere phantom, loader, and positioner | 1 | - | - | - |
| Service Key | 1 | - | - | - |
| Condition | Reference | Effectivity |
|---|---|---|
|
Cancel out of any previous exams. Click on End Exam. | - | - |
Head Coil Setup
Procedure
- Place Head sphere phantom, loader, and positioner in the head
coil. See Figure 1.
Figure 1. Phantoms Setup 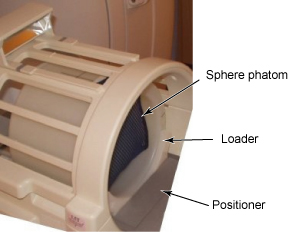
Invoking SPT Full Test Mode
Procedure
To start the SPT Full Test tool from the Service Browser, follow the steps on Figure 2, below.Notice Figure 2. Starting the SPT Test Tool 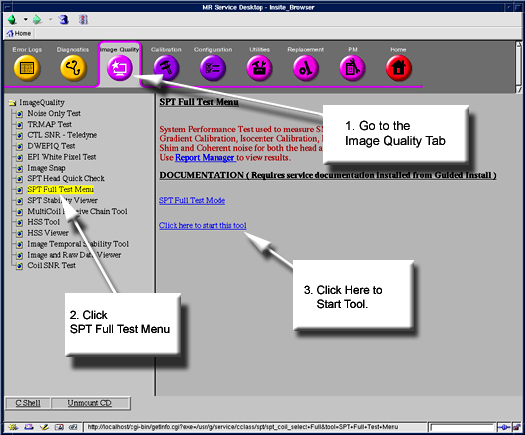
- The SPT Head Coil Selection screen appears. See Figure 3.
Figure 3. Select Head Coil for SPT Screen 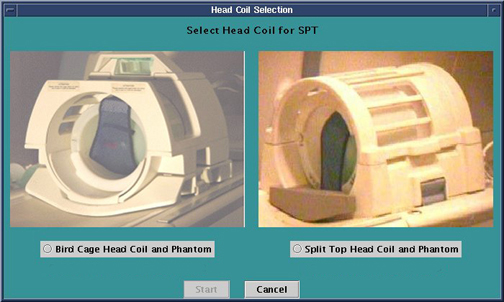
- Select 'Split Top Head Coil and Phantom' then click on Start. A SPT Test menu appears in a window on the desktop
).
- Click Start SPT to begin.
Figure 4. SPT Head SNR setting 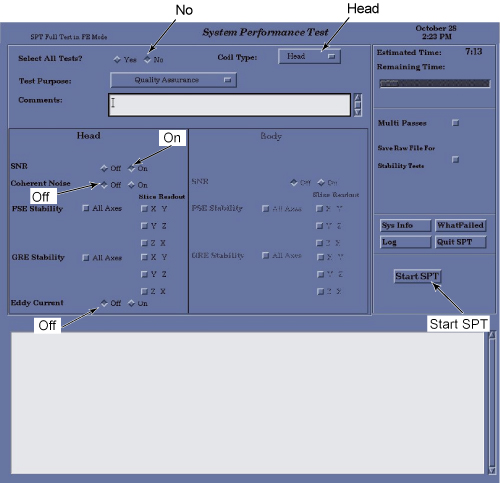
Status messages will appear in the text box below the menu as the tests are run. Use the scroll bar on the right side of the box to move up or down through the messages.
- Click Start SPT to begin.
Finalization
Procedure
- Do a TPS Reset after completing SPT to put the system back.
- If for any reason a SPT scan is aborted, Shutdown and Reboot the system.