
- SIGNA MR355 / SIGNA MR360
- Service Manual
- 5856356-3EN Revision 5.0
- Basic Service Documentation. Copyright General Electric Company.
- 00000018WIA300E9430GYZ
- id_176236877.0
- Feb 21, 2021 9:02:25 PM
Common field service tasks
A list of common field service tasks associated with the MR host computer.
Prerequisites
| Required persons | Preliminary requirements | Procedure | Finalization |
|---|---|---|---|
| 1 | Not Applicable | Not Applicable | Not Applicable |
About this task
This document provides instructions for some common field service tasks associated with the MR host computer. The following procedures are included:
Opening common service desktop
Procedure
- On the Service Desktop Manager, click Service Browser.
Figure 1. Service desktop manager 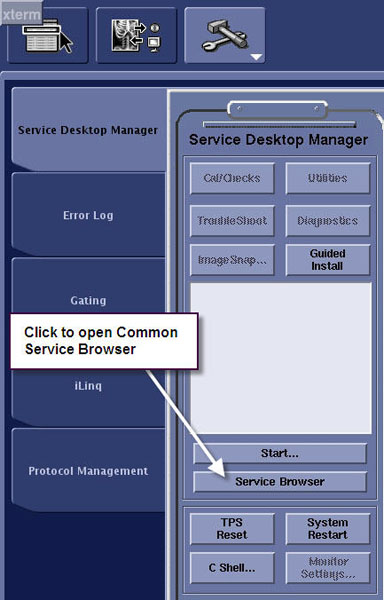
From the Common Service Desktop, you can perform many maintenance and service tasks.
Figure 2. Common Service Desktop 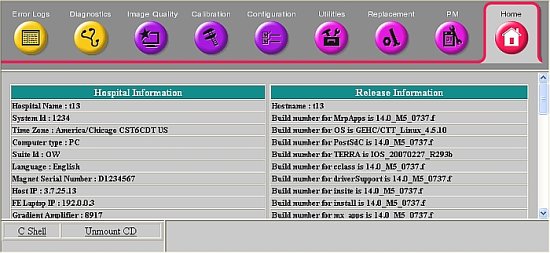
Opening Guided Install in FE Mode
Procedure
- Under the Configuration tab, select Guided Install > FE Mode > Click here to start this tool.
Figure 3. FE Mode 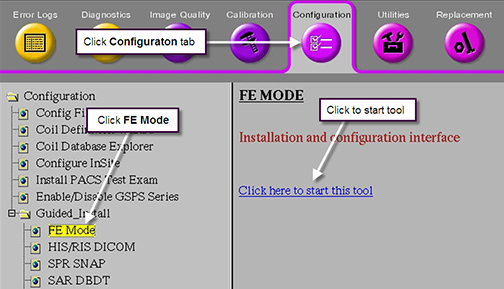
Doing TPS reset
Procedure
- Click Reset.
Figure 4. TPS reset 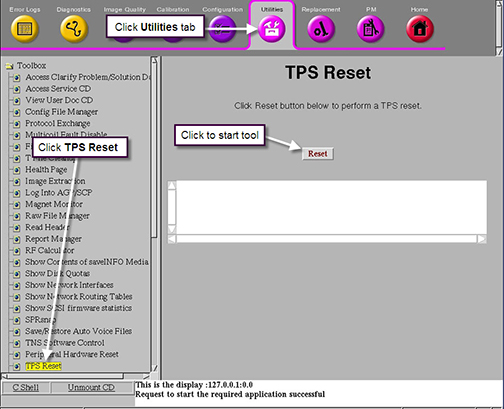
Opening C shell
Procedure
- To open a C shell window, select Tools > Command Window.
Figure 5. Tools Menu 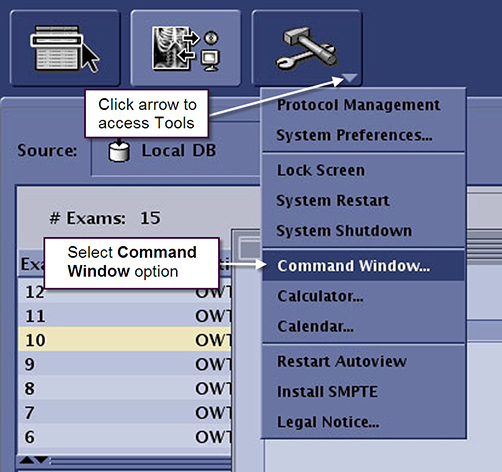
- A C shell terminal window opens.
Figure 6. C Shell Terminal Window 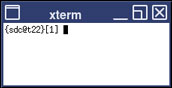
Accessing Planned Maintenance (PM) utilities
Procedure
- From the Common Service Desktop, select the PM tab.
Figure 7. PM utilities 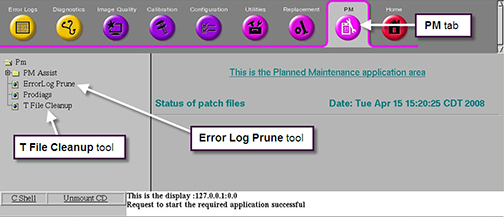
Accessing GE system error log
Procedure
- On the Error Logs tab, select GE System Log.
A new window displays the list of errors.
Figure 8. GE system error log 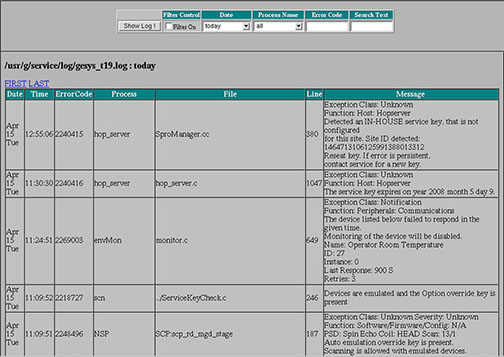
Laptop to host communication (FE)
About this task
Procedure
- Under Toolbox, select Produt Network Filter.
Figure 9. PNF screen 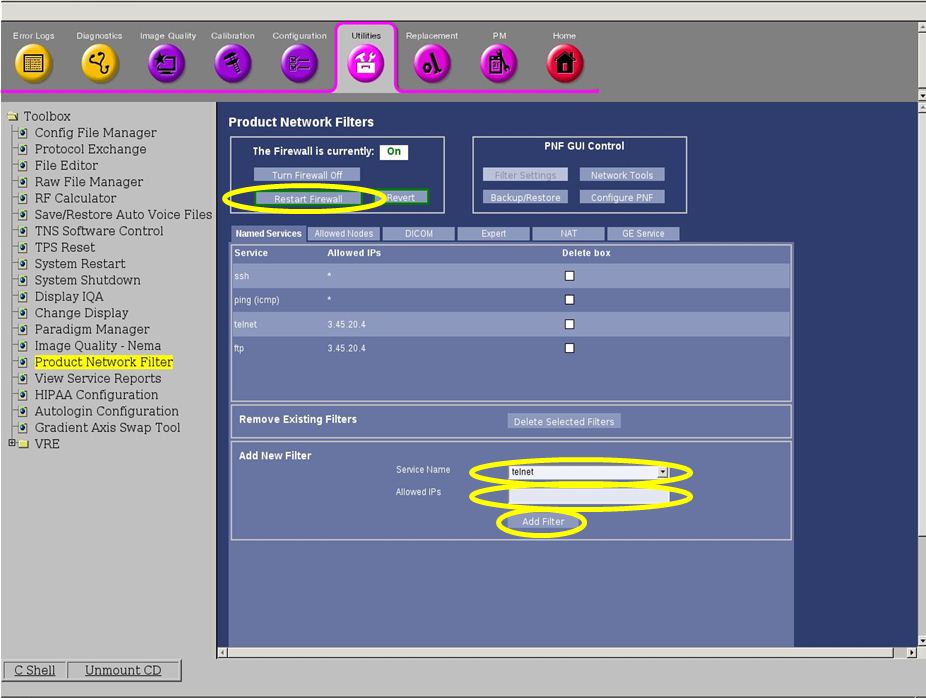
Remote tools: putty and WinSCP
About this task
Due to security updates in the DV25.1 R01 SW, telnet and ftp no longer work with DV25.1_R01 Software. PuTTY replaces telnet and WinSCP replaces ftp.
Procedure
- At the GE software download site, enter requests to download PuTTY and WinSCP software.
- Connect to the host with PuTTY.
- Open PuTTY.
- Enter the Host IP address. The connection type is SSH and port is 22. Select Open.
- If prompted with a security alert, select Yes. The security alert may not appear each time when logging in.
- Enter login ID and password at the command line when prompted. Some sites are configured to disable login as sdc. Login as insite instead (provided restricted service software is installed).
- The command line interface becomes available for telnet commands.
- Connect to the host with WinSCP.
- Open WinSCP.
- Enter the Host name (IP address). The file protocol is SFTP and port is 22.
- Enter user name and password. Select Login. Some sites are configured to disable login as sdc. Login as insite instead (provided restricted service software is installed).
- When prompted to trust the host, select Yes.
- When prompted with an authentication banner, select Continue.
- The local and remote interfaces are displayed for file transfer operations.
- The following configuration settings are recommended to make the keyboard/mouse act the same on different systems. If using these settings, check that the system behaves as expected.
- For Terminal > Window settings, change the Backspace key default to Control-H.
- For Window > Selection settings, change the mouse button action to xterm.
Finalization
About this task
No finalization steps.