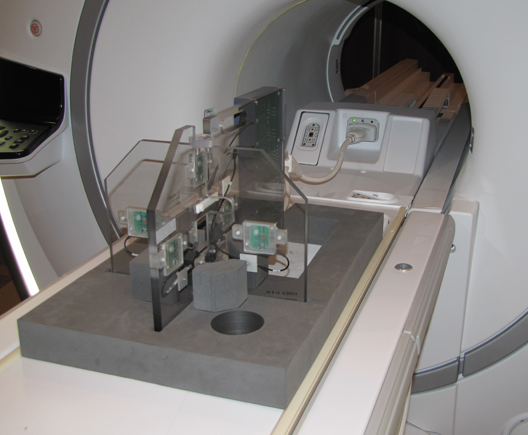
Object ID: 00000018WHA30999BGYZTopic ID: id_2002113 Version: 11.0Date: Feb 21, 2021 9:03:36 PMSetting up grafidy hardware ProcedureUnfold the six-channel Grafidy fixture and lock the arms into place (90° from center plate). Note: Make sure the six-channel Grafidy fixture is firmly pushed into the slit of foam support without any gap. Connect the P-port cable to the T/R board and secure with screws. Place the fixture at the front of the table with the connection box toward the bore.Connect the P-port connector to port P2. (The Green Coil ID light will come on.)Figure 1. Grafidy hardware setup for tableCenter the laser cross hairs on top of the fixture.Landmark the system and press Advance to Scan.