Rear Pedestal Removal
Prerequisites
1 Removing Front Bridge
Procedure
- Move the LPCA to the rear end of the rear pedestal and undock the patient table.
- Detach the cradle from the LPCA.
- System Power must be turned OFF. Refer to Lockout / Tagout for System Cabinet PDU Main Breaker.
- Remove following covers.
-
R/L Rear pedestal covers (Refer to Rear Pedestal Cover.)
-
R and L rear skirt covers (Refer to Skirt Cover Removal.)
-
LPCA cover (Refer to LPCA Cover Removal.)
-
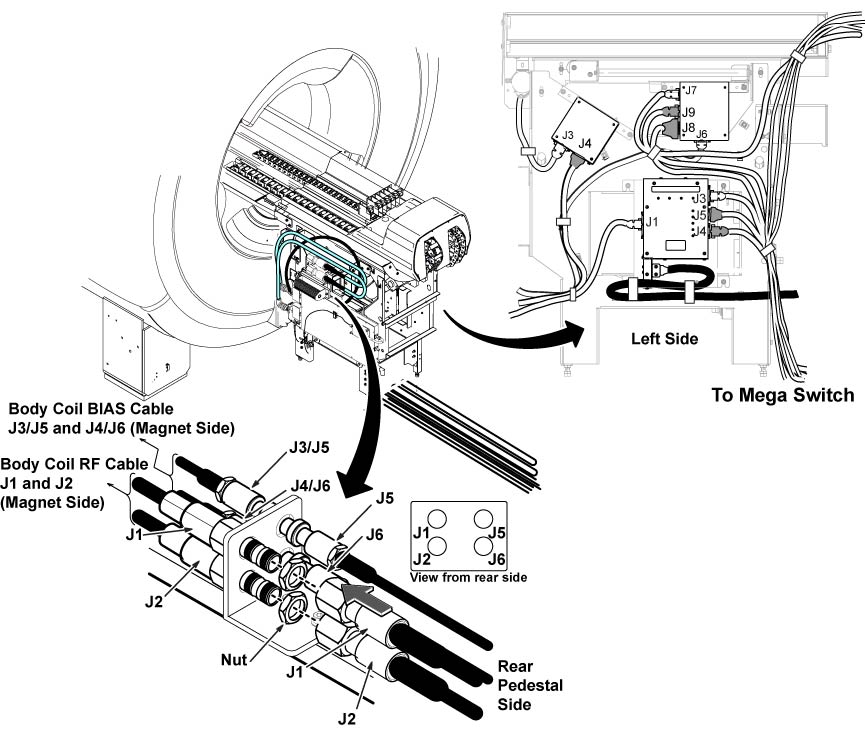
- Disconnect all connectors connecting the magnet and rear pedestal.
Figure 2. Connectors
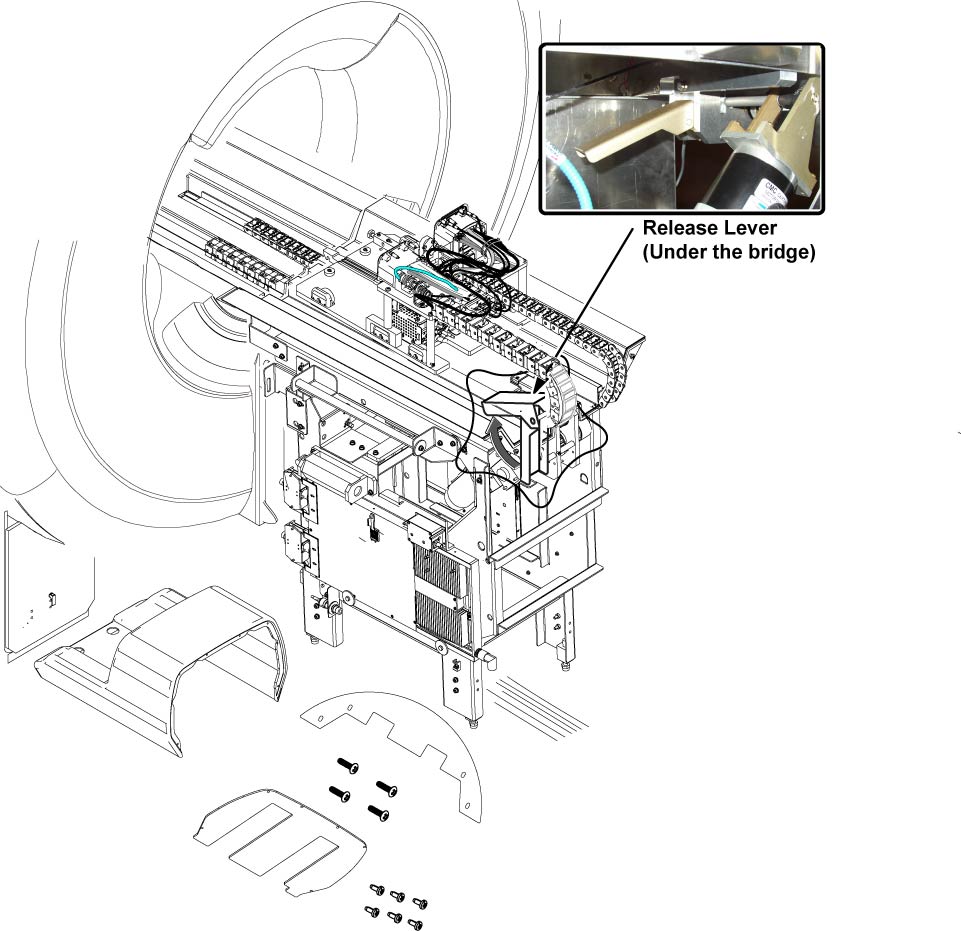
- Release drive belt tension by flipping lever under rear pedestal.
Figure 3. Belt Tension Arm
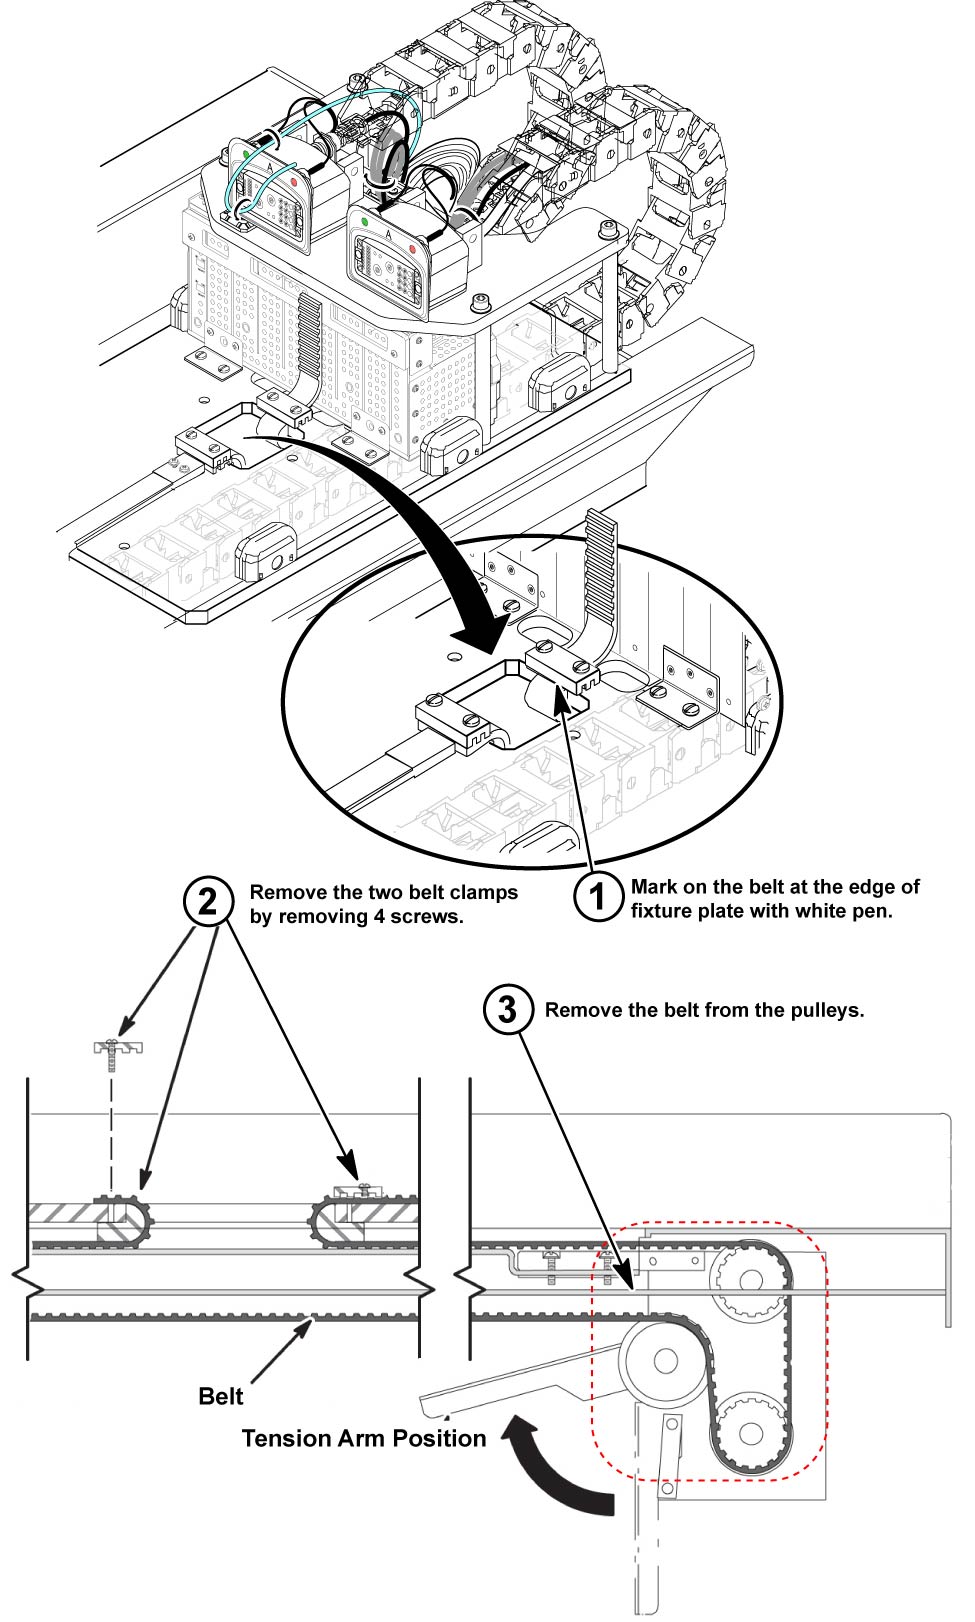
- Remove the belt clamp of front side from LPCA. Refer to illustration. (see Figure 4)
- Remove the belt from the pulleys of rear pedestal.
Figure 4. Note the number of Belt Notches beyond the Belt Clamp
- Remove the flexible cable holder from the front split bridge by removing 4 screws.
- Raise the flexible cable holder to the rear pedestal side. Refer
to illustration.
Figure 5. Drive Belt Threading through the Rear Pulley

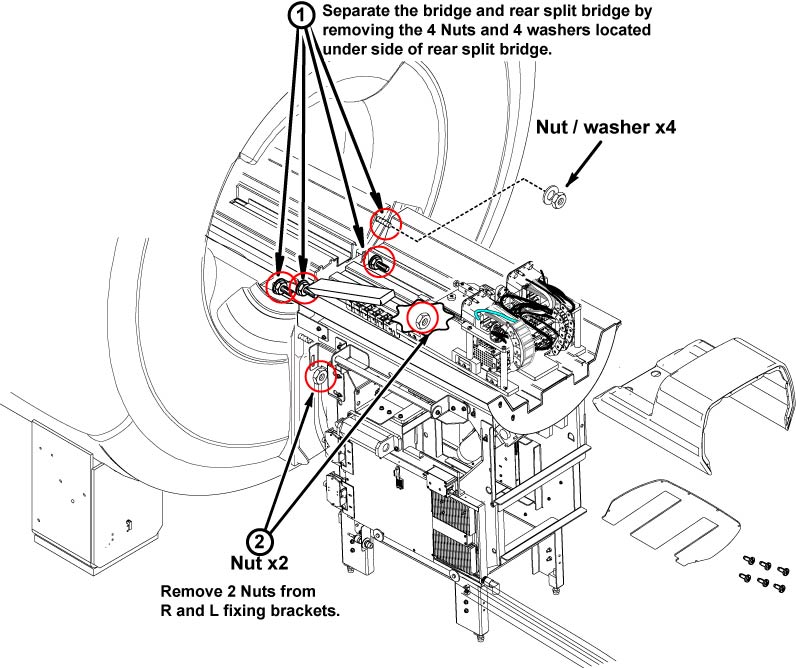
- Remove 4 nuts and 4 washers from back side of rear split bridge.
- Remove 2 nuts from R and L fixing brackets of rear pedestal.
Figure 6. Fixing Nuts Removal
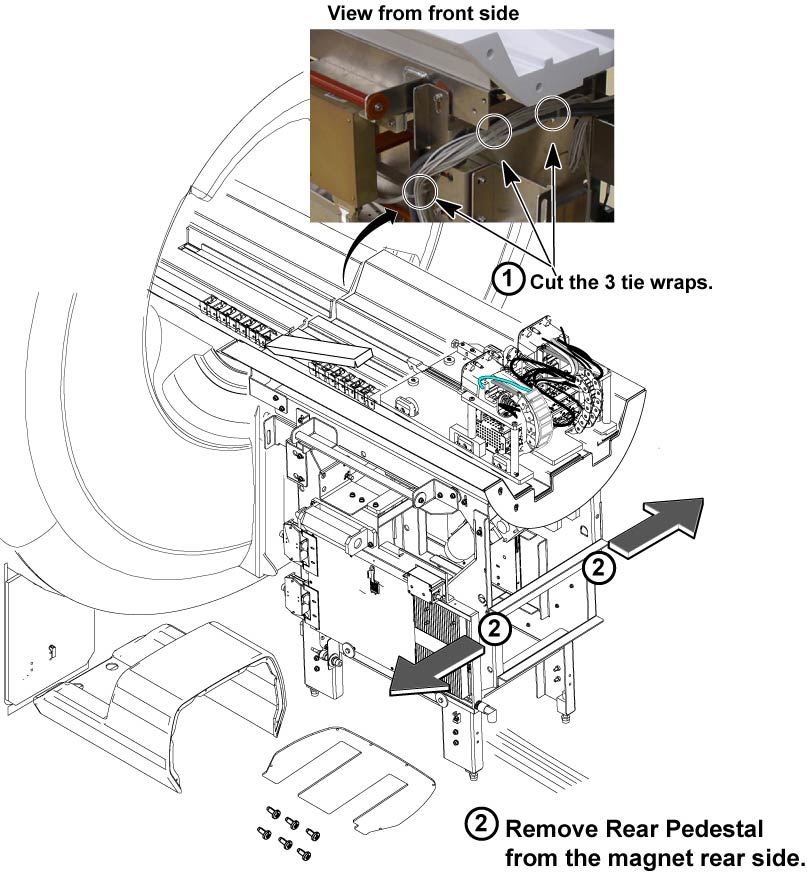
- Cut the 3 tie-wraps from the rear pedestal front side.
 warning
- Using three (2) people, grasp the rear pedestal frame. Slide
pedestal away from magnet and, if necessary, out of the magnet room.
Figure 7. Cable Tie-wraps
- Installation is reverse order of removal.
2 Finalization
Procedure
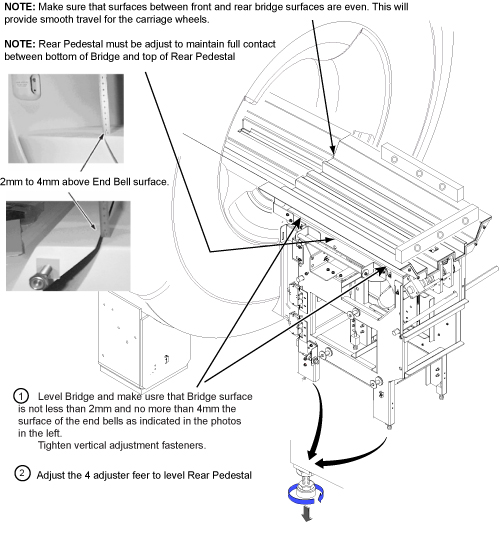
- Verify that the Rear Pedestal is leveled. Refer to Figure 8.
Figure 8. Leveling Of Bridge
- Restore power.
- Verify that Cradle moves in and out fully and smoothly.
- Perform Signal to Noise - Head Scan.