Computer Replacement
Prerequisites
Overview
Procedure
- Perform Save Info. if possible.
- Shutdown system applications if still running. Lockout/Tagout power to the Simple OC before continuing.
- Disconnect the all connectors from the PC rear panel.
- Remove the Right Cover, Refer to Right Cover Removal
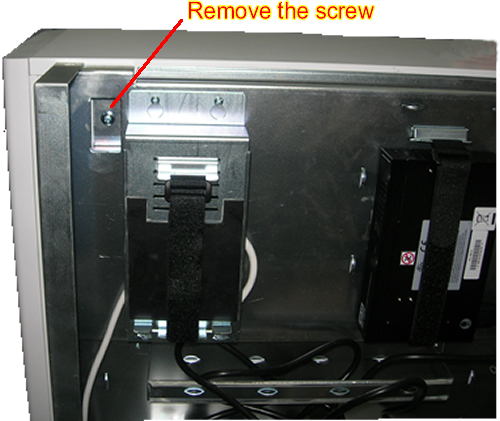
- Remove the screw fixing the PC right cover.note:
Remove the screw carefully not to drop it inside of the frame.
Figure 1. Remove the Screw fixing the PC right cover
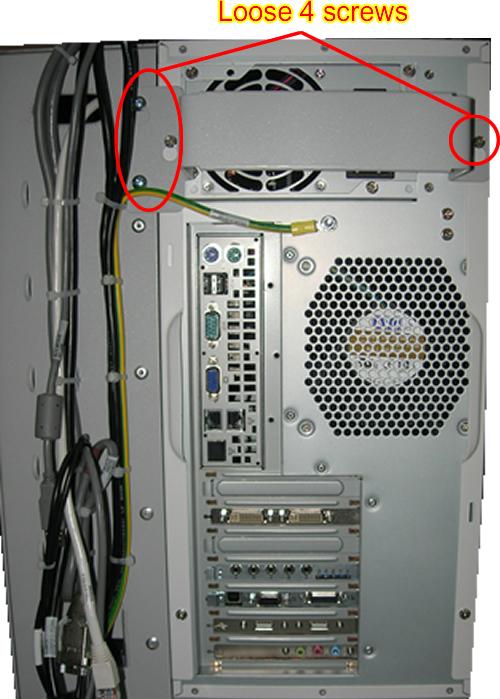
- Loosen the four screws that are fixing the bracket on the PC
rear panel and remove two screws that are fixing the base plate of
the PC (Shown is Figure 2), and take away the bracket.
Figure 2. Rear PC Panel
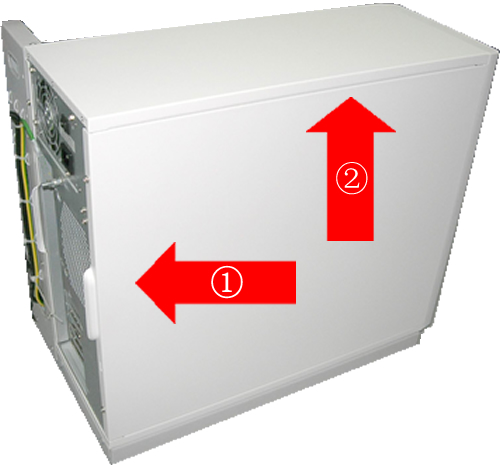
- Move the PC to the back until it can’t be moved. Then
pull up the PC from the chassis.
Figure 3. Remove the PC from the chassis
 note:
note:-
Keep enough space to lay down the PC.
-
Place a piece of sheet on the floor to prevent the PC from scratching.
-
Lay down the PC on the sheet carefully.
-
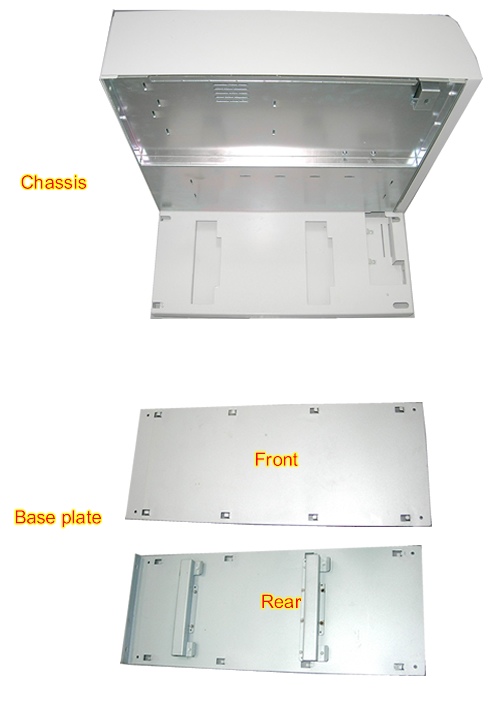
- Remove the four screws fixing the PC and base plate, then move
the base plate to the direction of red arrow. Refer to Figure 4
Figure 4. Detach PC and base plate

-
Figure 5shows the chassis, base plate..
Figure 5. Chassis and base plate
- Remove the Hard Disk drive from the defective PC and install it in the new PC (Hard Disk Drive Replacement). Take the hard drive from the new PC and install it in defective PC.
- Remove the PCI AA from the defective PC and install it in the new PC (PCI AA Replacement).
- Insert the hooks of Base Plate completely to the bottom slots of PC, and install the four screws.
- Install the new PC by performing the steps above in reverse order.
1 Finalization
Procedure
- Repackage defective PC for return.
- Restore power to the Simple OC. Boot software and ensure proper system operation.
- Generate the System Option Key with the new Host ID. Refer toSigna Software Option Installation From eLicese