Hard Disk Drive Replacement
Prerequisites
Overview
1 Preparation
Procedure
- Perform Save Info. if possible. If not, prepare the latest save info CD-ROM.
2 Procedure
Procedure
- Lockout/Tagout the Simple OC before beginning the replacement. Refer to Lockout Tagout.
- Wear the static electricity prevention band to the wrist.
- Spread the static electricity prevention sheet for replacement.
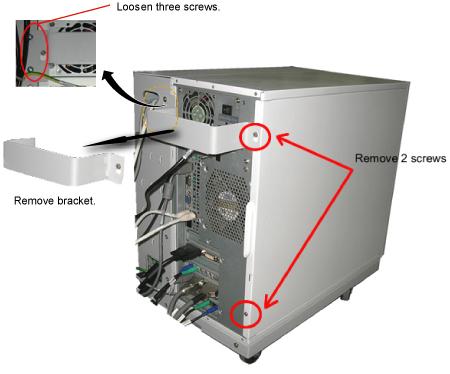
- Loosen the four screws that is fixing the bracket on the PC
rear panel and take the bracket away.note:
A seal might be attached at the PC rear panel which describes "Warranty void if this seal removed". Please do not care about description of the label and remove it for panel removal.
- Remove the left panel of the PC by remove 2 bolts.
Figure 1. Removing the Left Panel of PC
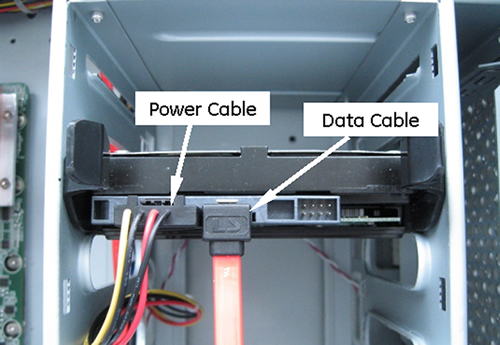
- Disconnect the power and data cable from the failed disk drive.
Figure 2. POWER AND DATA CABLES OF HDD
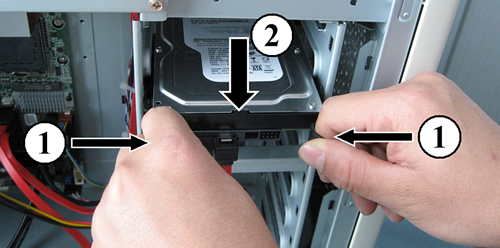
- Remove the Hard Disk drive by pinching the black restraining
tabs together, then slowly removing the drive.
Figure 3. SATA HDD REMOVAL
- Remove the black restraining tabs from defective HDD and install it to new HDD.
- Install the replacement hard drive by the reverse order of removal.note:
The jumper setting is not need for SATA HDD.
- Perform Host Operating System Software Load.Host Operating System Software Load.
3 Finalization
Procedure
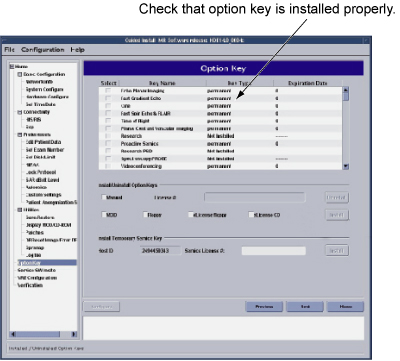
- Check that option key is properly restored by restore info.
- Open Guided Install by selecting Select 'Configuration/Guided
Install/FE Mode' from Common Service Desktop.
Enter 'operator' as password.
- Click Option Keys Tab and check that
option key is properly restored.
Figure 4. Option Keys Check
- Open Guided Install by selecting Select 'Configuration/Guided
Install/FE Mode' from Common Service Desktop.
- Perform Signal to Noise - Head Scan