PCI AA Replacement
Prerequisites
Procedure
- Shutdown the system software and Lockout/Tagout the power to the Simple OC before beginning the replacement.
- Wear the static electricity prevention band to the wrist.
- Spread the static electricity prevention sheet for replacement
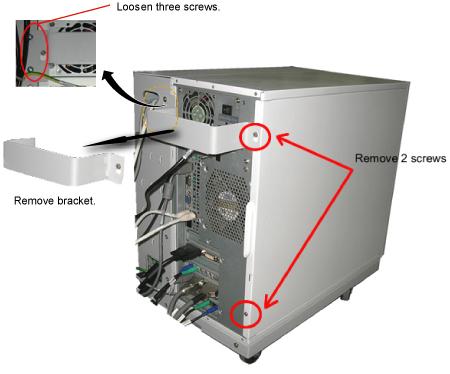
- Loosen the four screws that is fixing the bracket on the PC rear panel and take the bracket away.
- Remove the left panel of the PC by unscrewing the two screws
located on the back of the PC..
Figure 1. Removing the Left Panel of PC
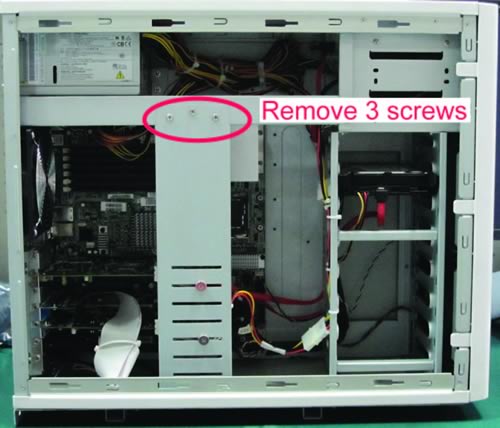
- Remove the 3 screws (Show in Figure 2) and take away
the bracket.
Figure 2. Removing the bracket
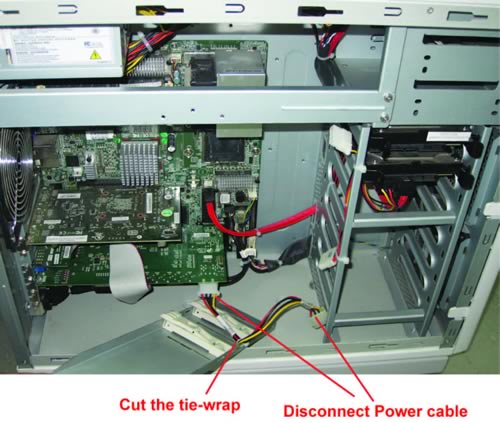
- Remove all the cables that connect to the PCIAA Board and PCIAA Extended Board on the rear of the PC.
- Remove the power cable on the PCIAA Board and cut the tie-wrap
(Show in Figure 3) and take away the bracket.
Figure 3. Remove Power Cable
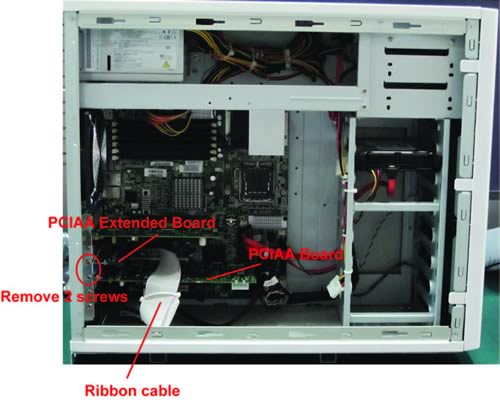
- Remove the two screws (Show in Figure 4) on the PCIAA
Board and PCIAA Extended Board, and take away them.
Figure 4. Remove the PCIAA
- Install the replacement PCIAA collector by the reverse order of removal.
1 Finalization
Procedure
- Turn the system power on. Verify system boot up without any problem.
- Perform Emergency Stop and Off Check
- Perform .note:
Simple OC PCIAA is pre-adjusted at vendor. So, basically, intercom adjustment of Simple OC PCIAA is not required. If necessary, perform Intercom Adjustment as troubleshooting