
- SIGNA™ Hero 3.0T Service Methods
- 5852800-8EN Revision 1.0
- 00000018WHA30BC62GYZ
- id_20014494.14
- Feb 4, 2022 2:59:05 PM
Configuring HIS/RIS
This procedure documents the setup and calibration of the system to a clinical hospital information system (HIS) or a radiology information system (RIS).
Procedure
- Under Connectivity, select HIS/RIS.
Figure 1. HIS/RIS screen 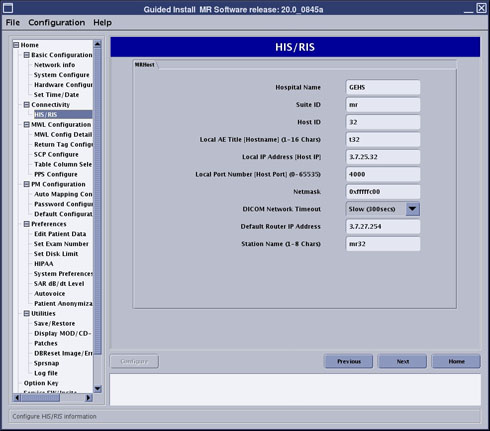
- Under MWL Configuration, select MWL Config Details.
Figure 2. MWL Config Details screen 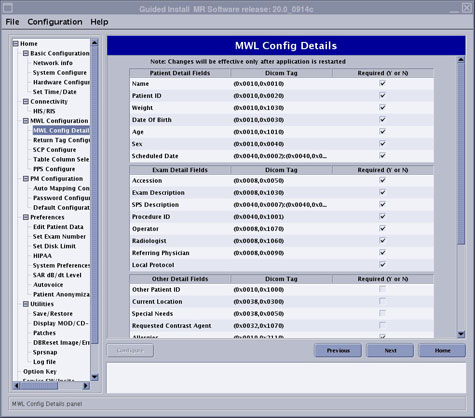
Figure 3. MWL Config Details screen (continued) 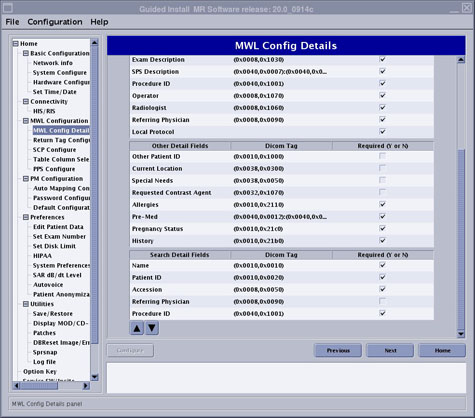
Detail fields Category Attribute description Search detail fields Name Patient Detail Fields Patient's full name Yes Patient ID Patient Detail Fields Primary hospital identification number or code for the patient Yes Weight Patient Detail Fields Weight of the patient in kilograms Date of Birth Patient Detail Fields Date of birth of the named patient Age Patient Detail Fields Age of the patient Sex Patient Detail Fields Sex of the named patient. Enumerated values: - M = male
- F = female
- O = other
Scheduled Date Patient Detail Fields Date on which the Scheduled Procedure Step (SPS) is scheduled to start Accession Exam Detail Fields A department IS-generated number that identifies the order for the Imaging Service Request (RIS). An RIS-generated number that identifies the order for the Study Yes Exam Description Exam Detail Fields Institution-generated description or classification of the Study (component) performed SPS Description Exam Detail Fields Institution-generated description or classification of the SPS to be performed Procedure ID Exam Detail Fields Identifier that identifies the requested procedure in the Imaging Service Request. Required if Sequence Items is present Yes Operator Exam Detail Fields Name of operator(s) acquiring or creating RT Image Radiologist Exam Detail Fields Name of the physician(s) reading the Study Referring Physician Exam Detail Fields Name of the patient's referring physician Yes Local Protocol Exam Detail Fields Other Patient ID Other Detail Fields Other identification numbers or codes used to identify the patient Current Location Other Detail Fields Describes the current known location of the patient Special Needs Other Detail Fields Medical or social needs (for example, wheelchair, oxygen, non-English-speaking, and so on) Requested Contrast Agent Other Detail Fields Contrast agent requested for use in the procedure Allergies Other Detail Fields Description of prior reaction to contrast agents Pre-Med Other Detail Fields Medication to be administered at the beginning of the SPS; for example, Nuclear Medicine radiopharmaceutical Pregnancy Status Other Detail Fields Describes pregnancy state of patient. Enumerated values: - 0001 = not pregnant
- 0002 = possibly pregnant
- 0003 = definitely pregnant
- 0004 = unknown
History Other Detail Fields History - Under MWL Configuration, select Return Tag Configure.
Figure 4. Return Tag Configure screen 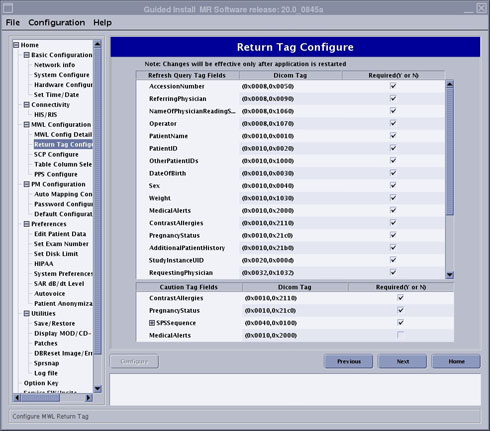
- Under MWL Configuration, select SCP Configure.Note: SCP means Service Class Provider. It is used for HIS/RIS server (which provides MWL service) configuration.
Figure 5. SCP Configure screen 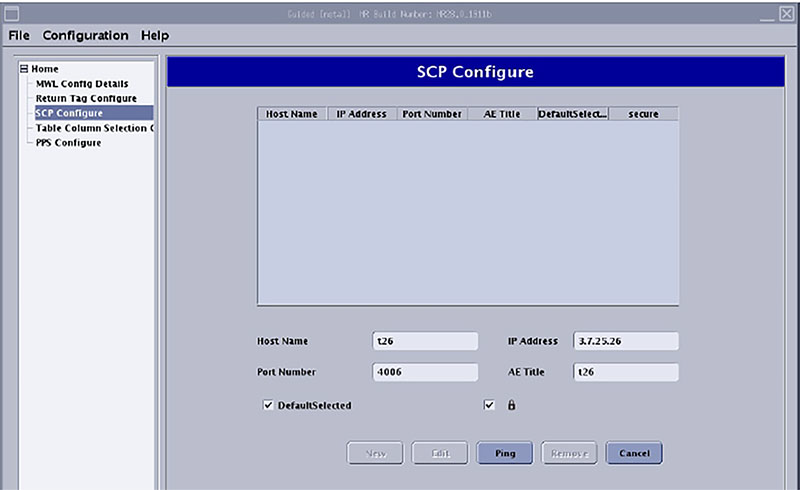 Note: The lock icon is only available for PX29.0 and later.
 - Under MWL Configuration, select Table Column Selection Configure.
Figure 6. Table Column Selection Configure screen 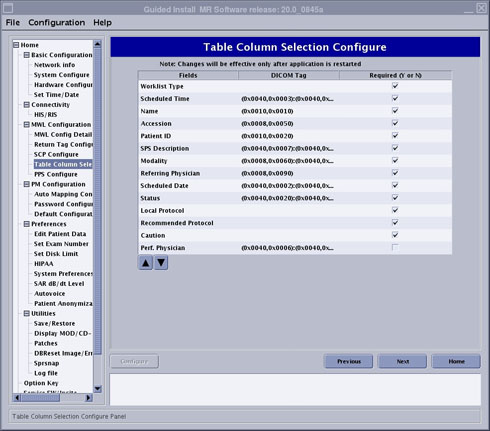
- Under MWL Configuration, select PPS Configure.
Figure 7. PPS Configure screen 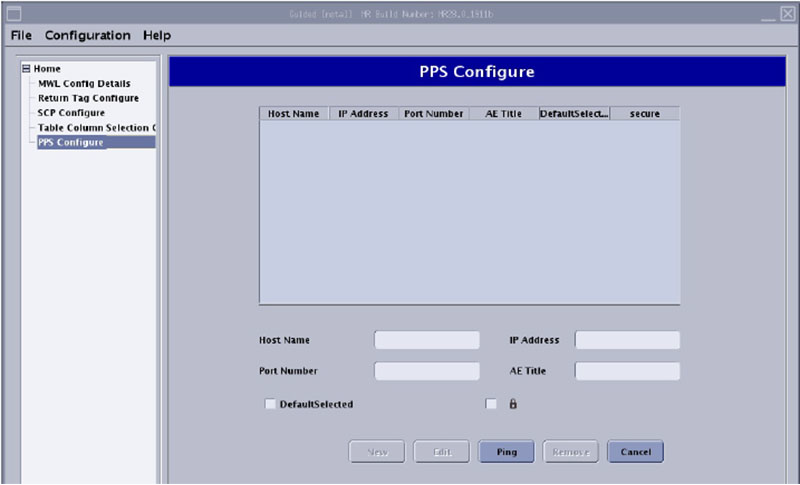 Note: The lock icon is only available for PX29.0 and later.