Replacement of PAC
Prerequisites
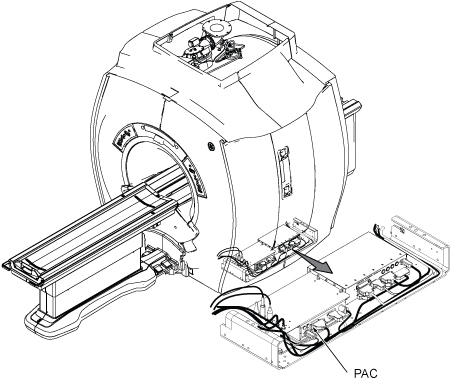
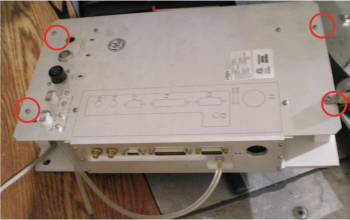
The PAC is located under the right side of the magnet enclosure.
Figure 1. PAC Location
1 Removal of PAC (for System Initial as SIGNA Creator / SIGNA Explorer)
Procedure
- Remove right middle side cover and right side covers.
-
Side Middle Cover (Right side Only)
-
Side Covers (Right side Only)
-
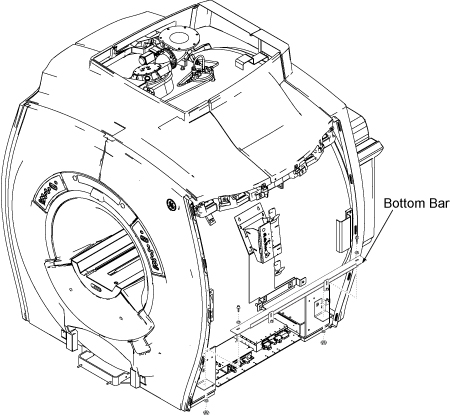
- Remove bottom bar from Magnet right side.
Figure 2. Removing bottom bar
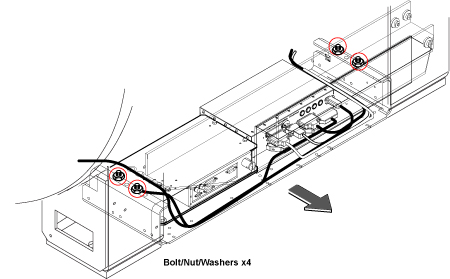
- Cut the tie-wraps fixing cables.
- Remove Four Bolts/Nuts/Washer that fixes the PAC/SRI Tray and
slide the PAC/SRI Tray out.
Figure 3. Slide PAC/SRI Tray
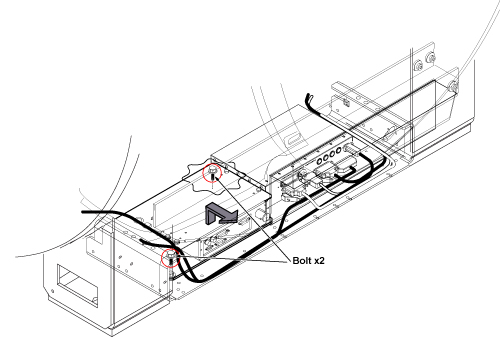
- Disconnect the all cables attached to the PAC. Note down the cable sequence.
- Remove 2 screws holding PAC to tray.
- Remove the PAC with bottom fixture.
Figure 4. PAC Removal
- Remove four screws and remove PAC Assy from Base Mount.
Figure 5. Remove PAC Assy from Base Mount.
2 Removal of PAC (for Explorer Lift System)
Procedure
- Remove right middle side cover and right side covers.
-
Side Middle Cover (Right side Only)
-
Side Covers (Right side Only)
-
- Remove bottom bar from Magnet right side. See Figure 2.
- Cut the tie-wraps fixing cables.
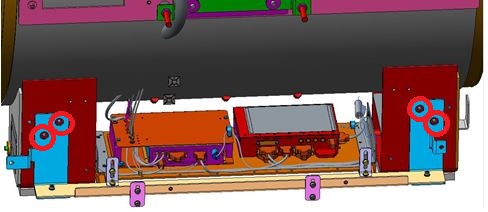
- Remove 4 screws securing right bottom bracket to magnet foot.
Figure 6. Screws Securing Right Bottom Bracket
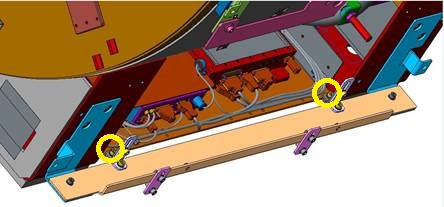
- Remove 2 screws securing PAC/SRI Tray to right bottom bracket.
Figure 7. Screws Securing PAC/SRI Tray
- Disconnect the all cables attached to the PAC. Note down the cable sequence.
- Remove 2 screws holding PAC to tray. See Figure 4.
- Remove the PAC with bottom fixture.
- Remove four screws and remove PAC Assy from Base Mount. See Figure 5.
3 Installation of New PAC
Procedure
- Place new PAC on base mount and fix it with four screws.
- Place PAC on tray and tighten 2 screws.
- Connect the all cables.
- Restore PAC/SRI Tray.
- Fix the cables with tie-wraps.
- Restore bottom bar.
- Restore side covers.
- Remove tag-out tag from circuit breaker.
- Restore power.
4 Finalization
Procedure
- Perform PAC Manual Test.
- Perform Signal to Noise - Head Scan.