- id_13107118
- Version: 3.0
- Date: Aug 29, 2019 1:54:00 AM
1.5T HD 8-Channel Wrist Array MCQA Test Setup
Prerequisites
| Required persons | Preliminary requirements | Procedure | Finalization |
|---|---|---|---|
| 1 | Not Applicable | 15 minutes | Not Applicable |
| Item | Quantity | Effectivity | Part number | Manufacturer |
|---|---|---|---|---|
| 1.5T HD 8-Channel Wrist Array Legacy Phantom | 1 | Legacy Phantom Set |
5160986-5 |
- |
| Cubical Unified Phantom | 1 | Unified Phantom Set |
5342681 |
- |
| Wrist Array Baseplate with Baseplate Riser | 1 | Curved Base Coil |
5160986-12 |
- |
| Condition | Reference | Effectivity |
|---|---|---|
|
For HDx, HDxt, and HDe, the following coil configuration name must be installed to run this tool: HDWRIST. |
- | - |
|
For MR450, MR450w and MR450w GEM, the following coil configuration name must be installed to run this tool: GE_HDx Wrist. |
- | - |
Follow this process to prepare for the MCQA test using the 1.5T HD 8-Channel Wrist Array by Invivo, Catalog Number M3335LJ (curved base).
Coils do not ship with phantoms. Phantoms come in a unified phantom set with the MR system.
Using Legacy Phantom
If installing the coil in a system for the first time, refer to Auto Coil Installation.
Procedure
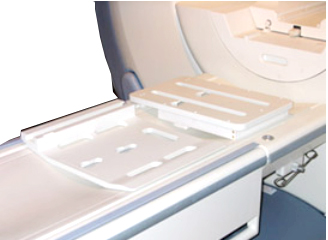
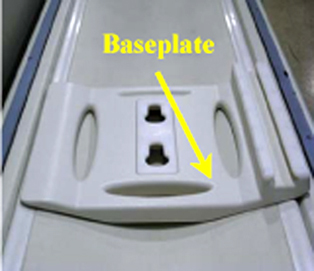
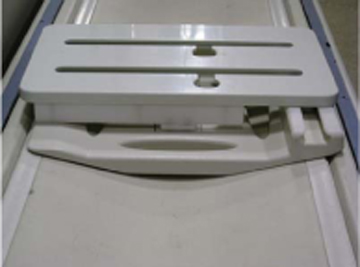
- Place the baseplate on the table as shown.
Figure 1. Baseplate on Table
- Attach the baseplate riser to the baseplate aligning the knobs on the riser, and place the assembly in the locked position.
Figure 2. Attaching Baseplate Riser to Baseplate
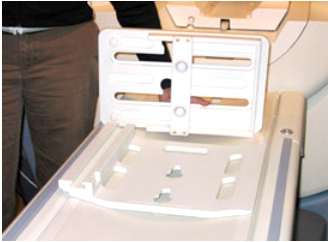
Figure 3. Baseplate Assembly in Locked Position
- Attach the Wrist Array Coil to the baseplate assembly using the knobs as shown below.note:
Record the serial number of the coil.
Figure 4. Placement of Coil on Baseplate Assembly
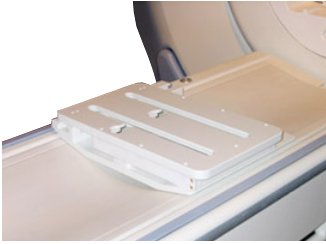
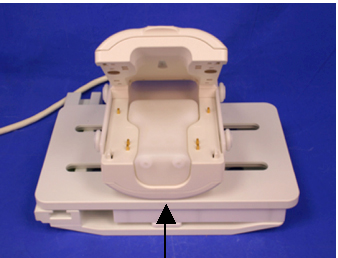
- Place the phantom in the coil as shown, close and lock the coil using the lock on the top of the coil. Slide the locked coil to center and align it properly.
Figure 5. Positioning Coil in Center of Baseplate Assembly
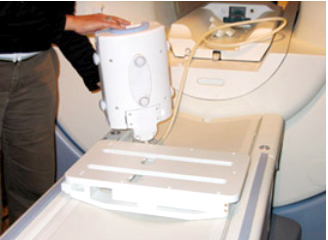
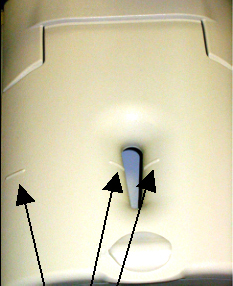
- Landmark the coil at the marks shown below, and Advance to Scan.
Figure 6. Landmark References
- Run the Multi-Coil Quality Assurance Tool.
Using Unified Phantom
The table is different depending on the system. MR450w GEM uses a flat table and the other systems use a curved table.
Procedure
- Place the baseplate of the wrist coil on the patient table as
shown.
Figure 7. Baseplate for Wrist Coil on Patient Table
- Attach the baseplate riser to the baseplate, and place the baseplate
assembly in the locked position.
Figure 8. Baseplate Riser Attached to Baseplate
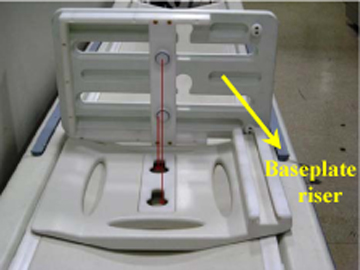
Figure 9. Baseplate and Riser in Locked Position
- Attach the Wrist Array Coil to the baseplate assembly using
the knobs shown below. Slide the locked coil to center and align properly.note:
Record the serial number of the coil.
Figure 10. Attaching Wrist Array Coil to Baseplate Assembly

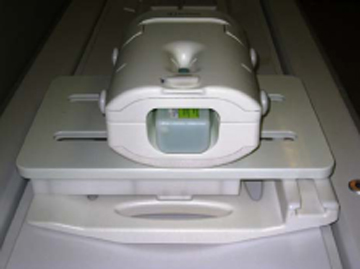
- Place the Cubical Unified Phantom into the coil by lifting the
upper portion of the coil, and close the coil.
Figure 11. Cubical Unified Phantom Positioned in Coil
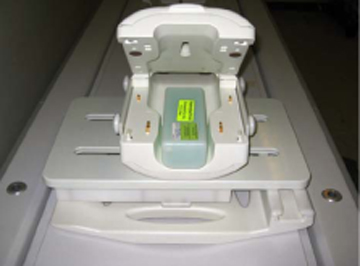
Figure 12. Closed Coil with Phantom
- Connect the coil to Port A of the LPCA, lock the coil, landmark
at the marks (shown below), and Advance to Scan.
Figure 13. Lock and Landmark Coil

- Run the Multi-Coil Quality Assurance Tool.
Finalization
Finalization
No finalization steps.