- id_13106852
- Version: 3.0
- Date: Aug 29, 2019 1:56:50 AM
1.5T HD 8-Channel Neurovascular Array Setup for MCQA Test (Invivo)
Prerequisites
| Required persons | Preliminary requirements | Procedure | Finalization |
|---|---|---|---|
| 1 | Not Applicable | 25 minutes | Not Applicable |
| Item | Quantity | Effectivity | Part number | Manufacturer |
|---|---|---|---|---|
| Legacy Phantom Kit, 1.5T 8-Channel Neurovascular Array | 1 | Legacy Phantom Set |
2317115-3 |
Invivo |
| Large Cylindrical Unified Phantom | 1 | Unified Phantom Set |
5342679 |
- |
| 10 cm Spherical Unified Phantom | 1 | Unified Phantom Set |
46-317586G1 |
- |
| 17 cm TLT Spherical Unified Phantom | 1 | Unified Phantom Set |
46-265826G6 |
- |
| Unified Phantom Positioner | 1 | Unified Phantom Set |
5344806 |
- |
| Condition | Reference | Effectivity |
|---|---|---|
|
For Discovery MR450 and Optima MR450w, the following coil configuration names must be installed to run this tool: 8NVHEAD_A and 8NVARRAY_A. For HDx, HDxt, and HDe, the following coil configuration names must be installed to run this tool: 8NVHEAD_A and 8NVARRAY_A. |
- | - |
Follow this process to prepare for the automated SNR Test using the 1.5T 8-Channel Neurovascular Array Coil by Invivo (M3335M).
Coils do not ship with phantoms. Phantoms come in a unified phantom set with the MR system.
Legacy Phantom Procedure
Procedure
- note:End the previous exam if not already done.
If installing the coil for the first time in a system, refer to Auto Coil Install.
- Make a note of the serial number of the coil.
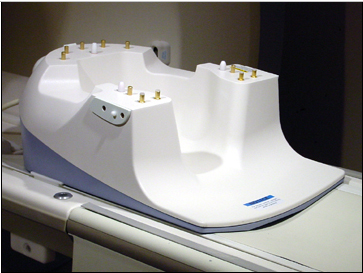
- Remove the top of the coil, and secure the base of the Invivo
HD 1.5T 8-Channel Neurovascular Array to the cradle in the same position
(shown in Figure 1) as the standard head coil.
Figure 1. Coil Bottom on Cradle
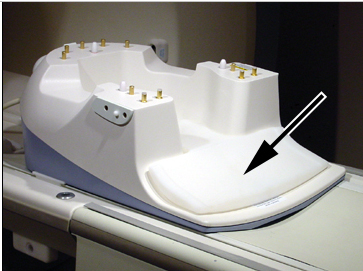
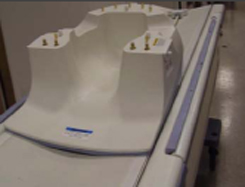
- Place the phantom positioner on the coil as shown in Figure 2.
Figure 2. Phantom Positioner on Coil
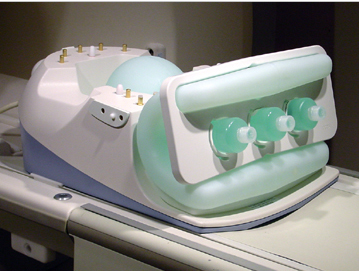
- Place the phantom on the positioner as shown in Figure 3.
Figure 3. Phantom on Positioner
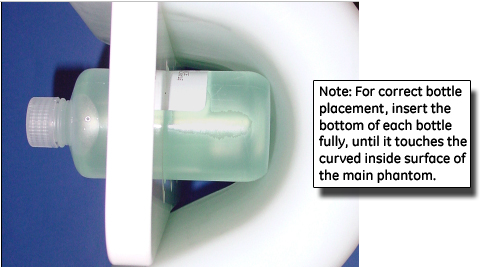
 note:
note:For correct bottle placement, fully insert the bottom of each phantom bottle until it touches the curved inside surface of the main phantom. (See Figure 4.)
Figure 4. Correct Bottle Placement
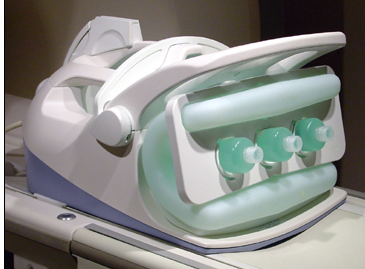
- Attach the top to the coil as shown in Figure 5.
Figure 5. Top on Coil
- Perform the Multi-Coil Quality Assurance (MCQA) Tool if available, otherwise perform the Surface Coils SNR Test.
Unified Phantom Procedure
Procedure
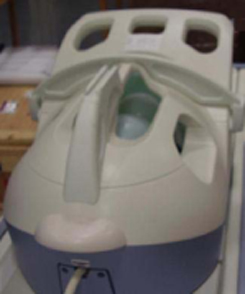
- Place the base of the NV array coil on the patient table and
latch it to the table as shown in Figure 6.
Figure 6. NV Array Coil on Patient Table
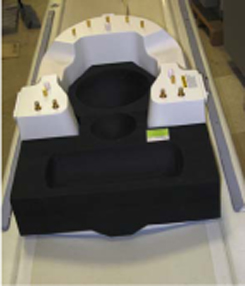
- Place the phantom positioner in the coil as shown in Figure 7.
Figure 7. Phantom Positioner in the Coi
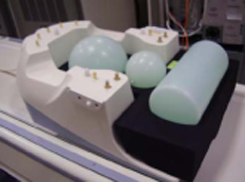
- Place the phantoms in the positioner as shown in Figure 8.
Figure 8. Phantoms in the Positioner
- Carefully align the connector pins on the base of the coil with
the top part of the coil and then latch both the coil sections into
place as in Figure 9. (The scanner will not operate if the coil sections are not latched
correctly).
Figure 9. Connector Pins Aligned on Base of Coil
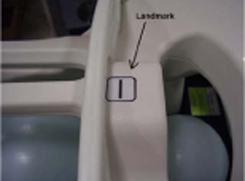
- Connect the coil to Port A of the system LPCA. Landmark the
coil at the cross mark as shown in Figure 10 and advance
to scan.
Figure 10. Landmark the Coil
- Run the Multi-Coil Quality Assurance (MCQA) Tool with the Unified Phantom Set.
Finalization
Finalization
No finalization steps.