- Topic ID: id_11038748
- Version: 4.0
- Date: Apr 22, 2019 12:56:10 AM
Collimator Cleaning Procedure
Prerequisites
Overview
This procedure details the steps necessary to remove the contamination without removing the X-Ray Tube. The entire process will take approximately 3 hours. Tube/Collimator Alignments do not need to be performed. If you wish, you can check the alignments after completing the cleaning process. Any adjustments will require a complete Detailed Phantom Calibration.
Do not check tube alignments if contamination is present. You will get false results. Perform Tube Alignment checks only after the contamination has been removed.
If you are at this step during a tube change, you must perform a complete Tube Alignment and Detailed Phantom Calibration.
Figure 1. Collimator Cleaning Flowchart Part A
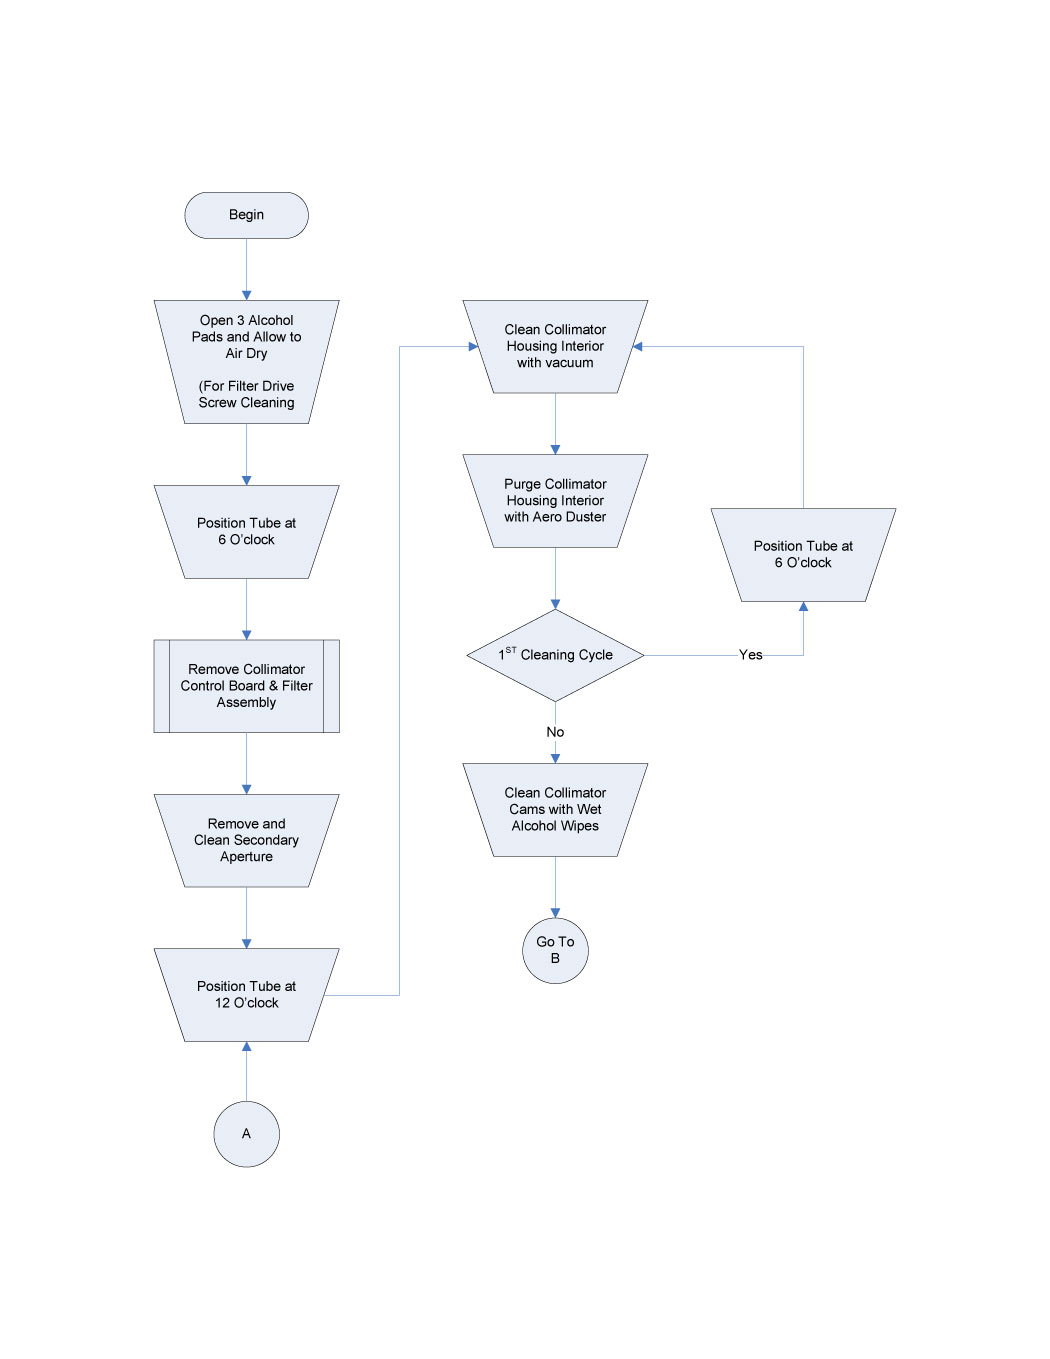
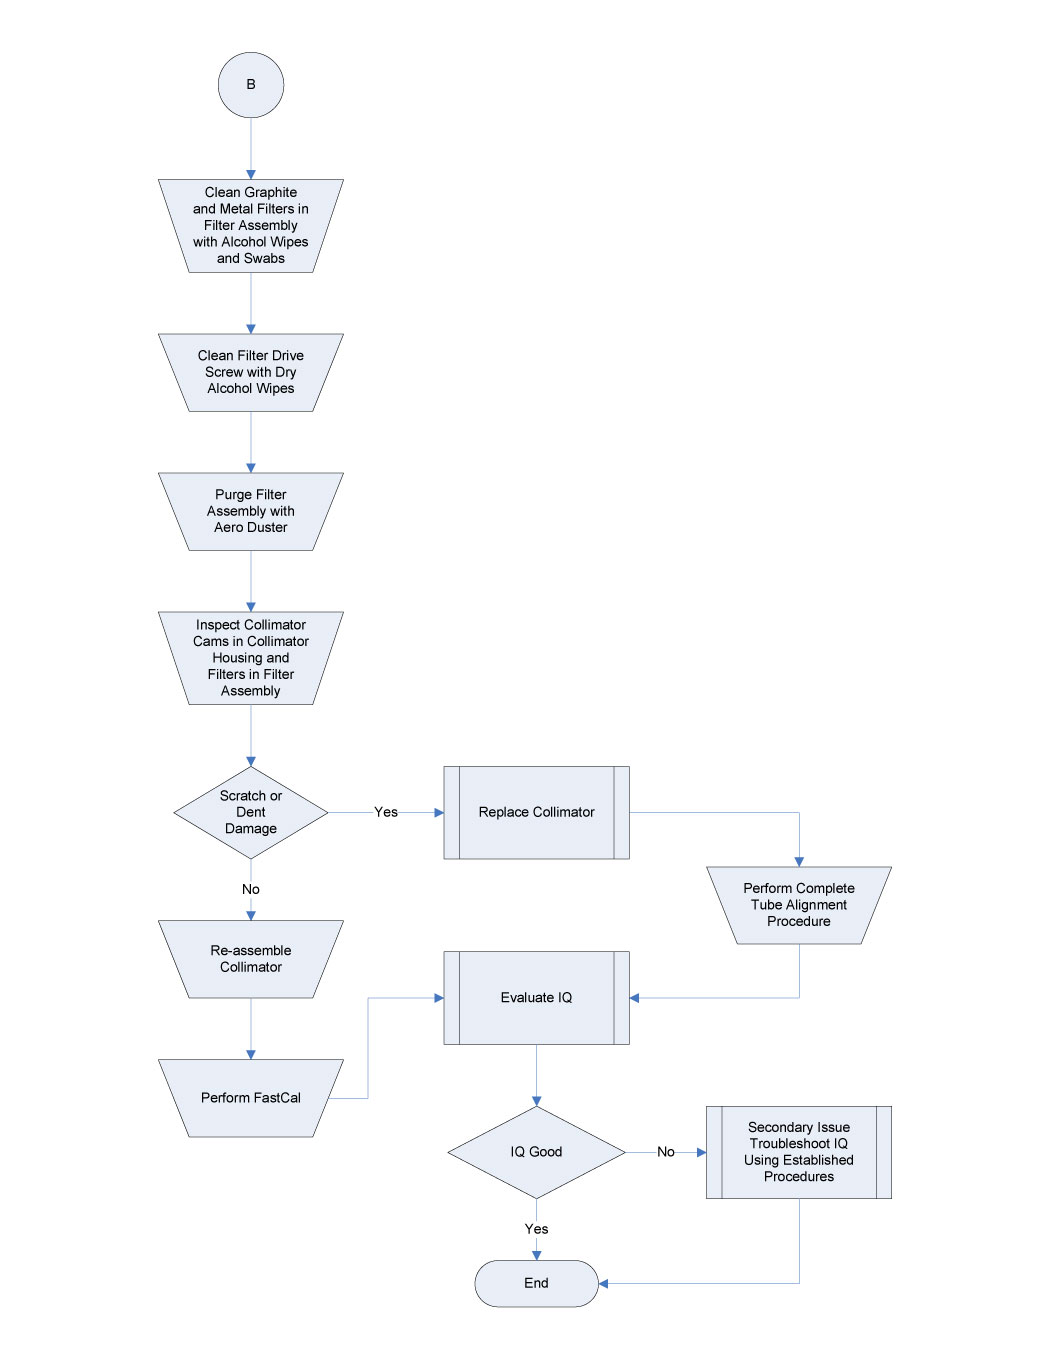
Figure 2. Collimator Cleaning Flowchart Part B
Procedure
 warning
- Remove the Gantry Covers as needed.
- Stop the rotor of X-ray tube in case of Liquid Bearing Tube before HVDC off. Refer to Liquid Bearing Tube Rotor stop procedure for details.
- Perform Gantry Power Lockout/Tagout procedures.
- Open three (3) Lint Free Alcohol Pads, unfold and allow to air dry.
- Position the gantry with the Collimator at six-o'clock.
- Remove the Collimator Control Board. See Collimator Control Board Replacement for guidance.
- Remove the Collimator Filter Assembly. See Collimator Filter Replacement for guidance.
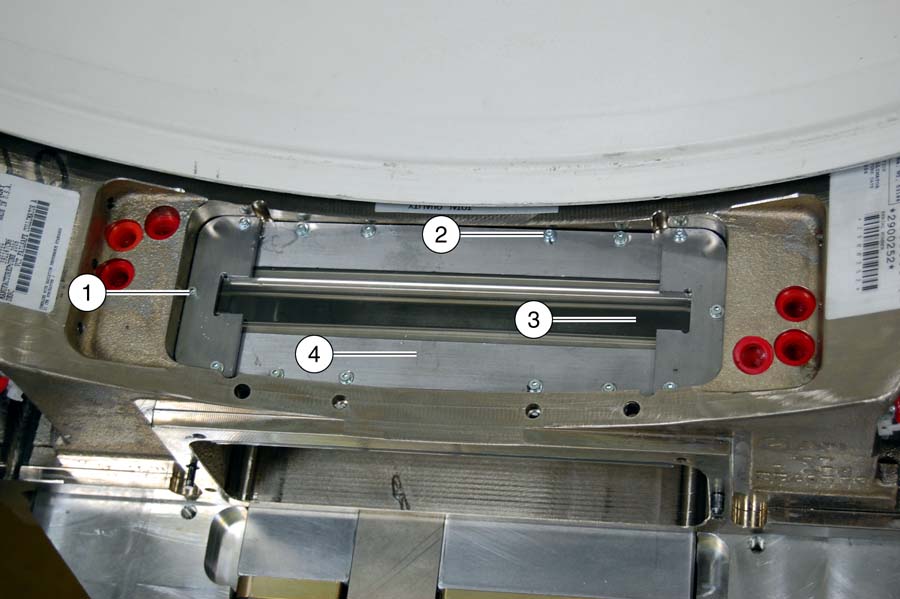
- Remove Secondary Aperture and Output Window. See Figure 3.
- Loosen the six (6) end plate screws and remove the end plates (Item 1), screws and washers together.
- Remove the eight (8) output window screws (Item 2) and washers.
- Remove the supporting plates. (Item 4)
- Remove the output window. (Item 3)
- Clean off any dust and/or particles from output window or support plates with Aero Duster.
Figure 3. Secondary Aperture and Output Window
- Rotate the gantry so collimator is at 12 o'clock position.
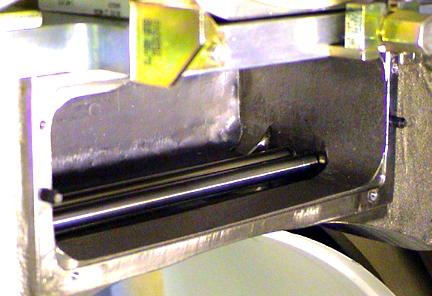
- Clean collimator housing interior.
- notice
- Using the vacuum cleaner, clean the housing interior to remove any attached grease to metal particles.
- Using the Aero Duster and nozzle, blow out debris from the collimator
housing interior.
Figure 4. Cleaning Collimator Interior


- Rotate gantry so collimator is at 6 o’clock and repeat Step 10. This is to ensure all loose particles are removed from collimator housing chamber.
- notice
- Use fresh, wet alcohol pads clean the collimator cams. Rotate
the cams using the motor shaft on each side of the collimator.
Figure 5. Cleaning the Collimator Cams
- notice
- Using fresh, wet alcohol pads and swabs to clean the filters
in collimator filter assembly. .
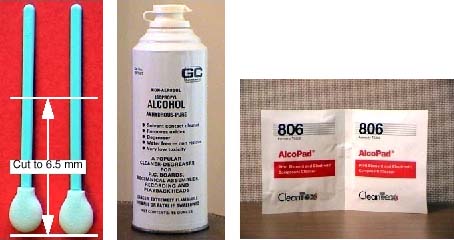
- Swab Preparation
Figure 6. Swabs, Pure Alcohol and Alcohol Pads
-
Cut swab to 6.5 cm (2.5 in) length.
-
Wet lint-free foam head with alcohol. Squeeze excess alcohol from head.
-
- notice
- Carefully insert swab into graphite filter chambers, and wipe filters clean. (Item 1 and 2 in Illustration.)
- Remove the swab and inspect the filters. Repeat with clean swabs as necessary until clean.
- Use alcohol pads to clean metal filters on both the patient
and tube sides of the filter assembly. (Items 1-3 in Illustration.)
Figure 7. Collimator Filters - Patient Side
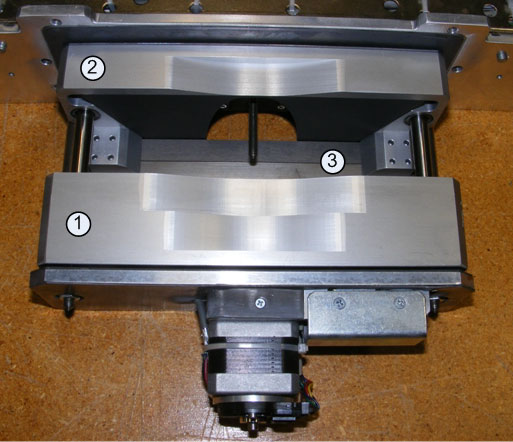
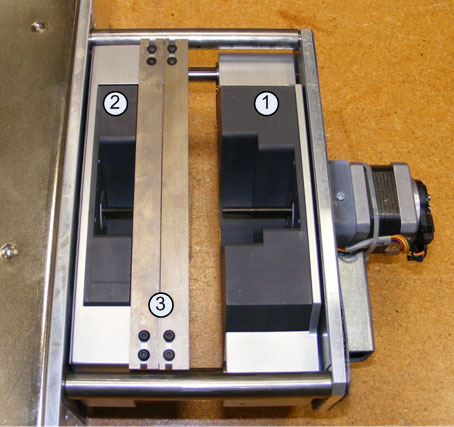
Figure 8. Collimator Filters - Tube Side

- Swab Preparation
- notice
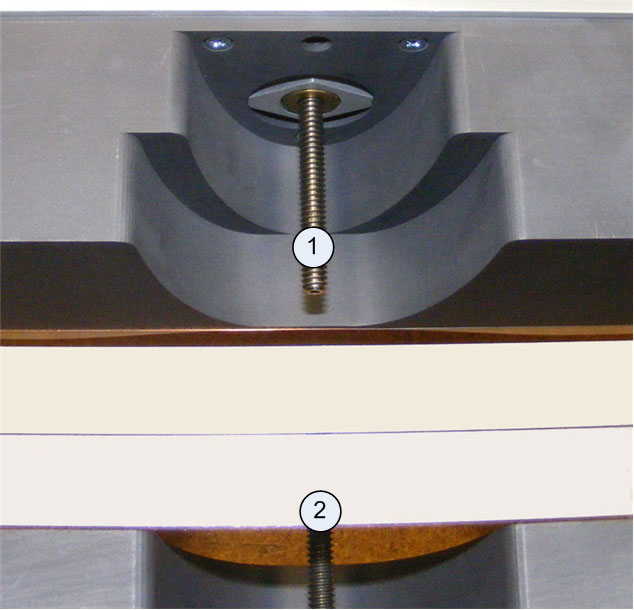
- Using the dry lint free alcohol pads, clean the Filter Positioning
Drive screws. See Figure 9.
- Remove only excess grease from the drive nut and drive screws.
-
Remove only accumulated grease that may dislodge.
-
The grease should lightly coat the screw thread, not fill it.
-
- The position of the filters can be moved using a flat blade
screwdriver and turning the drive screws motor shaft at either end
of the Filter Assembly.
Figure 9. Filter Position Drive Screws
- Remove only excess grease from the drive nut and drive screws.
- Purge the filter assembly with the Aero Duster to remove any fine particles still clinging to filters.
- Inspect both the cams in the collimator housing and filters in the filter assembly for scratches and dents. Such damage will cause image quality issues and will require collimator replacement.
- Re-assemble the collimator.
- Install filter assembly using the four (4) filter assembly bolts removed earlier. Torque to 3 ± 0.3 N-m (26.5 lbf-in).
- Install the secondary aperture using the fourteen (14) secondary aperture screws removed earlier. Use a small drop of Loctite 242 to secure screws. Take care not to damage the lead window.
- Install the collimator control chassis using the four (4) bolts removed earlier. Torque to 3 ± 0.3 N-m (26.5 lbf-in).
- Restore gantry power and perform a hardware reset.
|
|
|
Finalization
- Perform Fast Calibration.
- Perform System Scanning Test.