• Discovery MR750 3.0T System Service Methods
  • 5690009-2EN Revision 4
  • Object ID: 00000018WIA303A6030GYZ
  • Topic ID: id_12373695 Version: 1.3
  • Date: Nov 20, 2019 11:27:27 AM

Reconfiguring the System

Prerequisites

Table 1. Personnel requirements
Required personsPreliminary requirementsProcedureFinalization
1Not Applicable20 minutesNot Applicable

About this task

Overview

This document includes:

Topic ID: id_SL1801848-1050907

Re-configuring the System

Procedure

  1. From the MR Service Desktop, select the Configuration tab.
  2. Expand Guided Install and select FE Mode.
  3. Click the Click here to start this tool link. The Guided Install window opens.
  4. At the password prompt, type operator and press Enter to access the Guided Install interface.
    Note:

    It is possible that the customer changed the default password. If you cannot log in, contact the customer for the correct password.

    Note:

    Help documentation is built into the GUI. Use the Help menu for information on each tab.

  5. Click Next to move through the tabs in order, and modify values as needed.

    Click Configure on each tab, or when you have modified all required tabs, proceed to the Verification tab.

    Figure 1. Verification Configure Tab
  6. On the Verification tab, review the changes, make any necessary corrections, and click Configure Tab(s) to update the system.
  7. Before exiting the GUI, insert the SaveInfo CD/DVD or a new CD/DVD. From the File menu, select Save, and then Save GI Configuration to CD/DVD.

    This process does not create a SaveInfo disk, but a copy of the current information in the GUI fields for use in the next software install.

  8. From the File menu, select Quit. If any error conditions still exist, a warning indicates that no changes will be made prior to exiting. Fix any error conditions before exiting the GUI.
    Note:

    The system does not automatically reboot in configure mode. Reboot the system for changes to take effect.

Topic ID: id_SL1801853-1050907

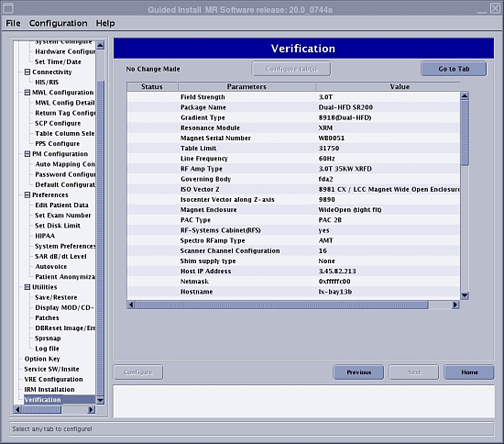
Setting the Time and Date

About this task

The Set Time/Date option is not set using the Configure button. This window has separate buttons for configuring the host PC time and date. To configure the time and date:

Procedure

  1. Expand Basic Configuration, and select Set Time/Date to open the window.
    Figure 2. Set Time/Date Window
  2. Set the time zone and then the time/date appropriately. Click Next.
  3. Restart the host PC for the time/date change to take effect.
    Note:

    You must restart the system for the changes to take effect, especially if your time change went backward.

Topic ID: id_SL4185947-1050907

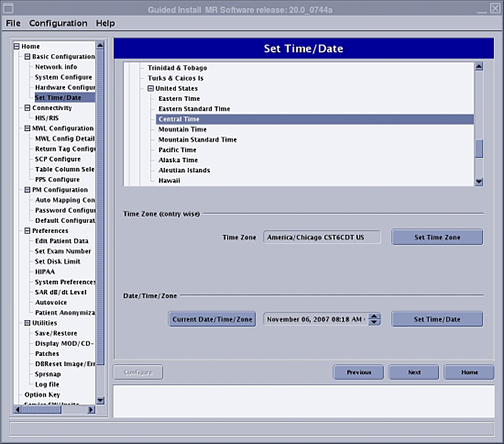
NTP Server Configuration

About this task

NTP server configuration can be done to synchronize the MR Scanner date/time automatically with an NTP server available on site. An NTP server and IP address are required. Follow the instruction in NTP Server Time Synchronization.

Procedure