
- Discovery MR750 3.0T System Service Methods
- 5690009-2EN Revision 4
- 00000018WIA30D62040GYZ
- id_20129982.3
- Apr 23, 2020 8:36:12 PM
Auto coil prescription high level workflow
Workflow overview
For a more detailed workflow, refer to the operator manual.
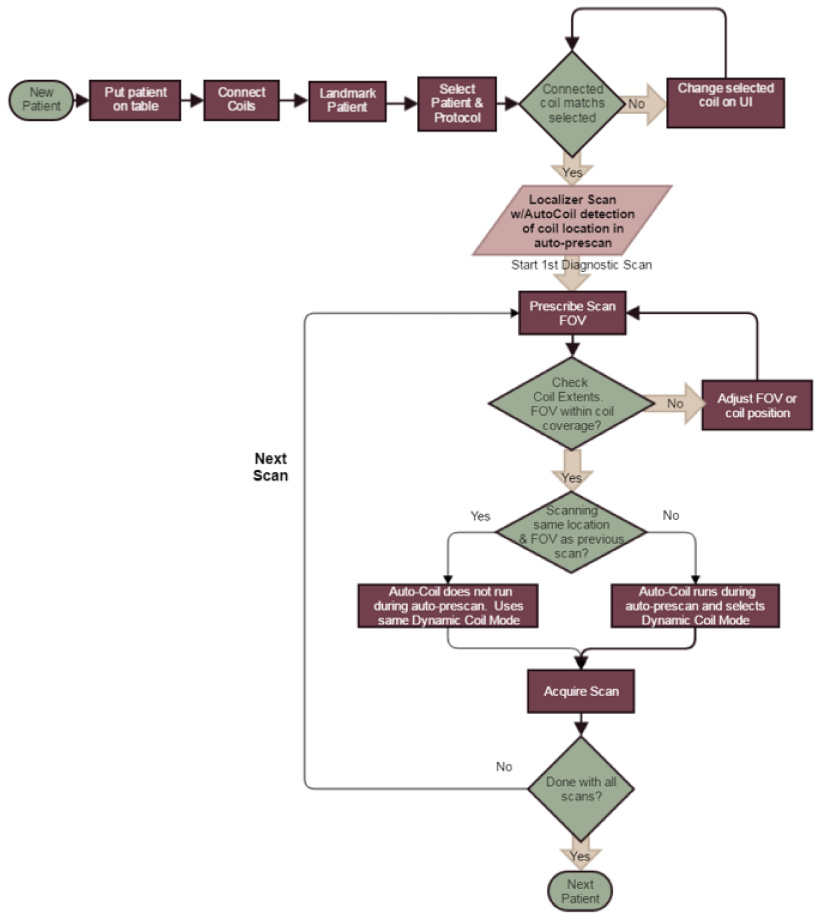
During prescan, auto coil calibration acquires data from all of the selected coils; this is known as the full coil mode. This data is automatically reacquired as needed due to changes such as connected or selected coils, patient table location, or an auto prescan being initiated from the Scan submenu. The auto coil algorithm will then automatically select the optimal group of Receive Element Groups (REG)s based on several factors such as: prescribed ROI, calibration data, parallel imaging, and annefact sensitivity. The REGs are used to construct a local coil mode that includes all of the elements from those REGs.

Workflow changes
With ACRx dynamic coil modes, coil landmarking is no longer required. The site can set up protocols to allow the use of any connected coil. This means that users can use different coils more easily, reducing pop-ups/changes. ACRx selects the best coil elements automatically so there are no coil modes for the users to select. The calibration is hidden from users as it runs during prescan. The location of the coil is detected and shown on the graphic rx user interface as coil extents. The users can see the location of the entire coil as well as the portion of the coil that is active for the scan.
User interface changes
With ACRx, the user selects physical coils from a simple interface with large icon buttons for each coil. The coil extents are shown gray for the entire coil and blue for active elements. Physical coil names, rather than coil modes, are shown on the interface.
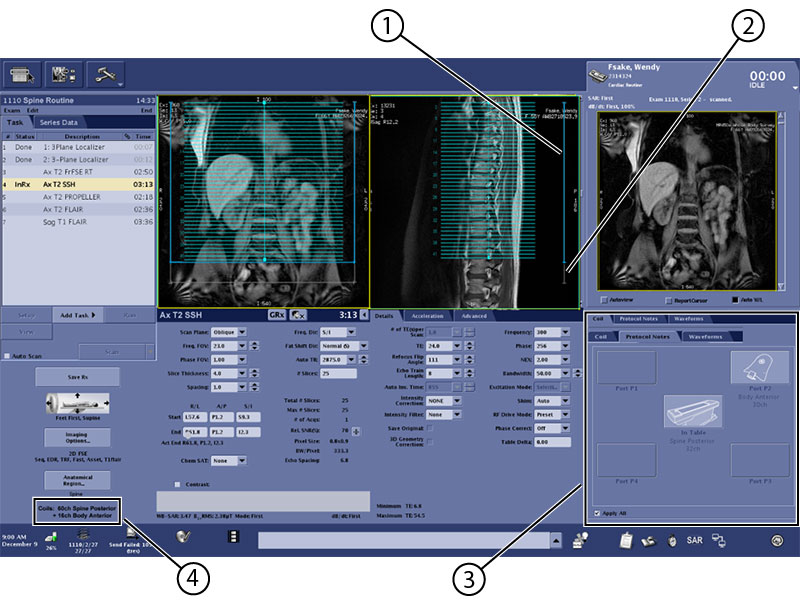
| 1 | Active elements (blue) |
| 2 | Entire coil (gray) |
| 3 | Coil icon buttons |
| 4 | Physical coil names selected |