- Discovery MR750 3.0T System Service Methods
- 5690009-2EN Revision 4
- 00000018WIA301ADB30GYZ
- id_20126603.5
- Oct 11, 2021 6:31:29 PM
Checking the longitudinal drive belt tension
Prerequisites
| Required persons | Preliminary requirements | Procedure | Finalization |
|---|---|---|---|
| 2 | Not Applicable | 15 minutes | 10 minutes |
| Item | Quantity | Effectivity | Part number | Manufacturer |
|---|---|---|---|---|
| Non-magnetic Service Tool Kit | 1 | - |
5113258 or 5112581 | - |
| Safety |
|---|
|
Before working in any GE Healthcare MR suite or performing any GE Healthcare service procedure, you must:
If you have any safety concerns at any time, do not begin work or immediately stop work and move to a safe location. Immediately contact your supervisor or site safety officer for instructions on how to proceed. |
About this task
Procedure
- Remove the LPCA cover by removing the four screws.
Figure 1. Location of Screws on LPCA Cover 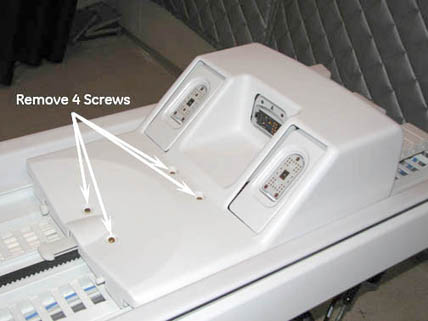
- Locate the drive belt tensioner.
Figure 2. Drive Belt Tensioner 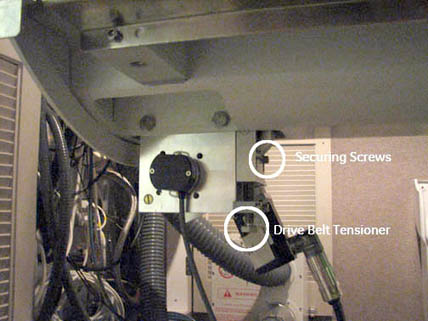
- Make sure that the belt tensioner is fully raised to set the cradle belt tension.
Figure 3. Drive 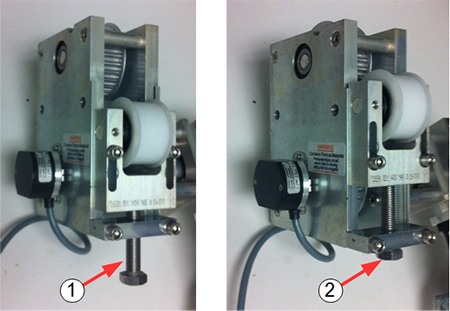
Item Description 1 Tension released 2 Tension set - Verify that 3 teeth (front), 15 teeth (back) on the belt are exposed, the belt tensioner is fully elevated and the cradle belt tension is set correctly.
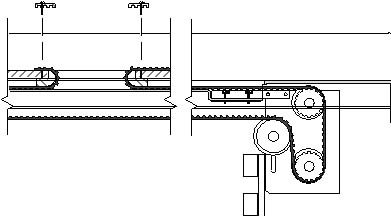
Figure 4. Drive Belt Threading Through Rear Pulley