
- Discovery MR750w and SIGNA™ Architect T 3.0T System Service Methods
- 5690002-2EN Revision 4
- 00000018WIA3091D030GYZ
- id_123736811.4
- Jul 5, 2019 10:03:32 PM
Configuring a Printer on Linux Systems (Generic Applications)
Prerequisites
| Required persons | Preliminary requirements | Procedure | Finalization |
|---|---|---|---|
| 1 | Not Applicable | 15 minutes | Not Applicable |
| Condition | Reference | Effectivity |
|---|---|---|
|
Application software running. | - | - |
About this task
Overview
This document provides instruction on configuring both network and local printers on Linux systems.
Depending on the software version loaded on the system, and the printer type, refer to the appropriate procedure listed below.
| Software Version | Network Printer | Local Printer |
| Pre-15.0_M4B, 20.x, and 21.x | Section 4.1.1; Procedure for Network Printer | Section 4.1.2; Procedure for Local Printer |
| 15.x at/higher than 15.0_M4B and 22.x and Higher | Section 4.2.1; Procedure for Network Printer | Section 4.2.2; Procedure for Local Printer |
Instructions for Software Release Pre-15.0_M4B, 20.x, and 21.x
Procedure for Network Printer
Procedure
- Select Configure Printer option. The following GUI will display
(shown below).
Figure 1. Printconf GUI 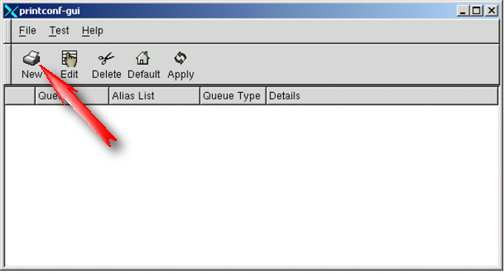
- Click New to add printer to the system.
A new window will appear (shown below). Click Forward to continue.
Figure 2. Add a New Print Queue 
- At the Queue name screen, type a name for the printer (shown
below). After entering the name, click Forward to continue.
Figure 3. Queue Name 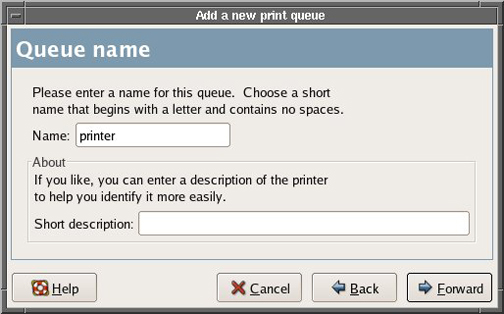
- Select Queue type as Networked Unix (LPD) (shown below).
Figure 4. Setting Queue Name 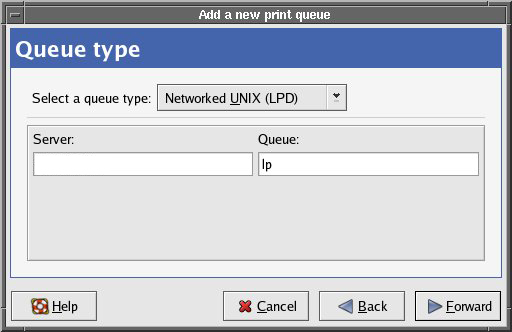
- Select the printer type (shown below). Then select Forward.
Figure 5. Setting Printer IP Address 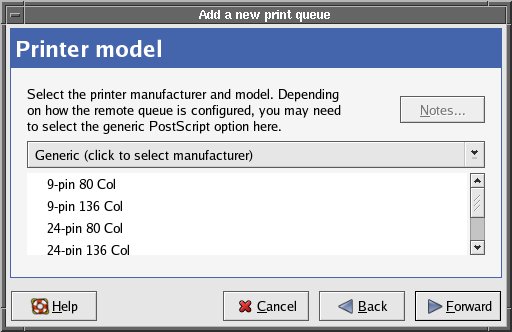
Procedure for Local Printer
Procedure
- Select Configure Printer option. The GUI
shown below will start.
Figure 6. Printer Configuration Screen 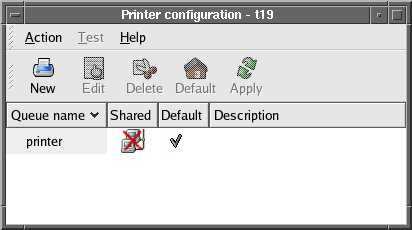
- The “Queue Type” will now appear. If the printer
is recognized by the system, it will display (shown below).
Figure 7. Add New Print Queue Screen 
- If the system does not recognize the printer that is connected,
select Printer Manufacturer and Model from the top screen (shown below).
Then select the exact printer and click Forward.
Figure 8. Add A New Print Queue 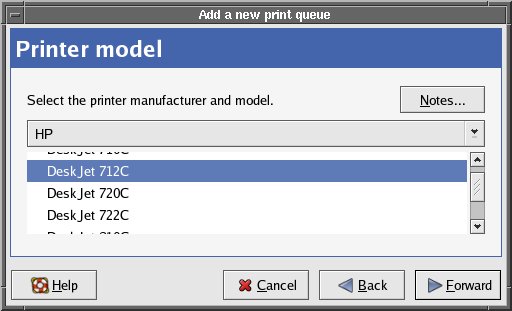
Instructions for Software Release 15.x at/higher than 15.0_M4B and 22.x and Higher
Procedure for Network Printer
Procedure
- Select the Configure Printer option, and
the following GUI will display (shown below).
Figure 9. Printer Configuration GUI 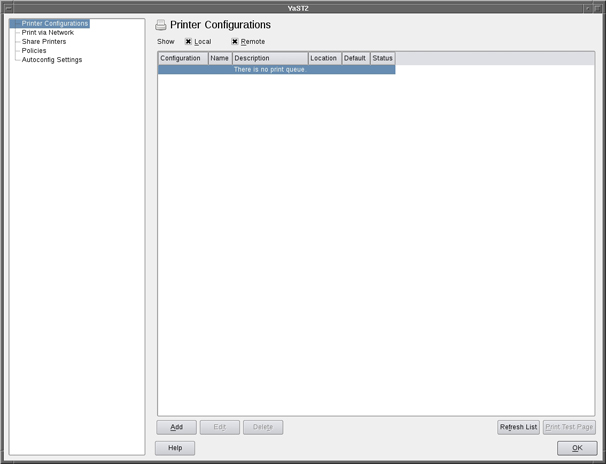
- Click Add to add the printer to the system
(shown above). If selecting a printer for the first time, a pop-up
will display (shown below). Click OK to continue.
Figure 10. Pop-up 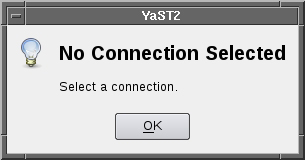
- On the Add New Printer Configuration screen,
click Connection Wizard (shown below). The
GUI in Figure 12 will display.
Figure 11. Queue Name 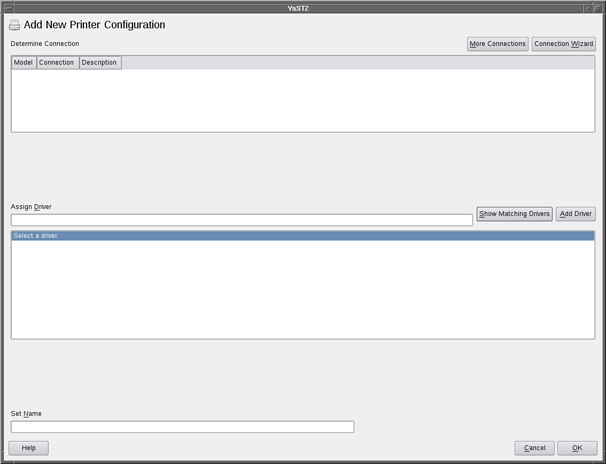
Figure 12. Connection Wizard GUI 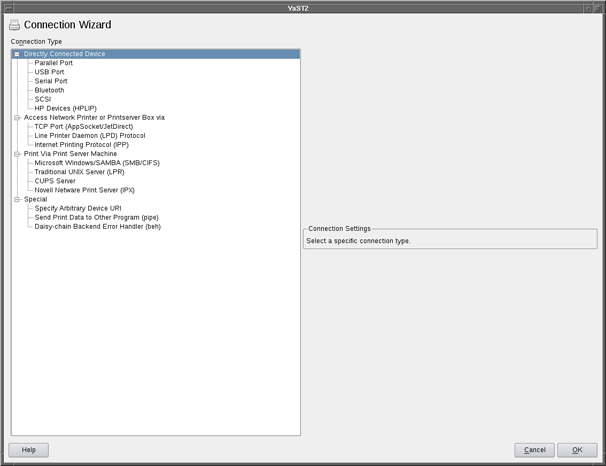
- Under the Access Network Printer or Printerserver
Box via label, select (shown below). Fill in
the printer IP Address, printer name, and select the manufacturer
(shown below).
Figure 13. Connection Wizard GUI (network printer setup) 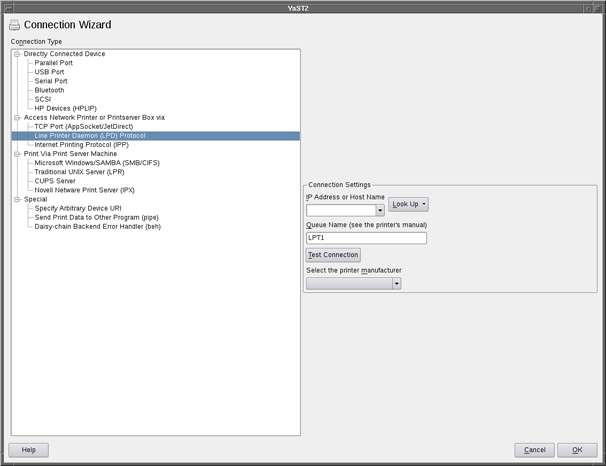
- The system will search for printer drivers. Select the appropriate
driver (shown below) and click OK to return
to the Printer Configuration GUI.
Figure 14. Printer Driver Selection (network printer setup) 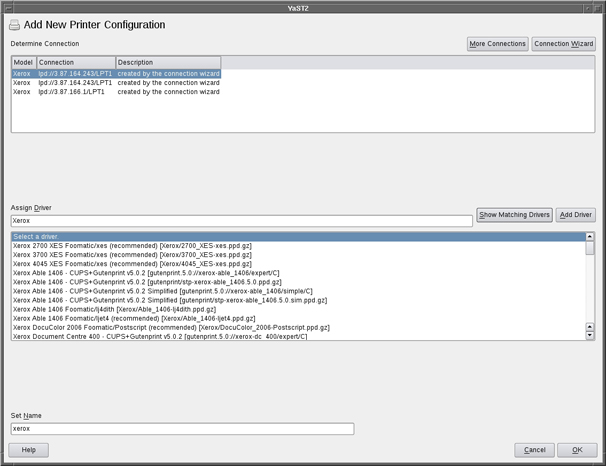
Procedure for Local Printer
About this task
Note:
Only USB connected printers are supported.
Procedure
- The directly connected printer will be automatically recognized,
as evident by two popup process bars (shown below).
Figure 15. Printer Detection Progress 
Figure 16. Retrieving Printer Driver Detection Information 