- id_13107170
- Version: 3.0
- Date: Aug 29, 2019 1:34:23 AM
Skirt cover removal and installation
Prerequisites
| Personnel requirements | |||
|---|---|---|---|
| Required persons | Preliminary requirements | Procedure | Finalization |
| 1 | Not Applicable | 5 minutes | Not Applicable |
| Tools and test equipment | ||||
|---|---|---|---|---|
| Item | Quantity | Effectivity | Part number | Manufacturer |
| Screwdriver | 1 | - | - | - |
| Cut-Resistant Gloves | 1 pair | - | - | - |
|

| Required conditions | ||
|---|---|---|
| Condition | Reference | Effectivity |
| Rear pedestal side cover has been removed (rear skirt cover only). | - | - |
| Side cover has been removed for the MR450w. | - | - |
Remove skirt covers
Procedure
- The skirt covers are held into place using poppers and screws.
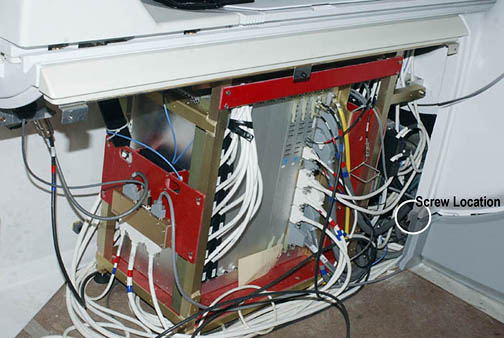
There is one screw that secures each skirt cover to the magnet. Remove
the screw from the skirt cover being removed.
Figure 1. Screw Location - Front Cover
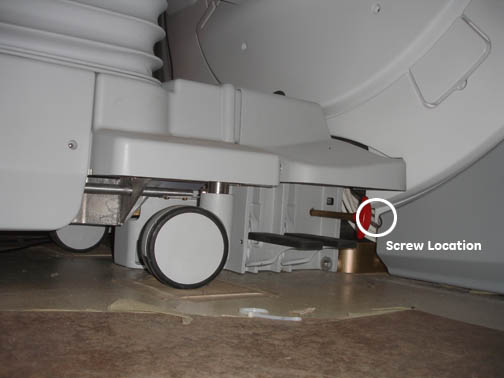
Figure 2. Screw location - rear cover
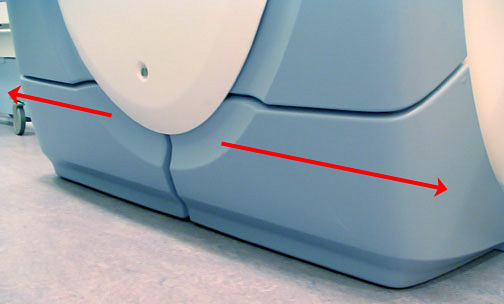
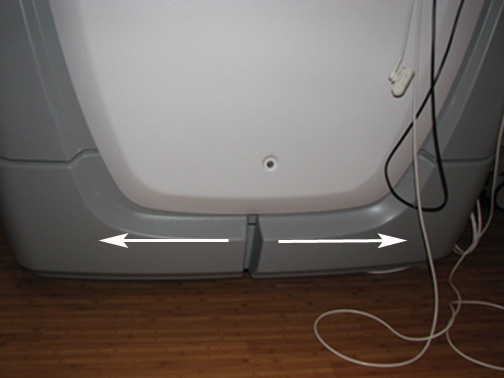
- To remove a skirt cover simply slide it towards the front (or,
in the case of the back covers, to the rear) of the magnet (see Figure 3).
Figure 3. Removing skirt covers
 note: The rear pedestal cover has to be removed before removing the rear skirt cover.
Install skirt covers
Procedure
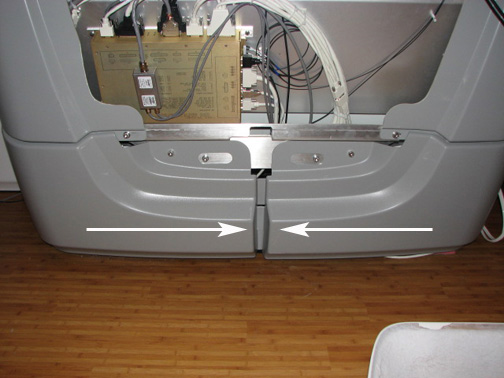
- Align fastener on skirt cover to the notch on the arc cover and slide cover towards the center of the magnet (#id_SL1956813-1057045/SL1956819-1057045).
- Align fastener on skirt cover and slide cover towards the center of the magnet.
- Align tabs so they interlock with the tabs on the adjoining skirt cover (see Figure 4).
Figure 4. Aligning Skirt Tabs
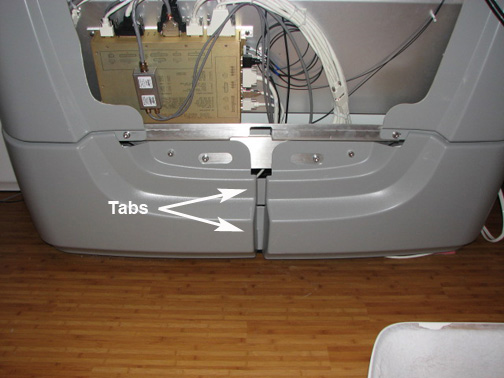
- Align tabs so to interlock with tabs on adjoining skirt cover (see #id_SL1956813-1057045/SL2121887-1057045).
- Snap popper on the skirt cover into place and replace the two (2) screws (see Figure 5).
Figure 5. Installing skirt covers
Finalization
Finalization
No finalization steps.