- id_13107132
- Version: 3.2
- Date: Jan 17, 2020 11:10:06 AM
Side cover removal and installation
Prerequisites
| Personnel requirements | |||
|---|---|---|---|
| Required persons | Preliminary requirements | Procedure | Finalization |
| 1 | - | 5 minutes | - |
| Tools and test equipment | |||
|---|---|---|---|
| Item | Quantity | Part number | Manufacturer |
| Cut-Resistant Gloves | 1 Pair | - | - |
| Nonmagnetic Titanium Service Tool Kit, Large Set | 1 | 5112581 | - |
|

Removing left side covers
Procedure
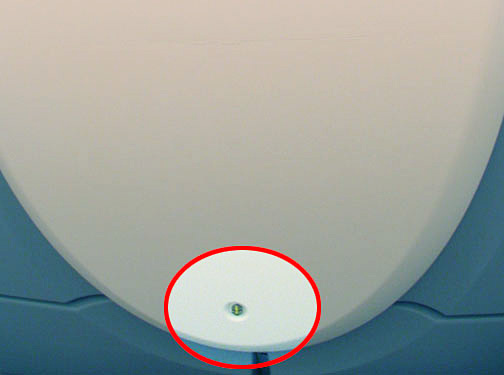
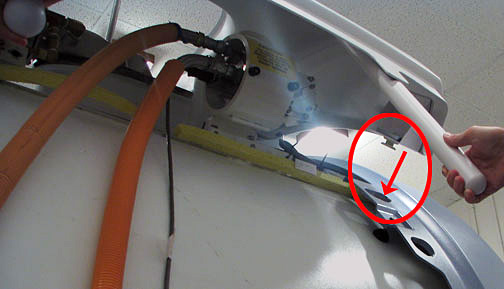
- Loosen the large screw on lower portion of the lower side cover
by using a non-ferrous allen key and turning the screw counter-clockwise Figure 1.
Figure 1. Side cover screw
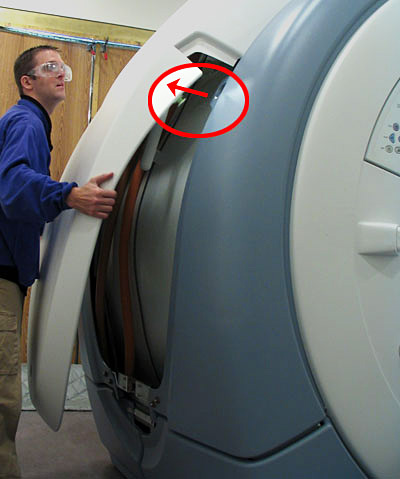
- Grab sides of lower cover and lift upwards until the cover is
released from the upper cover. Set lower cover aside Figure 2.
Figure 2. Removing left side cover
- The upper cover is secured to the arc covers primarily by two round feet on the lower portion of the side cover. To remove the cover, grab the two handles on the upper cover firmly and push the cover up and then pull out away from the enclosure. This should release the cover’s feet and allow you to move it freely (see Figure 4).
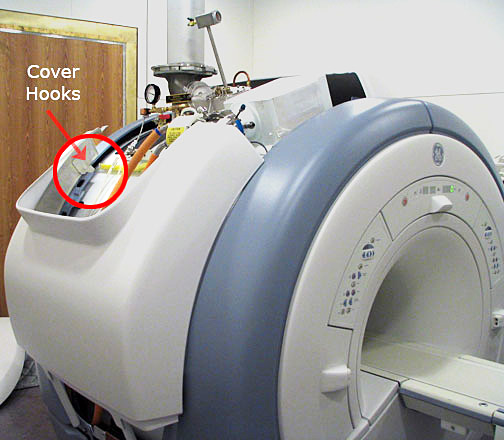
- Once the feet are released, use the arc cover as a guide rail,
and allow the cover to slide down the side of the enclosure. Once
the cover clears the fixtures on the upper portion of the magnet,
the cover can either be safely set aside or it can be rested on the
side of the magnet using the cover’s hooks that latch on to
the arc covers Figure 3.
Figure 3. Resting Top Cover on Side of Magnet
Installing left side covers
Procedure
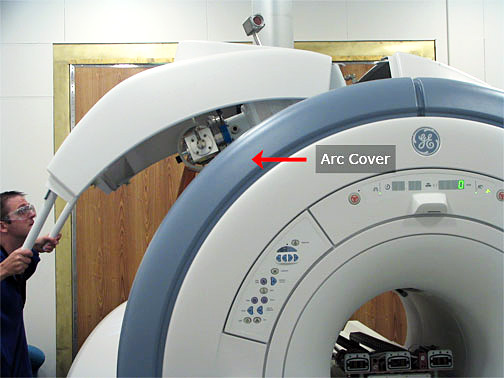
- note: To replace the left side covers, the top right side cover must be installed.Using the arc covers as guide rails, slide the side cover up to meet the right side cover at the top of the magnet Figure 4.
Figure 4. Using the arc covers as guide rails
- Hold the handles away from the enclosure to ensure that the
alignment tabs get properly slotted under the right side’s slot Figure 5.
Figure 5. Slide alignment tabs below right side cover
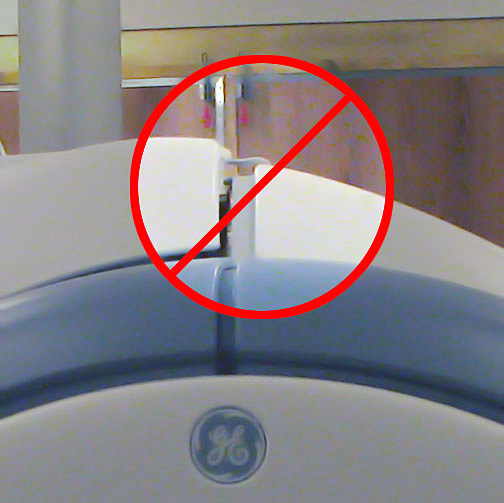
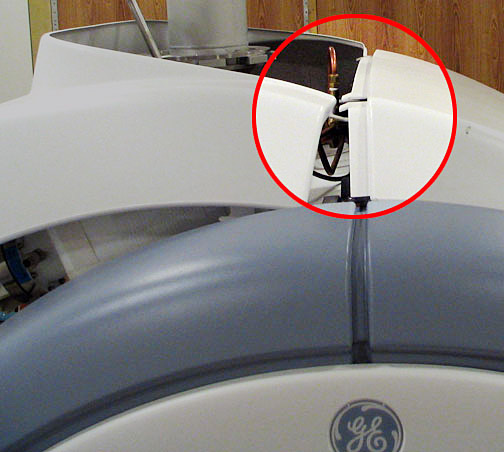 note: This is not easily accomplished since you cannot see all the alignment tabs while holding on to the cover’s handles. Before proceeding to install the lower side cover, go over to the front and rear of the magnet and visually verify that the alignment tabs have been properly inserted and are not protruding over the top of the right side cover Figure 6
Figure 6. Ensure tab is properly placed
- Set the round foot on the magnet side of the cover into the
upper oval slots on the arc cover Figure 7. Snap into place.
Figure 7. Place round foot in arc cover's oval hole
- Hold the sides of the Lower Cover and align the round feet on
the magnet side of the Lower Cover with the arc cover’s oval
slots Figure 8. Snap into place.
Figure 8. Installing left side cover
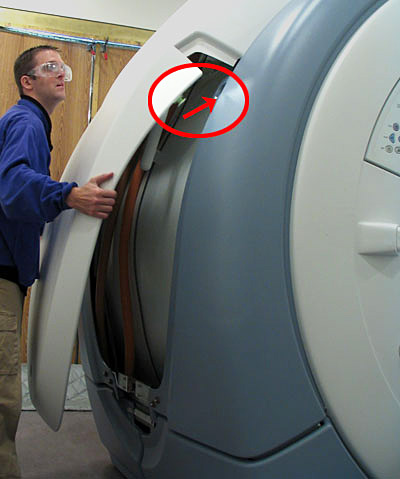
- Latch the cover into place by turning the screw clockwise so
the latch is secure Figure 9.
Figure 9. Side cover screw
Finalization
Finalization
No finalization steps.