- id_13106842
- Version: 3.1
- Date: Oct 24, 2019 2:47:55 AM
1.5T HD 8-Channel Foot Ankle Coil Replacements
Prerequisites
| Required persons | Preliminary requirements | Procedure | Finalization |
|---|---|---|---|
| 1 | 0 minutes | 30 minutes | 0 minutes |
| Item | Quantity | Effectivity | Part number | Manufacturer |
|---|---|---|---|---|
| No. 2 Phillips Screwdriver | 1 | - | - | - |
| Item | Quantity | Effectivity | Part number | Manufacturer |
|---|---|---|---|---|
| Refer to 1.5T HD 8-Channel Foot Ankle Coil Field Replaceable Units | - | - | - | - |
|
Cable Replacement
Procedure
- Perform the Cable Continuity Check found in 1.5T HD 8-Channel Foot Ankle Coil Troubleshooting Tips.
- Proceed as follows for the Cable Replacement procedure:
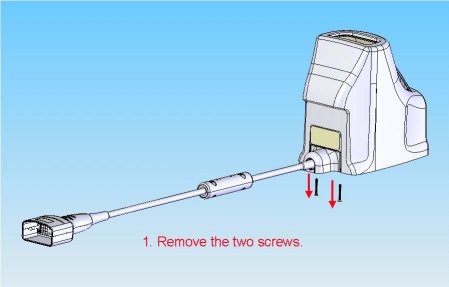
- Remove the two Coil Connector mounting screws as detailed below.
Figure 1. Removing Screws on Coil Connector
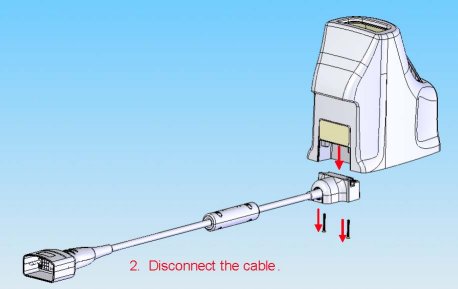
- Disconnect the cable by grasping the coil connector housing,
and pulling the cable away from the coil connector in a downward direction.
Figure 2. Disconnecting Cable from Coil Connector
- Remove the two Coil Connector mounting screws as detailed below.
Mechanical Parts Replacement
Refer to the Using the Foot Ankle Coil section in 1.5T HD 8-Channel Foot Ankle Coil Operator Manual for both steps below.
Procedure
- Exercise the latches on the baseplate by moving the blue latch
handle back and forth. (The foot support and coil is capable of a
15 degree plantar flexion.)
-
Latches must move smoothly and lock positively into place.
-
Latches must not loosen or open during the course of an examination
-
- Move the coil from side to side on the baseplate, making sure
the coil moves smoothly.
- Swivel the coil on the baseplate. The coil must move smoothly within a 10 to 15 degree rotation.
- Lock the coil into position on the baseplate. The coil must remain in place while locked down, and resume smooth movement when unlocked.
Finalization
Finalization
No finalization steps.