
- 00000018WIA30879030GYZ
- id_123734021.3
- Jul 5, 2019 10:03:33 PM
Alignment Light Checks
Prerequisites
| Required persons | Preliminary requirements | Procedure | Finalization |
|---|---|---|---|
| 1 | Not Applicable | 15 minutes | Not Applicable |
About this task
Overview
The laser light(s), mounted on the front face of the magnet bore, are pre-adjusted at the factory and do not normally require realignment after the initial installation alignment procedures are completed.
Procedure
- Check whether the axial alignment light at the top is aligned
with the marks on the bridge. If there are no marks in the cradle,
verify that the axial alignment light is plumb (pointing straight
down). Disengage the cradle.
Figure 1. Alignment Marks 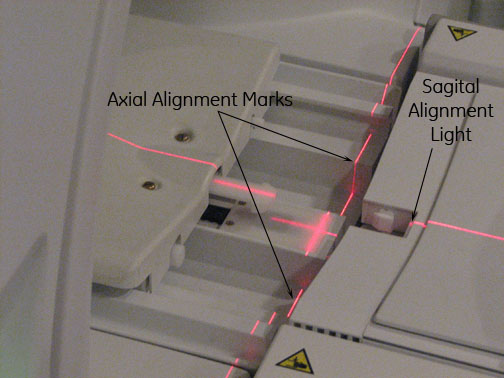
Figure 2. Alignment Marks and Beam 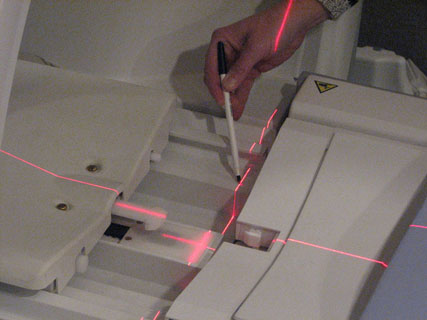
Finalization
- If adjustments were made, perform z-iso center calibration by running the DQA II tool. See DQA II Tool and Troubleshooting.
- Make two marks with a pen in the locations as shown in Figure 2. These marks will be the reference for future alignment light checks.