Main Breaker
Prerequisites
Procedure
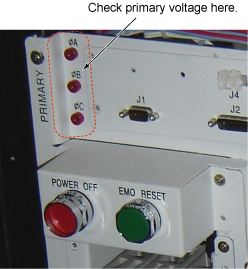
- Check the AC Voltage between φA-B, φB-C, and φC-A
(Primary) and verify that the voltage is under 1VAC.
Figure 1. Voltage Check
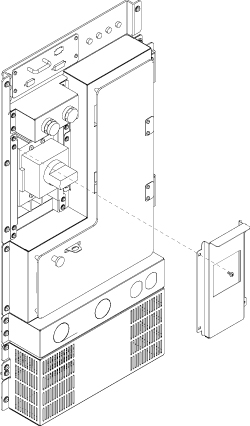
- Remove front cover. Refer to SC Cover Removal.
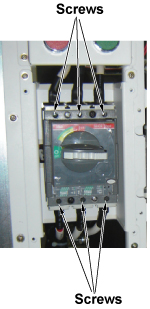
- Remove 4 screws and remove Breaker Panel.
Figure 2. Open Breaker Panel
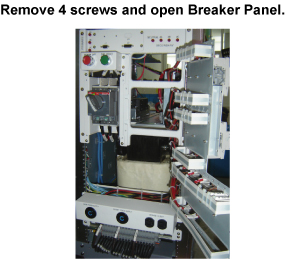
- Open Breaker panel by removing four screws.
Figure 3. Open Breaker Panel
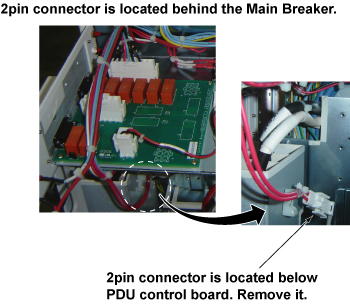
- Disconnect 2-pin connector. 2pin connector is located behind
the Main Breaker.
Figure 4. 2-pin connector
- Remove 6 screws from the main Breaker terminal and remove cables.
Use 5mm hex wrench.note:
To access to the screws and remove cables, it is easier to remove separator panel. Slide the panel forward and remove them for easy operation.
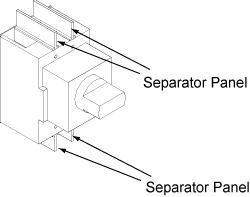
Figure 5. Remove 6 screws
- notice
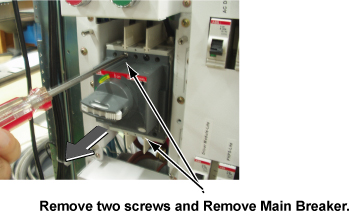
- Remove 2 silver screws and remove main breaker.
Figure 6. Remove Main Breaker
- notice
- Restore it by the reverse order of the removal.
- Before installing main Breaker, make sure separator panels are removed.
- Connect two pin connector.
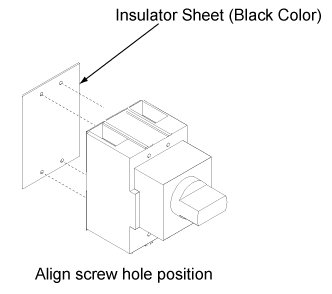
- Attach Insulator sheet (Black color) behind the main Breaker.
Figure 7. Insulator sheet
- Install Main Breaker with 4 screws.
- Install cables with 6 screws.
- Install Separator Panels.
- Restore Breaker Panel.
- Restore Breaker Panel.
 |
|
1 Finalization
Procedure
- Restore Power for main input circuit breaker.
- Restore the Power. Refer to Lockout / Tagout for MDP(Main Disconnect Panel) or Facility PDU.
- Run one head or body scan.