DVD Drive Replacement
Prerequisites
Procedure
- Shutdown the system software and Lockout/Tagout the power to the Simple OC before beginning the replacement.
- Wear the static electricity prevention band to the wrist.
- Spread the static electricity prevention sheet for replacement
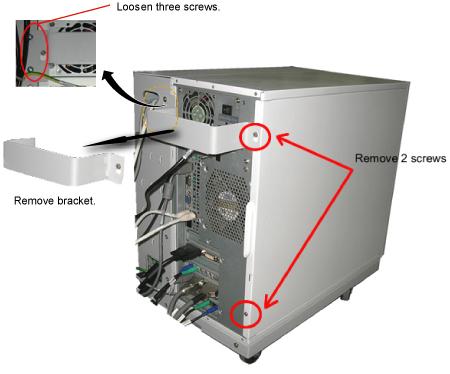
- Loosen the four screws that is fixing the bracket on the PC
rear panel and take the bracket away.note:
A seal might be attached at the PC rear panel which describes "Warranty void if this seal removed". Please do not care about description of the label and remove it for panel removal.
- Remove the left panel of the PC by unscrewing the two screws
located on the back of the PC..
Figure 1. Removing the Left Panel of PC
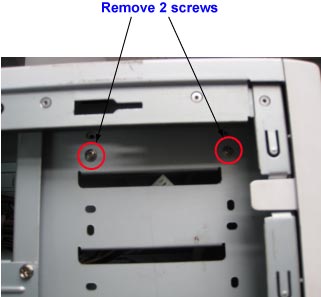
- Remove the 2 screws from the Left side of PC (Show in Figure 2) . note:
There are no screw on the other side.
Figure 2. Removing 2 screws
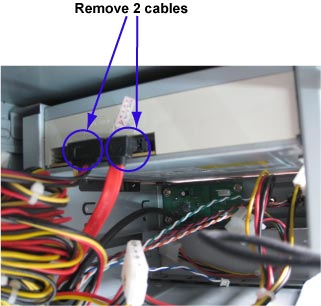
- Remove 2 cable from rear side .
Figure 3. Remove 2 cable
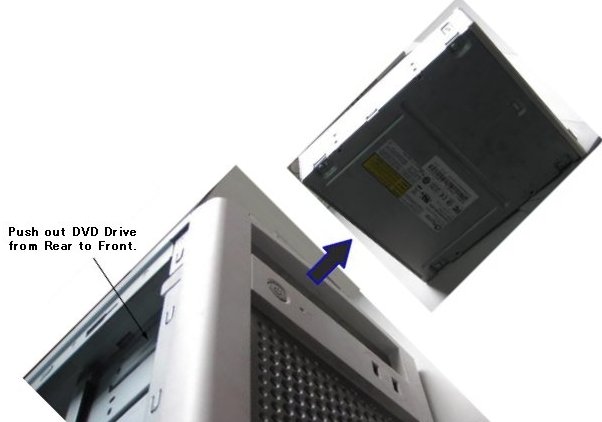
- Push out DVD Drive with a bit of force and take it away.note:
To pushed out DVD, need a bit of force.
Figure 4. Push out DVD Drive
- Install DVD Drive, cables, screws and the Left Panel of PC.
1 Finalization
Procedure
- Turn the system power on. Verify system boot up without any problem.
- Perform one body or head scan.
- Perform SaveInfo to check DVD Drive Function.