8-Channel Body Array Anterior Handle Replacement
Prerequisites
The Anterior coil’s handle can break after repeated use. The kit 2418437 includes all components required to replace the Anterior Handle.
Procedure
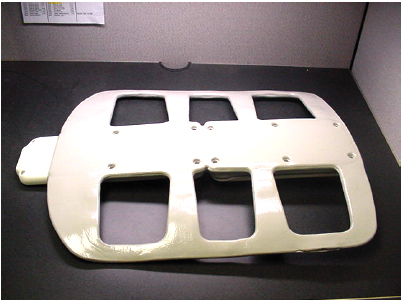
- Place the anterior section of the coil foam side up on the work
area. See Figure 1.
Figure 1. Place The Anterior Section Of The Coil Foam Side Up
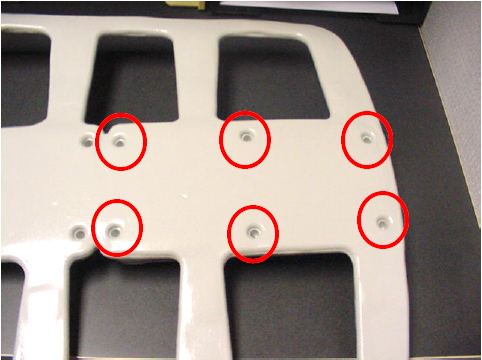
- Locate and remove the 6 screws holding the smaller anterior
cover in place. See Figure 2.note:
Make sure that you do not damage the foam while performing this step.
Figure 2. Remove The 6 Screws Holding The Smaller Anterior Cover
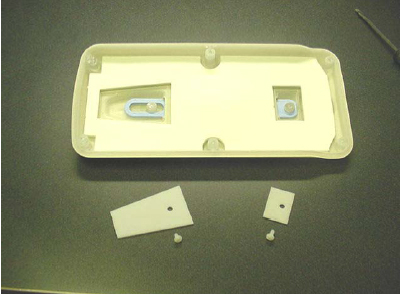
- Locate and remove the 2 screws holding the ends of the handle
on the inside of the cover. See Figure 3.
Figure 3. Locate And Remove The 2 Screws Holding The Ends Of The Handle

- Lift the covers to expose the ends of the handle. See Figure 4.
Figure 4. Lift The Covers To Expose The Ends Of The Handle
- Lift the ends of the handle off of the posts and pull the handle
out of the slots in the cover.note:
It may be necessary to pry the one end of the handle off of its post. See Figure 5.
Figure 5. Lift The Ends Of The Handle Off Of The Posts And Pull The Handle Out

- Place the ends of the new handle in the slots of the cover, making sure it is orientated as shown.
- Place the covers over the ends of the handle and secure them in place with their screws.
- Place the cover back on the anterior section of the coil and secure it in place by retightening the 6 screws.
Finalization
- Perform Signa 1.5T HD 8 CH Body Array Coil Setup for SNR Test to ensure proper operation of the coil.