- Topic ID: id_17423241
- Version: 1.0
- Date: Aug 23, 2018 11:14:51 PM
Z840 Host Computer Troubleshooting
1 Overview
The follow information assists in confirming if the Z840 Host Computer is experiencing a hardware fault. Although the following is not a complete set of diagnostics, it should be sufficient in determining if the Z840 Host Computer is suffering from hardware issues at the prescribed Field Replaceable Unit (FRU) level.
Obtain complete diagnostic details for the Z840 Host Computer from Hewlett Packard’s support web site: http://www.hp.com/
Click on Support & Drivers and search by HP Computer model number.
Reference the HP Z840 Maintenance and Service Guide manual by clicking on the following PDF icon. 14882751.pdf
2 General Troubleshooting Checklist
Before proceeding with the rest of this procedure, use the following checklist to find possible solutions for Host Computer problems:
-
Is the Z840 Host Computer plugged in and powered on?
-
Are the Z840 Host Computer and Monitors connected to the proper and working electrical outlet?
- Are the front panel power light illuminated on Z840 host computer and Monitors?
- Has Circuit Breaker #1 (CB2) tripped on Power Distribution Box?
-
Check LCD Monitor Video Cable connections and adjust the monitor brightness and contrast controls if the monitor is dim.
- Reference Functional Interconnects for cable interconnects.
-
Remove all media from the drives before you power on the system.
-
Are you running the latest BIOS version and have correct BIOS Settings?
- Reference Z840 Host PC BIOS Setup
3 LEDS & POST Error Indicators
Refer to the HP Z840 Maintenance and Service Guide for the following error indications
4 Basic Troubleshooting
Refer to the HP Z840 Maintenance and Service Guide for the following basic troubleshooting.
5 HP Hardware Diagnostics
Refer to the HP Z840 Maintenance and Service Guide for details on HP’s PC Hardware Diagnostics.
5.1 Downloading and installing the update
Follow these steps to download and install the update. You need a blank USB drive (at least 2GB). This process formats the USB Drive to FAT32.
You cannot download the softpaq directly to the USB drive. You have to download the softpaq to the computer, and then copy the softpaq to the USB drive.
-
Download and install the HP Hardware Diagnostics UEFI and save it to a convenient location on your hard drive. Make a note of the location where the downloaded file is saved.
-
Double-click the downloaded file, then follow the on-screen instructions.
note:If the workstation in question does not boot to the operating system, you need to download this tool on another machine and run the .exe file. After downloading and running the .exe file continue with these steps.
-
Find a blank USB drive or a USB drive that you can format.
note:The USB drive needs to be more than 1BG but less than 32GB.
-
Insert the USB drive into the machine that you downloaded the file on. Make sure this is the only USB drive that is plugged into the computer.
-
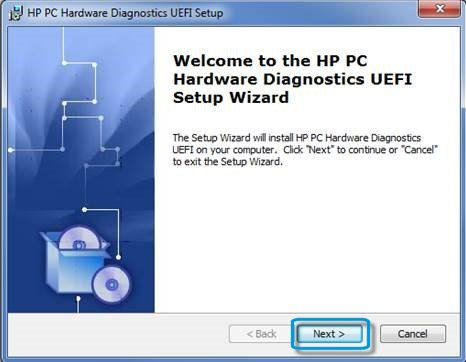
After you run the .exe file, the HP PC Hardware Diagnostics UEFI Setup automatically opens.
note:If the HP PC Hardware Diagnostics UEFI Setup does not automatically open, go to C:¥SWSETUP¥SP69045¥ and run Setup.exe.
Figure 1. HP Hardware Diagnostic UEFI Setup
-
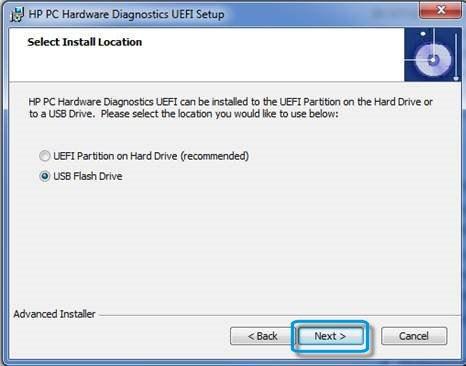
Select USB Flash Drive.
note:This formats the USB drive to FAT32
Figure 2. USB Flash Drive
-
Click Next.
The files installs on the thumb drive.
-
Click Finish.
-
Once this is done, remove the USB Drive from the computer.
5.2 Testing using HP PC Hardware Diagnostics (UEFI)
-
Turn off the computer.
-
Insert the USB drive containing the latest UEFI version into a USB port on the computer.
-
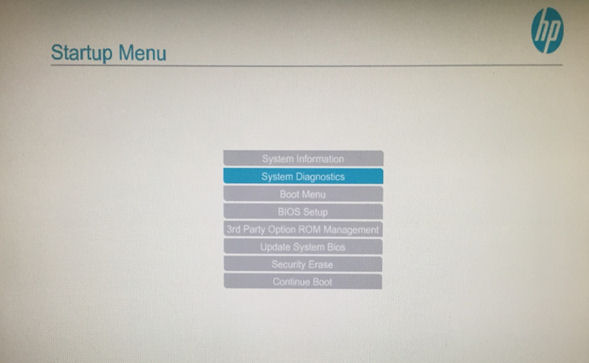
Press the power button. Press the Esc key repeatedly until the Startup Menu screen appears.
Figure 3. Startup Menu Screen
-
Select System Diagnostics.
-
HP PC Hardware Diagnostics UEFI screen appears. The system is ready to begin testing.
Figure 4. HP PC Hardware Diagnostics UEFI Screen
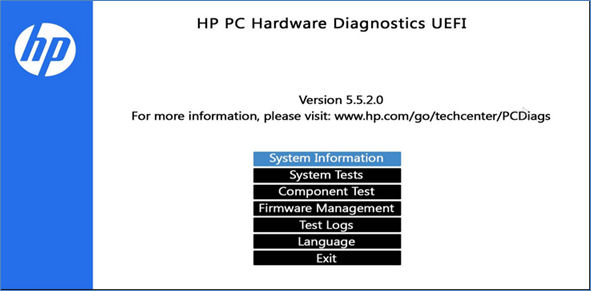
System Information Display – Provides information about the system such as Model, Serial Number, Warranty Start Date, and hardware configuration.
System Tests - Check the PC’s hardware to assure everything is functioning properly. If your system won’t boot into Linux, try the Quick System Test. For more comprehensive testing, use the Extensive System Test option.
Component Tests – Select individual tests focused on selected hardware components in your PC.