- Topic ID: id_16157570
- Version: 4.0
- Date: Jun 29, 2020 10:12:03 PM
Z840 Host PC BIOS Setup
Prerequisites
Overview
The BIOS of the computer is a collection of machine language programs stored as firmware in ROM. The BIOS ROM includes such functions as POST, PCI device initialization, Plug 'n Play support, power management activities, and the BIOS Setup (F10) Utility. The BIOS Setup (F10) Utility enables you to change factory default settings and set or change the system configuration based on the Host PC hardware or system functionality requirements.
1 HP Z840 BIOS Flashing and Recovery
The following information covers the necessary procedures for flashing and recovering from corrupted or incomplete flashing of the Host PC’s BIOS ROM. This is not to be confused with the BIOS Settings discussed later. The BIOS firmware code flashed to the BIOS ROM is the executable portion of the BIOS ROM code, which includes a default set of configuration settings. Later, customize these settings for the Host PC’s specific configuration details. You can save and restore these customized settings on CD for quick restoration in the event of BIOS ROM corruption or BIOS updating.
1.1 Z840 BIOS ROM Flash Update Procedure
Procedure
- Power down the Host PC.
- Insert a BIOS image CD into the DVD drive. You can also use USB media such as an HP DriveKey.
- Power on the Host PC.
- When the display is active and Press the Esc Key for Startup Menu appears at the bottom of the screen, press F10 or Esc.
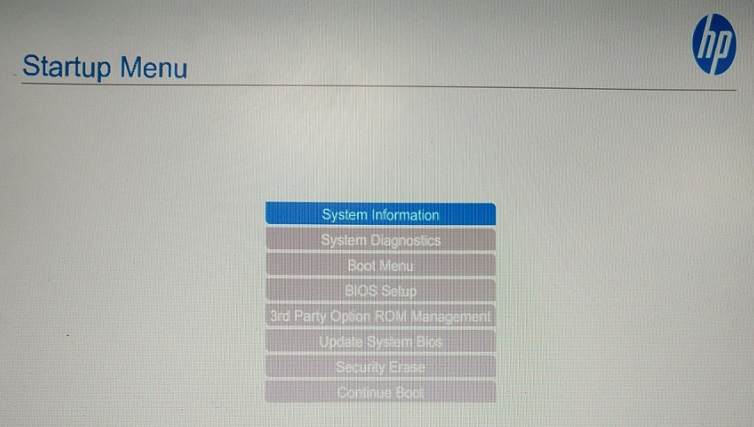
- The Startup Menu appears, use the up and down arrow keys to select BIOS Setup.
Figure 1. Startup Menu
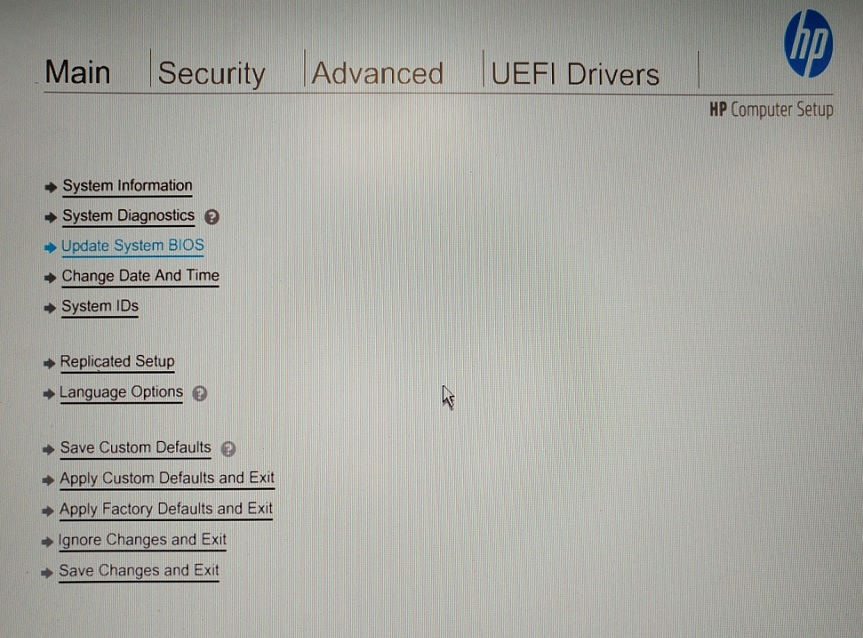
- In the Computer Setup (F10) Utility menu, the following headings are displayed: Main, Security, Advanced and UEFI Drivers.
- Use the left and right arrow keys to select Main, use the up and down arrow keys to select Update System BIOS, and then press Enter. (See Figure 2.)
Figure 2. Flash System BIOS ROM Selection
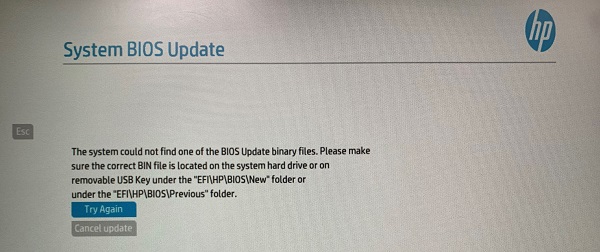
- If no BIOS image CD or USB media is found, you are prompted to insert one and restart the computer.
Figure 3. no BIOS Image CD or USB Media
If a BIOS image CD or USB media is found, the following screen appears.
note: Current BIOS version is BIOS 2.23, below figures are examples.Figure 4. System BIOS Available (Example)
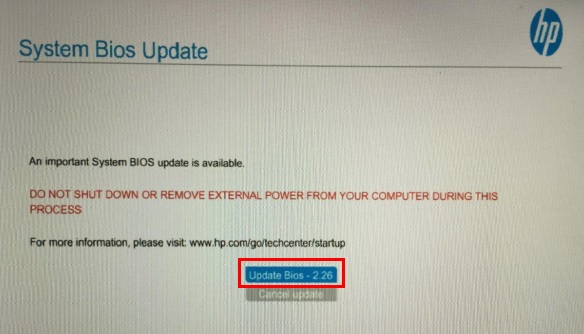
- Select the Update Bios – x.xx, the update procedure is going.
Figure 5. Updating BIOS (Example)
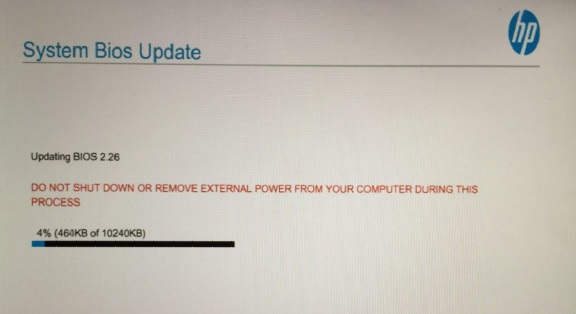
- When the System BIOS update is completed, the “Upon restarting, the screen may be blank for a few minutes and various LED lights may flash. Please do not attempt to interrupt or power during this time.” appears. Click Reboot to restart the Host PC.
1.2 FailSafe Boot Block
The FailSafe Boot Block enables BIOS recovery in the unlikely event of a ROM flash failure. For example, if a power failure occurs during a ROM upgrade, Boot Block uses a flash-protected section of the ROM to verify a valid system ROM flash when power is restored to the computer.
- If the system ROM is valid, the computer starts normally. If the system ROM fails the validation check, FailSafe Boot Block provides enough support to start the computer from a BIOS image CD that has been created from a SoftPaq. The BIOS image CD programs the system ROM with a valid image.
- If the system ROM is invalid, the computer power LED blinks red eight times and the computer beeps eight times; then the computer pauses for two seconds. On some models, a Boot Block recovery mode message appears.
In preparation for system recovery, use the BIOS CD media file in the SoftPaq to create a BIOS image CD or USB flash drive.
Recovering the Computer from Boot Block Recovery Mode
Procedure
- Remove any media such as USB flash drives or discs in the optical drives.
- Insert a BIOS image CD into the DVD drive. You can also use USB media such as an HP DriveKey.
- Turn the computer off, and then turn it on.
If no BIOS image CD or USB media is found, you are prompted to insert one and restart the computer. (See Figure 3)
If a setup password has been established, the Caps Lock light turns on and you are prompted for the password.
- Enter the setup password.
If the computer starts from the boot media and successfully reprograms the ROM, three keyboard lights turn on and a rising-tone series of beeps signals successful recover.
- Remove the boot media and turn off the computer.
- Restart the computer.
2 Z840 BIOS Setup (F10) Utility Functions
The BIOS Setup (F10) Utility enables you to do the following:
-
Update BIOS using a USB device.
-
Change factory default settings and set or change the workstation configuration, which might be necessary when you add or remove hardware.
-
Determine if all devices installed on the workstation are recognized by the system and are functioning.
-
Determine information about the operating environment of the workstation.
-
Solve system configuration errors that are detected but not resolved during the Power-On Self-Test (POST).
-
Establish and manage passwords and other security features.
-
Establish and manage energy-saving time-outs
-
Set the workstation date and time, and modify or restore factory default settings.
-
Set, view, change, or verify the workstation configuration, including settings for processor, graphics, memory, audio, storage, communications, and input devices.
-
Modify the boot order of installed mass storage devices such as SATA drives, optical drives, and network drives.
-
Enable or disable Network Server Mode. This mode enables the workstation to start the operating system when the power-on password is enabled, with or without a keyboard or mouse attached. When the keyboard and mouse are attached to the workstation, they remain locked until the power-on password is entered.
-
Select Post Message Enabled or Disabled to change the display status of Power-On Self-Test (POST) messages. POST Messages Disabled suppresses most POST messages, such as memory count, product name, and other non-error text messages. If a POST error occurs, the error is displayed regardless of the mode selected. To manually switch to POST Messages Enabled during POST, press any key (except F1 through F12).
-
Specify an Ownership Tag, which is displayed on the screen when the workstation is started or restarted.
-
Specify the Asset Tag or property identification number assigned to this workstation.
-
Enable power-on password prompts during system restarts (warm-starts) and when the computer is started.
-
Hide or show the integrated I/O functionality, including serial, USB, or parallel ports, audio, or embedded NIC. Hidden devices are inaccessible, which increases system security.
-
Enable or disable removable media boot ability.
-
Enable or disable removable media write ability (if supported by hardware).
-
Replicate the workstation setup by saving system configuration information to removable storage or restoring it.
3 Accessing Z840 BIOS Setup (F10) Utility
You can only open the BIOS Setup (F10) Utility by powering on the Host PC or restarting the system. To access the BIOS Setup (F10) Utility menu, perform the following steps:
Procedure
- Turn on or restart the workstation.
- When the display is active and Press the Esc Key for Startup Menu appears at the bottom of the screen, press F10 or Esc.note: If you do not press F10 or Esc at the appropriate time, try again. Turn the workstation off, then on, and press F10 again to access the utility. You can also press Ctrl+Alt+Delete keys before starting if you do not press F10 before the message disappears.
- Select your language from the list, and press the Enter key.
In the Computer Setup (F10) Utility menu, the following headings are displayed: Main, Security, Advanced and UEFI Drivers.
note: The option for selecting the language is available on first boot only. To reset the selection, press Esc during POST and from the Startup menu, select Change Language to switch between languages. - Use the left and right arrow keys to select the appropriate heading, use the up and down arrow keys to select an option, and then press Enter
- Choose from the following:
-
To apply and save changes, select Main > Save Changes and Exit, and then press Enter to accept the changes.
-
To remove changes you have made, select Ignore Changes and Exit, and then press Enter to acknowledge the cancelllation.
-
To restore factory settings, select Main > Apply Defaults and Exit.
note: Do not turn off the workstation while saving Computer Setup (F10) Utility changes, because the Complementary Metal-Oxide Semiconductor (CMOS) nonvolatile storage could become corrupted. Turn off after you exit the F10 Setup screen. -
4 Saving and Restoring BIOS Settings as Default
This section describes the steps necessary to save and restore Z840 BIOS Settings.
4.1 Saving Host PC BIOS Settings as Default
Perform the following steps to save the Host PC BIOS Settings as default settings (settings currently configured and stored in ROM):
Procedure
- Turn on or restart the workstation.
- When the display is active and Press the Esc Key for Startup Menu appears at the bottom of the screen, press F10 or Esc.note: If you do not press F10 or Esc at the appropriate time, try again. Turn the workstation off, then on, and press F10 again to access the utility. You can also press Ctrl+Alt+Delete keys before starting if you do not press F10 before the message disappears.
- In the Computer Setup (F10) Utility menu, the following headings are displayed: Main, Security, Advanced and UEFI Drivers.
- Use the left and right arrow keys to select the appropriate heading, use the up and down arrow keys to select an option, and then press Enter.
- Select Main > Replicated Setup, and then press Enter. The Replicated Setup screen appears.
Figure 6. Replicated Setup
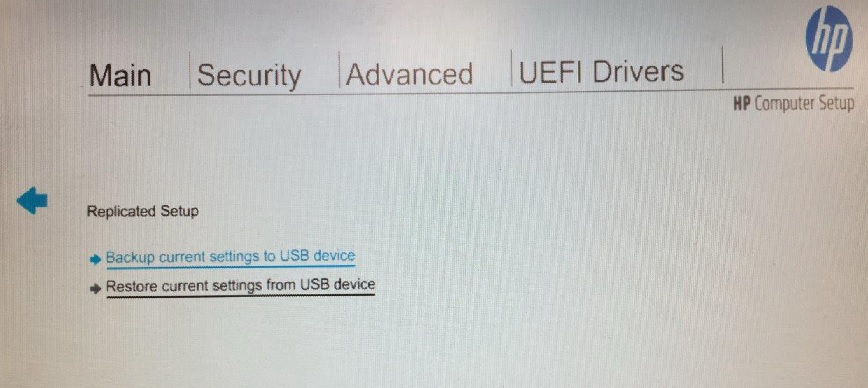
- Select Backup current settings to USB device. The HpSetup.txt file will be created in USB device and “Settings successfully saved to USB storage device (HpSetup.txt).” appears, and then click on OK.
- The Host PC reboots.
4.2 Restoring Host PC BIOS Settings from Default
Perform the following steps to restore the Host PC BIOS settings from default settings (BIOS Settings currently saved in Defaults Settings of ROM):
Procedure
- Reboot the Host PC, when the display is active and Press the Esc Key for Startup Menu appears at the bottom of the screen, press F10 or Esc.note: If you do not press F10 or Esc at the appropriate time, try again. Turn the workstation off, then on, and press F10 again to access the utility. You can also press Ctrl+Alt+Delete keys before starting if you do not press F10 before the message disappears.
- Select Main > Replicated Setup, and then press Enter. The Replicated Setup screen appears. (Figure 6)
- Select Restore current settings from USB device. The “Settings successfully restored from USB storage device.” appears, and then click on OK.
- The Host PC reboots.
5 Z840 BIOS Settings Clear / Reset Procedure
5.1 Using the CMOS Button to Reset CMOS
Procedure
 warning
- caution
- Back up your computer CMOS settings run Computer Setup (F10) Utility, and select Main > Replicated Setup > Back up current settings to USB device.
- caution
- Shut down the operating system, power off the computer and external devices, and disconnect peripheral devices.
- Disconnect the AC power cord from the power outlet.note: The CMOS button does not clear CMOS if the power cord is connected.
- Open the workstation.
- Locate, press, and hold the CMOS button for five seconds.
For assistance locating the CMOS button and other system board components, see the below figure.
Figure 7. BIOS Setting (CMOS) Reset Button

- Close the workstation, reconnect external devices, connect the power cord and power on the workstation.
- The system boots to an F1 prompt and displays a message that the date/time has changed and that system options have changed.
- Press F1. The system shuts down for three seconds and then powers on again.
- Use the F10 (Setup) utility to reset the date and time.
 |
|
|
5.2 Using Computer Setup (F10) Utility to Reset CMOS
Procedure
- Access Computer Setup (F10) Utility menu.
- When Computer Setup message appears in the lower-right corner of the screen, press F10, and then press Enter to bypass the title screen, if necessary.
If you do not press F10 while the message is displayed, the computer must be rebooted to access this utility.
- From Computer Setup (F10) Utility menu, select Main > Replicated Setup > Back up current settings to USB device.
This restores the setting that include boot sequence order and other factory settings. However, it does not force hardware rediscovery.
- Choose Restore Factory Settings as Default, and the press F10 to accept.
- Select Main > Apply Defaults and Exit, and then press F10 to accept.
- Reset the computer passwords and configuration information, such as the system date and time.note: This step does not clear the passwords.
6 Computer Setup (F10) Utility Menu
Procedure
- The following table describes the functions available in the Computer Setup (F10) Utility menu.note: With new BIOS releases, the following content is subject to change, so the menu might be different than shown.
7 Finalization
After running any of the procedures in this document, ensure that BIOS settings conform to those in Table 4.