- Topic ID: task_s11_sxk_ynb
- Version: 3.0
- Date: Nov 8, 2021 5:12:31 AM
Z8G4 System/Backup SSD Replacement
Prerequisites
Overview
System/Backup drive uses two SSD disks to be hot backup to enhance the system reliability. If one SSD disk is defective, it needs to be replaced. This procedure shall be followed when replacing the System or Backup SSD disk in Z8G4 host computer.
1 System or Backup SSD Replacement Preparation and Location
Procedure
- Shutdown system. Select one of the following methods to Power OFF the Console:
- If Applications are up, click on the [Shut Down] button on desktop display and select [Shutdown].
The Operator Console monitor will display a 'Power Down' message when it is acceptable to power OFF the Operator Console.
- If Applications are down, open a Terminal Window. Type: halt , then press ENTER
- When halt command has finished, power Off the console at the front panel switch.
- If Applications are up, click on the [Shut Down] button on desktop display and select [Shutdown].
- Apply LOTO. See Equipment Service - Lockout-Tagout-PPE procedure.
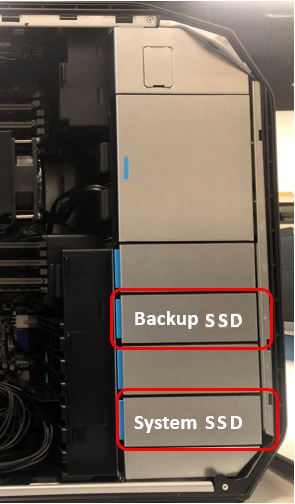
- Locate System or Backup SSD by referencing the Illustrations below.
Figure 1. Z8G4 Component Location
2 System or Backup SSD Removal
Procedure
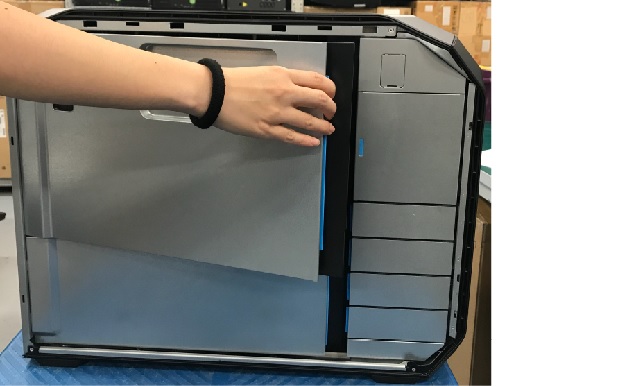
- Open and remove the module small side cover.
Figure 2. Remove module small side cover
- Disconnect the power and signal cables from hard disk drives.
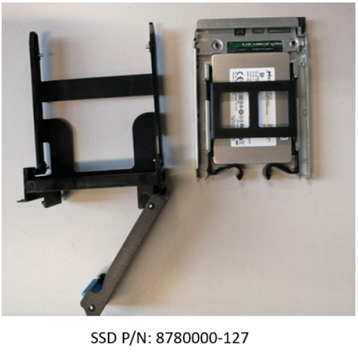
- Pull System/Backup SSD from the computer’s drive bay.
Figure 3. Remove SSD
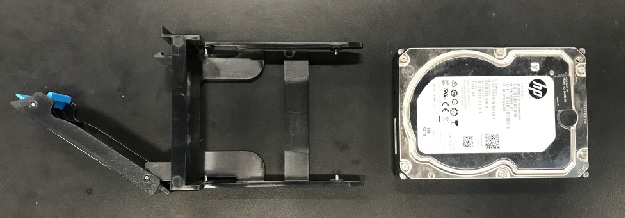
- Remove the original SSD from the disk carrier rails.
Figure 4. Remove SSD from Carrier Rail
3 System or Backup SSD Installation
Procedure
- Install replacement SSD into original disk carrier rails.
Figure 5. Install SSD
- Install the replacement SSD assembly into the computer’s drive bay.
- Reinstall the module small side cover.
- Reinstall the host computer left side panel.
4 Destination SSD Rebuilding
Procedure
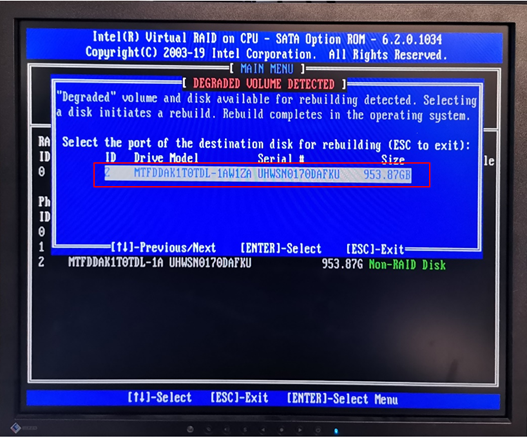
- Power on the host computer and immediately press Ctrol + l (UI displays HP logo) to enter BIOS configuration.
- Select the port of the destination disk for rebuilding and press Enter.
Figure 6. Select Destination Disk
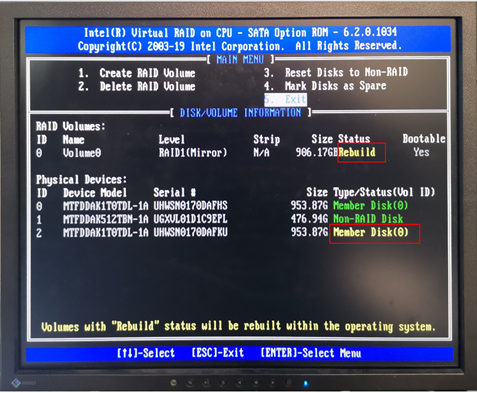
- The Disk/Volume Information window appears, use up/down keys to select Exit in Main Menu when the Raid Volumes Status shows yellow "Rebuild" and the Physical Devices Type/Status (Vol ID shows yellow "Member Disk (0)", then press Enter, the host computer will quit BIOS UI and auto restart.
Figure 7. Disk/Volume Information
- Wait for the host computer reboot until the password change window pops up, close it.
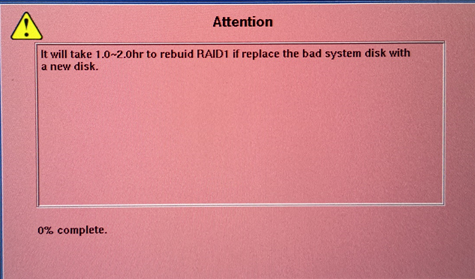
- An attention window pops up.
Figure 8. Attention of Raid Rebuilding
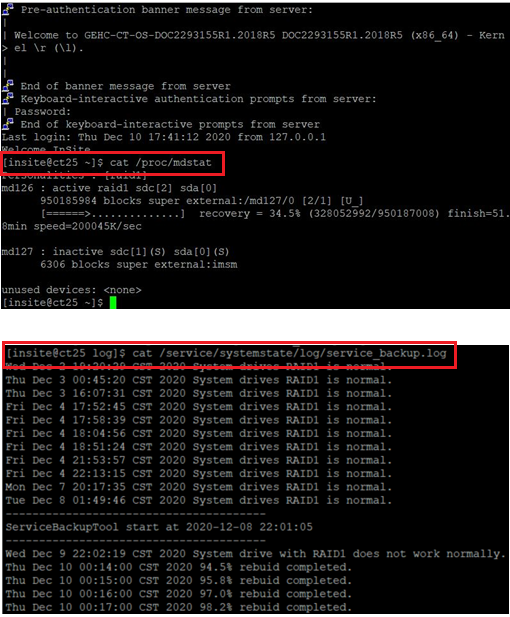
 note: If the screen is locked due to long time no operation, you can press Space to active it.note: If remotely connection by RSVP-FFA, you can monitor the rebuilding progress by command "cat /proc/mdstat" and "cat /service/systemstate/log/service_backup.log".
Figure 9. Monitor Rebuilding Progress
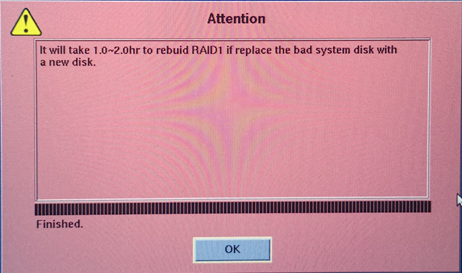
- It will take 1-2 hours to rebuild the RAID1, click OK after the rebuilding finished (if the application not launch automaticlly, open a shell to type "st" to start it).
Figure 10. RAID Rebuilding Finished
- Check the disk status by running "df -h" in shell.
Figure 11. Check Disk Status

- Check two disks status by selecting "Host: System Drive (Raid1)" in Console Diagnostics Tool.
Figure 12. Console Diagnostics Tool
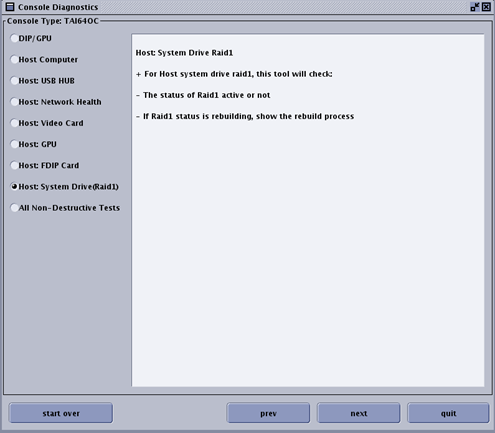
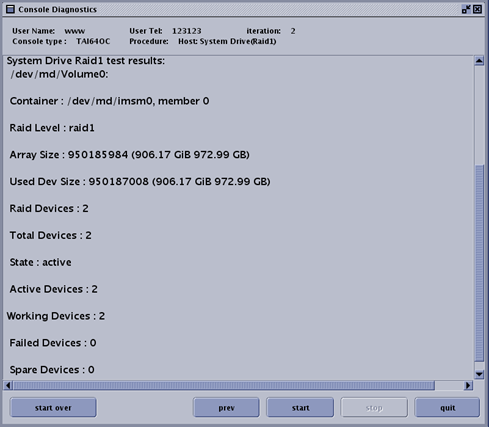
Figure 13. System Drive Raid1 Test Result
5 Finalization
Procedure
- Perform the Functional Checks → System Scanning Test instructions from the procedure list.
- Reinstall the console covers and all removed components, and reconnect any cables that have been disconnected.
- Remove LOTO on console.