- Topic ID: id_17423482
- Version: 3.0
- Date: Jan 20, 2020 8:33:36 PM
Table Sponge Replacement
Prerequisites
Overview
Procedure
- notice
- Move the cradle to the OUT mechanical limit position by hand.
- Raise the Table to its highest position.note:
If the Table up/down movement is inoperative, use the service power cable to raise the Table (refer to Enforced Table Elevation).
- "Remove power from Table by turning off “120VAC”, “Axial Drive” and “HVDC” switches on the service switch panel."
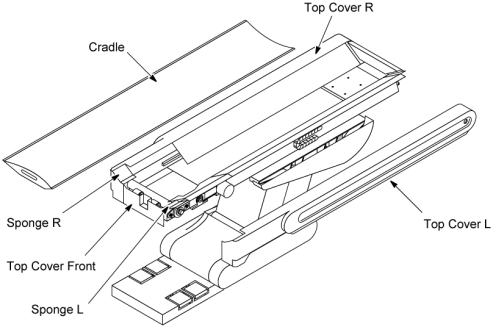
- Remove the following covers and component from the Table:
-
Cradle (Refer to Cradle)
-
Top Cover L and R (Refer to Table Covers Removal)
-
Top Cover Front
note:When replacing the Sponge R, remove the Top cover R only. When replacing the Sponge L, remove the Top cover L only.
Figure 1. Removing the Cradle and Top Cover
-
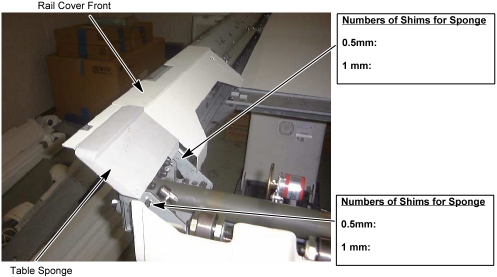
- Remove the two screws and Rail Cover Front.
- notice
- Remove the two (or one) bolt(s) and table sponge.
Figure 2. Table Sponge Removal
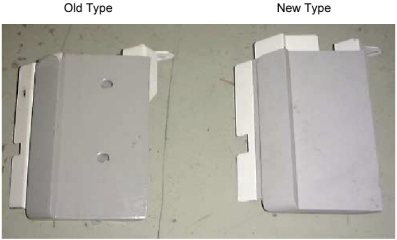
Some tables might contain the old type of sponge, which is installed using one screw. In this case, the sponge bracket must be replaced before installing the new sponge which is installed using two screws.
Figure 3. Table Sponge
- Install the new sponge with shims of which number is recorded in previous step. Temporarily tighten the mounting bolts.
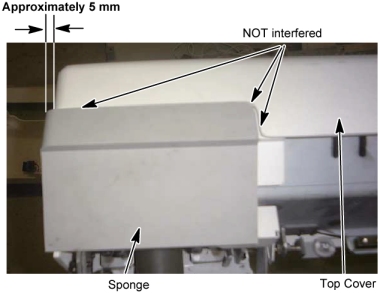
- Temporarily install the top cover, then verify that:
-
The sponge is NOT interfered with the top cover.
-
The distance between the edges of sponge and top cover is approximately 5mm.
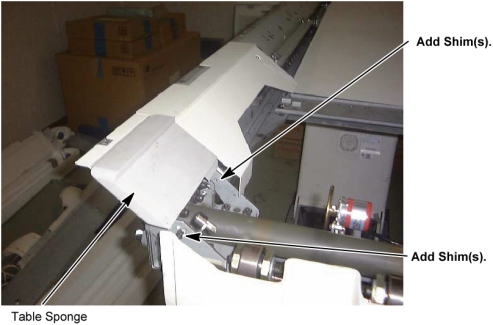
Figure 4. Table Sponge Installation
-
- If the sponge does not meet the specification above, adjust
the sponge location using shims (in the sponge FRU kit).
Figure 5. Table Sponge Positioning
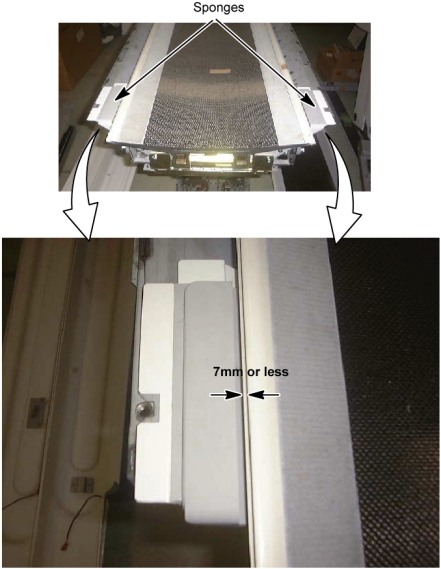
- Temporarily place the cradle onto the table, then verify that:
The clearance between cradle and sponge is 7mm or less.
If it is not, remove the cradle and adjust the sponge horizontally by loosening the mounting bolts.
Figure 6. Table Sponge and Cradle Position
- Remove the cradle from the table and tighten the sponge mounting bolts securely.
- Install the removed parts in the reverse order of removal.
 |
|
Finalization
No finalization steps.