- Topic ID: id_15460187
- Version: 2.0
- Date: Nov 8, 2018 1:38:13 AM
DIFB Chassis EMC Strip Replacement
Prerequisites
Overview
This procedure describes how to replace the EMC finger strips on each side of the DIFB chassis.
Procedure
- Remove gantry right side cover.
Refer to
- Stop the rotor of X-ray tube in case of Liquid Bearing Tube before HVDC off. Refer to Liquid Bearing Tube Rotor stop procedure for details.
- Disable Axial drive and HVDC from the service switch panel.
- Rotate the gantry to access the desired DIFB chassis.
- Disable gantry 120 VAC service switch from the service switch panel.
- Lock the gantry rotation to keep the gantry from moving during service.
- Remove the right side top cover for easier access to the DIFB chassis.
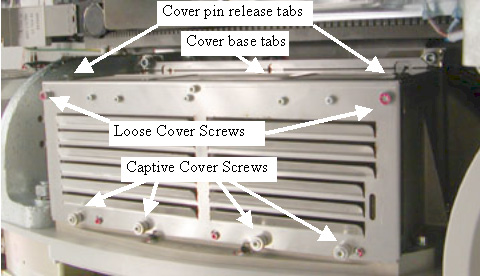
- Remove DIFB chassis cover fasteners and use press in on cover
release pin tabs shown in Figure 1 while pulling cover up and off
chassis.
Figure 1. DIFB cover top view
- The fingers of the chassis EMC strip can be replaced using the
following process. Replace any fingers damaged.
Figure 2. DIFB chassis EMC strip
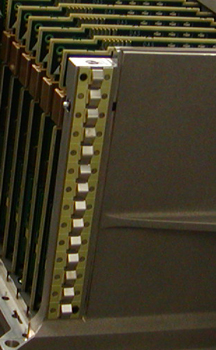
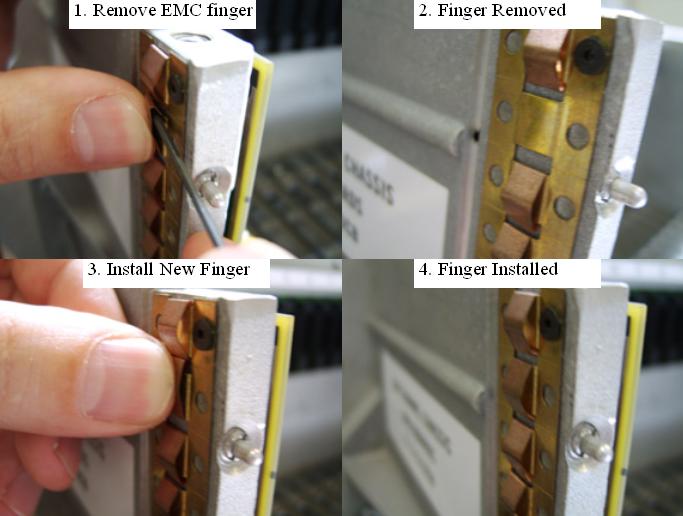
Figure 3. Finger removal overview
-
Using a small hex wrench (2 or 2.5 mm) push in on the finger to flatten it expanding the fingers with the hex wrench behind the finger pulling the top of the finger up and out. See Figure 3 step 1.
-
Perform the same procedure on the EMC strip received as a FRU. (NOTE: excess fingers from the FRU can't be kept on hand for any future needs)
-
Install the new finger by pushing in against the EMC strip to spread the tabs and sliding the finger up and down to engage the tabs on the back of the EMC finger. See Figure 3 step 3.
-
- Reinstall the DIFB chassis cover. (Use a flat blade driver bit
or Torx T20 bit) Install the 4 captive cover screws and Torque to:
- Install the 2 - M6 cover screws and Torque to:
- Install the gantry top cover.
Refer to
- Turn on the gantry 120 VAC, HVDC and Axial Drive service switches from the service switch panel. Push the E-stop reset button on the bottom right of the service switch panel.
- Install the gantry right side cover.
Finalization
No finalization steps.