- Topic ID: id_15460539
- Version: 2.0
- Date: Nov 8, 2018 1:37:11 AM
(09MW29.14 or Earlier) GOC6 Load From Cold
Prerequisites
Overview
The following procedure describes and illustrates the system software loading process commonly referred to as the Load From Cold (LFC). It is important to follow the steps listed below in order.
1 Software Deliverable for GOC6 Consoles
Procedure
- CTT Operating System, Version 5.3.8
- CT Applications Software
- Class C Software DVD
- Class M Software DVD
2 Pre-LFC Checks and Information Gathering
Procedure
- Confirm that a current System State DVD-RAM Disk is on site.
If unsure of status of the System State, execute System State Save Restore found in the Software
Chapter of this manual.note:
As a backup to the System State Disk, confirm that a GOC6 Console Information Sheetis available and is completely filled out with site-specific configuration and preference settings.
- Remove all media from MOD and USB Peripheral Towers before starting
a Load from Cold.
3 Operating Software (OS) Load
Procedure
- Unplug the Hospital Network (HSP - J26) cable from rear Console bulkhead.
- Label the cable as HSP - J26 (if necessary) and set it aside during LFC.
- Remove the Operator Console front cover per the prescribed procedure Console Cover Removal and Installation.
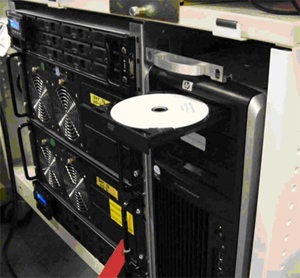
- Insert the OS DVD into the tray on the Host Computer DVD-ROM
Drive (Figure 1).
Figure 1. Host Computer DVD Drive Location
- Shutdown and Power Cycle Operator Console:
- Using the toolchest, open a Terminal Window.
-
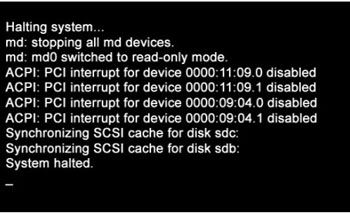
Type: {ctuser@hostname}halt
-
Wait for System Halted message to appear on the monitors.
Figure 2. Monitor Display – System Halted
-
- Cycle Operator Console power (Turn off, then On). Wait 30 seconds for the Operator console to settle down before re-powering the console.
- Using the toolchest, open a Terminal Window.
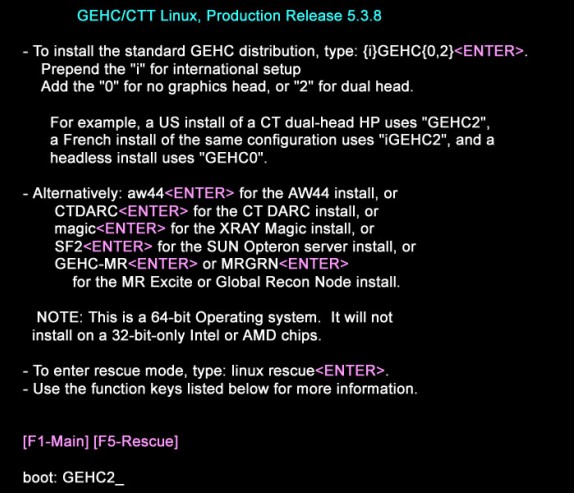
- As the Host Computer restarts, the boot process messages appear. After the booting process completes the boot: prompt appears.
- At the “boot:” prompt, type the following:
Type: boot: GEHC2
note:Special install script iGEHC2 for multi-language keyboard support is no longer required for GOC6 consoles. System Configuration (reconfig) script and the new Linux OS supports multi-language keyboards.
Figure 3. Monitor Display – Boot Prompt
- After the OS is loaded on the Host Computer, Complete Window
appears.
Figure 4. Monitor Display – OS Load Complete
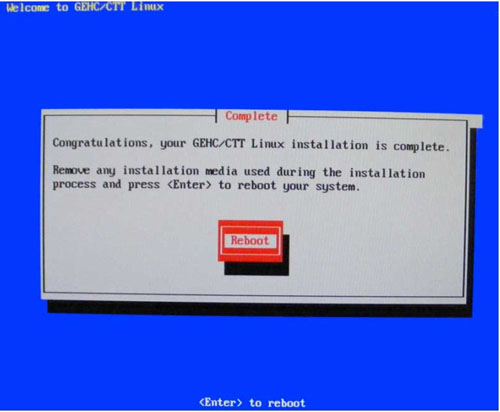
- Remove the OS DVD from the Host Computer DVD-ROM drive when it ejects and close the tray. Press Enter to Reboot.
- The Host Computer begins to reboot.note:
Do not insert the Applications Software DVD into the Host Computer until the Host Computer has completed rebooting and a Terminal Window appears, displaying the prompt: [root@localhost ~]#.
Figure 5. Monitor Display – After OS Load Reboot

4 Applications Software (APPS) Load
Procedure
- Open the tray on the Host Computer DVD-ROM Drive.
- Insert the Applications DVD into the DVD-ROM Drive and close
the tray.note:
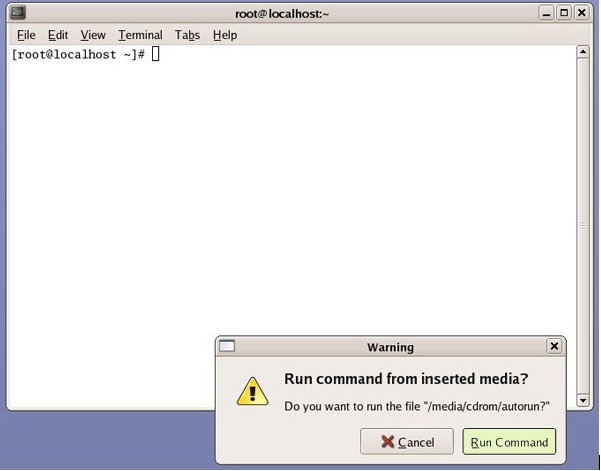
The Apps Software CD will open and run automatically.
- Select Run Command in the Warning box.
Figure 6. Apps Run Command Window
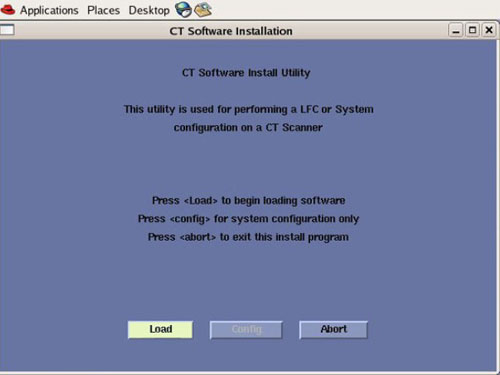
- Select Load in the CT Software Installation
window.
Figure 7. Apps Load Command Window
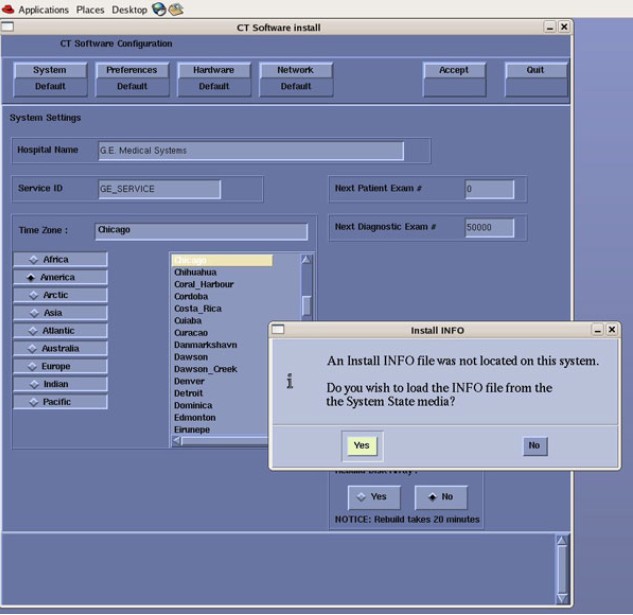
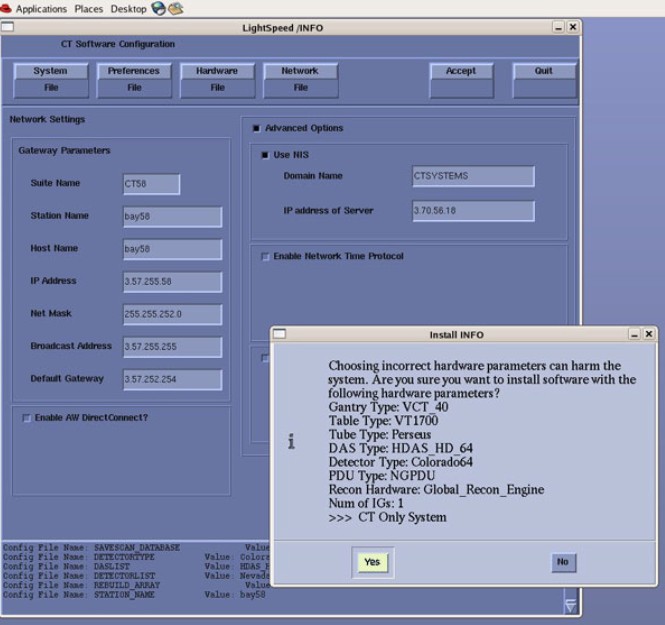
- System State decision for the Install INFO decision box (Figure 8) will appear. Select Yes.
Figure 8. Install INFO Window
 note:
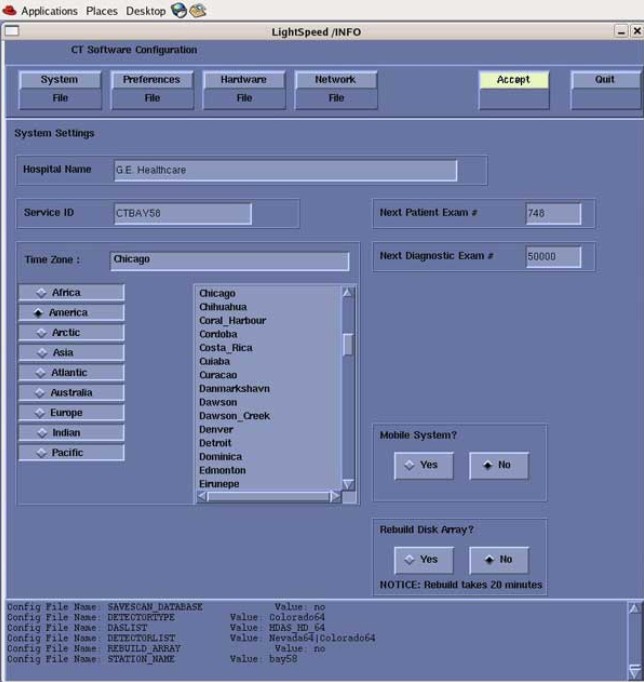
note:If a valid and current System State is not available or first time install of software, answer No and manually configure the Hardware Tab to define System and Console Type in accordance with the procedure Manually Configuring System INFO.
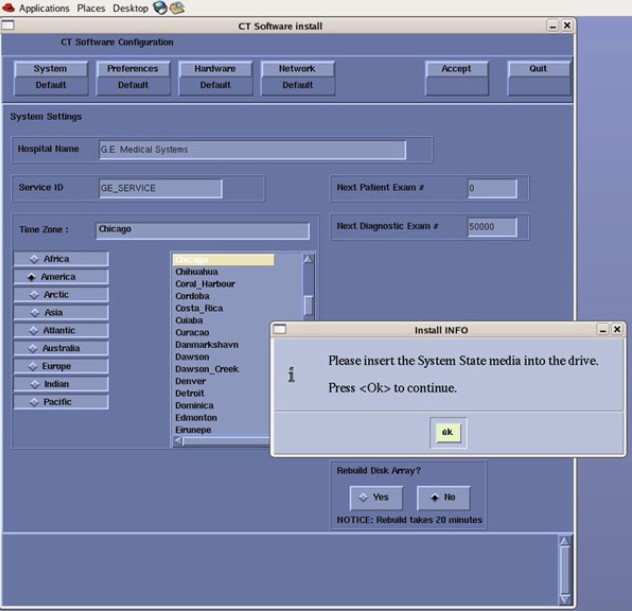
- Insert the System State DVD-RAM into the Peripheral Tower.
Select OK.
Figure 9. Install INFO - System State DVD Installed Window
- The Install INFO on the System State disk will be read and if
a valid System State Disk has been inserted, an Accept window will
appear.
Select Accept.
Figure 10. Install INFO - Accept Window
- The Install INFO on the System State disk will be displayed
and a confirmation window will appear.
Select Yes.
Figure 11. Install INFO - Confirm Window
 note:
note:Install INFO detail in Graphics will differ depending on System type. Verify that the Install INFO detail is correct before selecting [YES].
- System Install INFO will be now used to create the CT Application load routine. A message will appear briefly stating: “Please make sure the CT application media is in the drive - the system will be rebooted”.
- Do not remove the APPS disk at this time. The Operator Console will reboot automatically. A shell window will open and the CT Application software will be loaded.
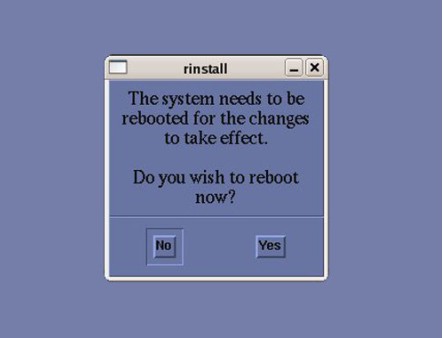
- When completed, the Operator Console will display a window requesting
that the console be rebooted. Select YES. note:
Remove APPS disk after selecting YES. The DVD Drive will not open until the Host Computer has rebooted.
Figure 12. Apps Load Complete- Reboot Window
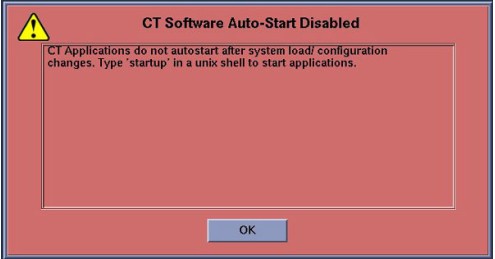
- After the Operator Console has rebooted, a window will be displayed
stating that the CT Application cannot autostart.
Select OK.
Figure 13. Post Apps Load – CT Apps Autostart Window
5 DIG Software Load
If the GOC6 Operator Console is equipped with a VeRB Computer, this procedure can be expedited by performing Section 4.6 VeRB Software Load simultaneously with Section 4.5 DIG Software Load. After executing the following steps in Section 4.5, wait for 10 seconds and launch a second Terminal Window to execute steps in VeRB Software Load .
Procedure
- Open a Terminal Window, and log on at root:
- Type: {ctuser@hostname} su – ENTER.
- Type the root password and press ENTER.
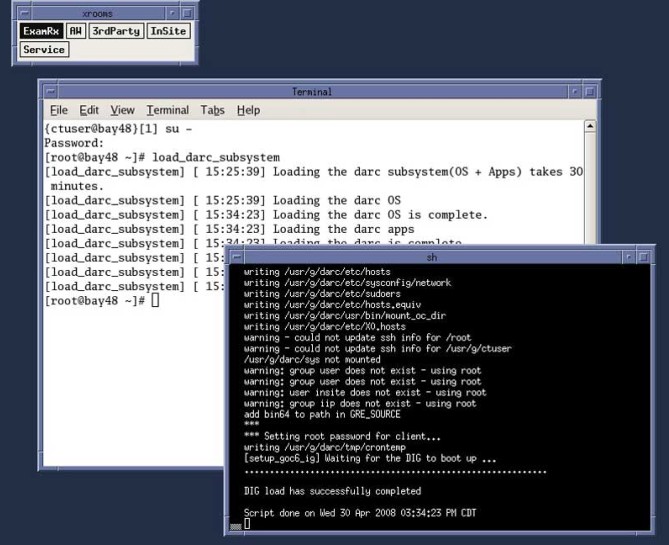
- In the Terminal Window Type: [root@hostname] load_darc_subsystemENTER.
A Shell Window will open and the DIG software will be configured and loaded
Figure 14. Terminal Window – DIG SW Load

- When finished the Shell window will display “DIG load
has successfully completed”. Close Shell window.
Figure 15. Shell Window – DIG SW Load
6 VeRB Software Load
This step can be skipped if the GOC6 Operator Console is not equipped with a VeRB Computer.
Procedure
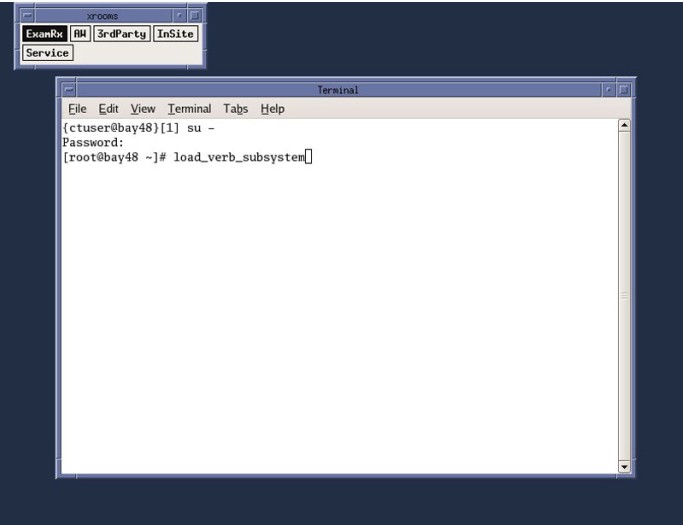
- Open a second Terminal Window, and log on as root:
- Type: {ctuser@hostname} su – ENTER.
- Type the root password and press ENTER.
- In the second Terminal Window
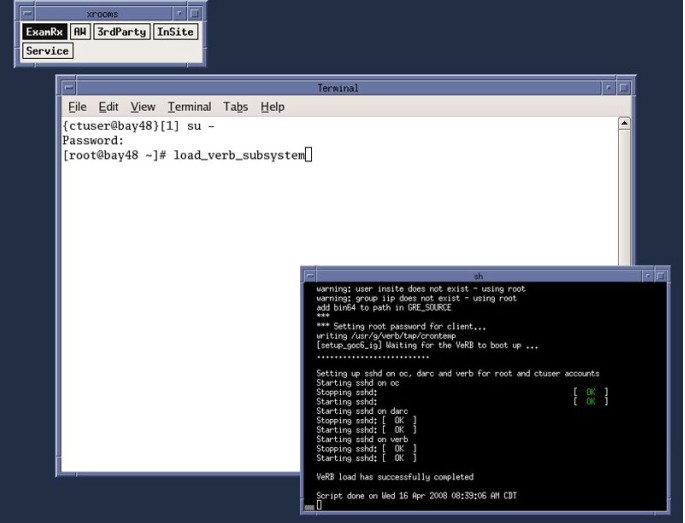
Type: [root@hostname] load_verb_subsystemENTER.
A Shell Window will open and the VeRB software will be configured and loaded.
Figure 16. Terminal Window – VeRB SW Load
- When finished the Shell window will display “VeRB load
has successfully completed”. Close VeRB Software Load Shell
and Terminal Windows. Leave first Terminal Window open for the following
steps:
Figure 17. Shell Window – VeRB SW Load
7 Check System Date and Time
Procedure
- In the remaining open Terminal Window:
Type: [root@hostname] setdateENTER.
- Set the appropriate date and time values as needed. Follow instructions on screen for setting date and time.
8 Restore System State
Procedure
- In the Terminal Window, Type: [root@hostname] reboot ENTER.
- Allow the System to come up fully into application Mode. If
the CT Applications fail to start automatically, open a Terminal Window.
Type: {ctuser@hostname} st ENTER.
- Insert the System State DVD-RAM Disk into the Peripheral Tower DVD-RAM drive.
- Wait until the DVD-RAM drive is ready (i.e., front panel DVD drive LED is no longer lit).
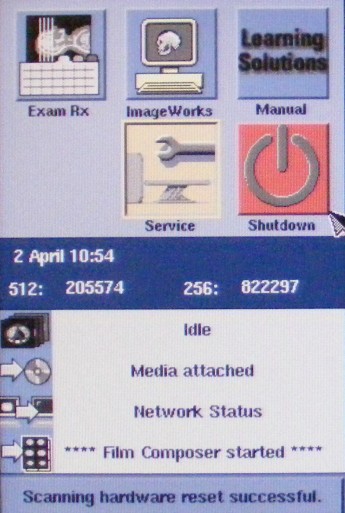
- Select: Service to access the Common
Service Desktop (CSD).
Figure 18. Desktop Service ICON
- Select: Utilities Tab.
Figure 19. Common Service Desktop – Utilities Tab
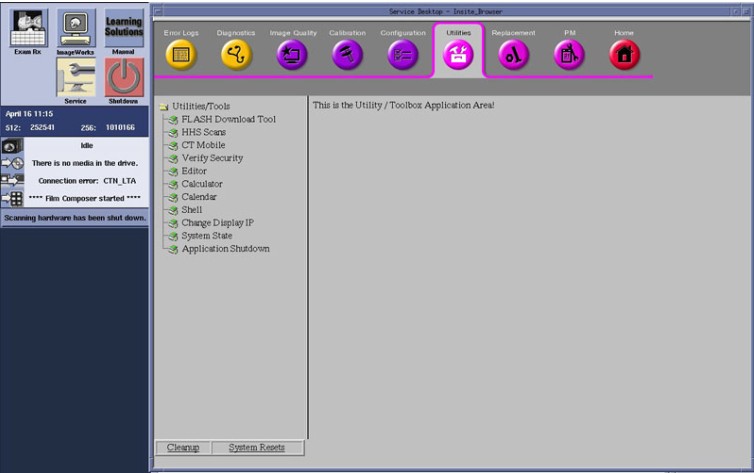
- Select: System State. The System State
Save/Restore screen appears.
Figure 20. System State – Save/Restore Utility Window
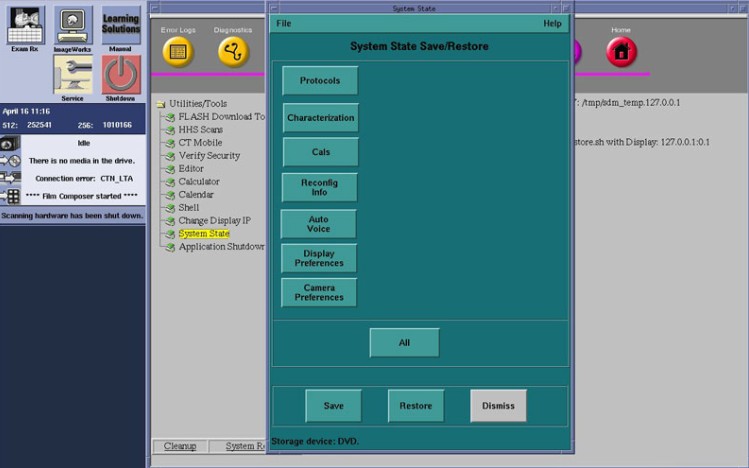
- Select All.
- Select Restore. The Restore System State box appears.
- Select Yes.
Figure 21. System State – Restore Confirmation Windows

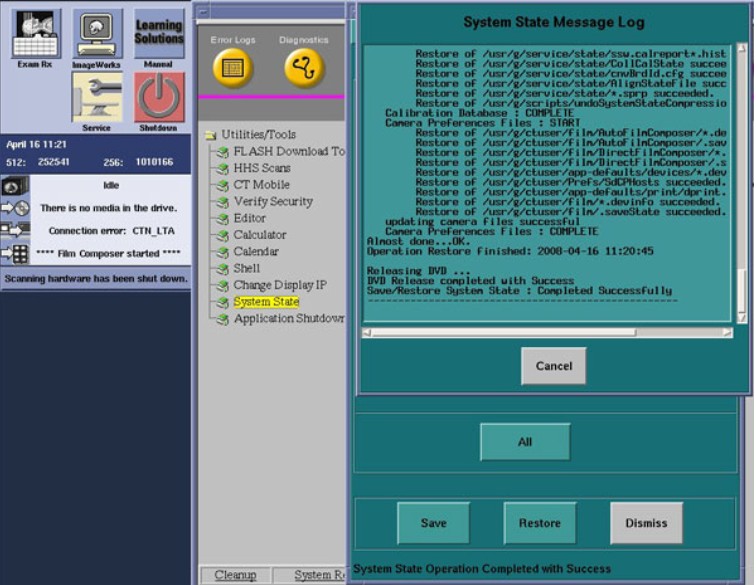
- Verify that the "Restore" of System State was successful.
A message at the end of the System State Message Log Window should
state: “Save/Restore System State: Completed Successfully.”
Figure 22. System State – Restore Completed Successfully Window
- When completed, select Cancel, then Dismiss.
- Select Shutdown icon on the Desktop and restart the system.
9 Software Options
NOTE: If performing a Load From Cold (LFC) for the first time and Software Option Licenses plus site-specific configuration has not been saved to System State, Software Options will need to be loaded manually.
-
See Install Software Options to load manually.
OR
-
Software Options licenses will be loaded during Restore System State. Proceed to next section.
10 Flash Download
Procedure
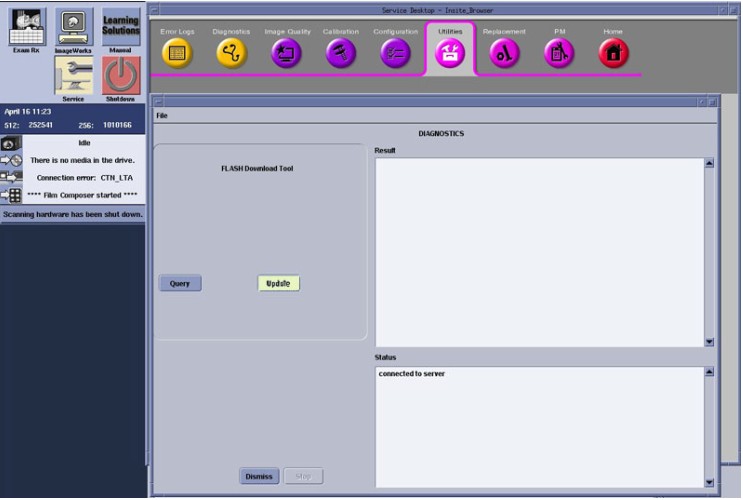
- On the Common Service Desktop – Utilities Tab, select Flash Download.
Figure 23. Common Service Desktop – Utilities Tab, Flash Download
 note:
note:The Flash Download takes 5 - 30 minutes, depending on which subsystems need firmware updating.
- When the Flash Download Window opens,
Select Update.
Figure 24. Flash Download Window
- Once the Gantry Hardware Flash Downloads successfully, select Dismiss.
- Close the Common Service Desktop.
- Reconnect the Hospital Network cable at the rear of the Operator Console (J26) that was disconnected at the beginning of the LFC.
- Select Shutdown icon on the Desktop and restart the system.
11 Final Save System State
Procedure
- Insert the System State DVD-RAM Disk into the Peripheral Tower DVD-RAM drive.
- Wait until the DVD-RAM drive is ready (i.e., front panel DVD drive LED is no longer lit).
- Select the Service icon to access the Common Service Desktop (CSD).
- Select: Utilities tab.
- Select: System State. The System State Save/Restore screen appears.
- Select All.
- Select Save. The Save System State box appears.
- Select Yes.
- Verify that Save System State was successful. A message at the end of the System State Message Log Window should state: “Save/Restore System State: Completed Successfully.”
- When complete, select Cancel, then Dismiss.
- After completing Save System State, store the DVD-RAM Disk in a safe place.
12 Finalization
Procedure
- After completing Save System State, store the DVD-RAM Disk in a safe place.
- Go to the Functional Checks Chapter > System Scanning Test document to confirm proper operation.
- Reinstall Console Front Cover.