|
1. Position the table with the four leveling pads over
the floor cutouts. Use the table centering and reference lines to
position the table to its approximate location relative to the gantry.
|
|
|
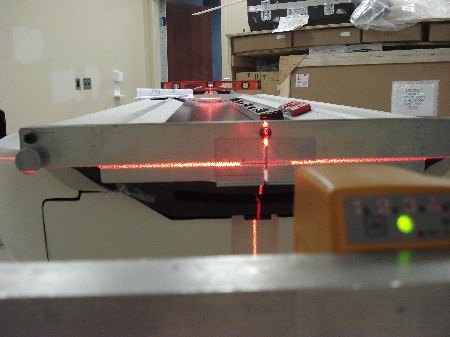
2. Level and align the table to the gantry by following
these steps:
|
-
With all weight on the dollies, align
the table to the laser and table reference line as close as possible.
-
Lower the table fully onto the leveling
pads.
-
Set the table height to 22 mm (cradle
centerline to horizontal laser beam) at the front/head of the table
by adjusting the two leveling pads closest to the gantry.
-
Level the table head-to-foot by adjusting
the two leveling pads furthest from the gantry. Level the table side-to-side.
-
Align the rear/foot end of the table
to the laser first. Shift the table weight slightly onto the dollies
if necessary.
-
Align the front/head end of the table
to the laser second. Shift the table weight slightly onto the dollies
if necessary.
-
Lower weight fully onto leveling pads.
-
Tighten the locking rings Otherwise,
when torqueing the mounting bolts, it will slip a little bit and throw
off the levelness.
-
Repeat rear and front alignment as
necessary.
|
|
3. Verify all of the following. Repeat the alignment
if any are not true.
-
The laser is centered on the tape mark
on the back wall.
-
The front and rear table jigs are aligned
to the laser left-to-right.
-
The table is level head-to-foot and
side-to-side.
-
The table base is on the table reference
line.
|
|
|
4. Perform cradle/table parallel check (this is an alternate
method to verify table alignment).
|
|
|
5. Remove shipping bolts from the table leveling pads.
|
|
6. Verify lock rings are tight at all mounting locations.
|

