- SIGNA™ Hero 3.0T Service Methods
- 5852800-8EN Revision 1.0
- 00000018WIA30C59110GYZ
- id_20042539.1
- Jul 13, 2021 3:56:30 PM
Setting up 48-channel head coil
Set up the 48-channel head coil for the Multi-Coil Quality Assurance (MCQA) check.
Prerequisites
Note: Coils do not ship with phantoms. Phantoms come in a unified phantom set with the system.
| Personnel requirements | |||
|---|---|---|---|
| Required persons | Preliminary requirements | Procedure | Finalization |
| 1 | - | 30 minutes | - |
| Tools and test equipment | |||
|---|---|---|---|
| Item | Quantity | Part number | Manufacturer |
| Large Cylindrical Unified Phantom (for 3.0T) | 1 | 5342679-2 | - |
| TL Unified Phantom (for 3.0T) | 1 | 5343347-2 | - |
| MCQA Phantom Positioner (shipped with 48-channel head coil) | 1 | 5756144 | - |
| Safety |
|---|
|
Before working in any GE Healthcare MR suite or performing any GE Healthcare service procedure, you must:
If you have any safety concerns at any time, do not begin work or immediately stop work and move to a safe location. Immediately contact your supervisor or site safety officer for instructions on how to proceed. |
Procedure
- Place the 48-channel head coil posterior unit on the table and connect the coil to port P2 on the table.
Figure 1. Placement of 48-channel head coil posterior unit 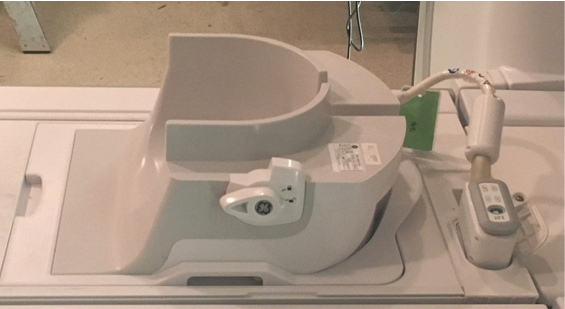
- Place the 48-channel head coil phantom positioner into the 48-channel head coil posterior unit, then place the large cylindrical unified phantom and TL unified phantom into the 48-channel head coil phantom positioner.
Figure 2. Placement of large cylindrical and TL unified phantoms 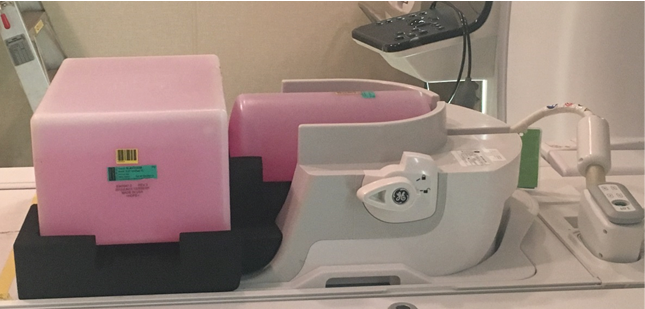
- Lock the anterior portion to the posterior portion by rotating the lock handle counterclockwise so that it points to the lock symbol.
Figure 3. Lock of 48-channel head coil anterior and posterior units 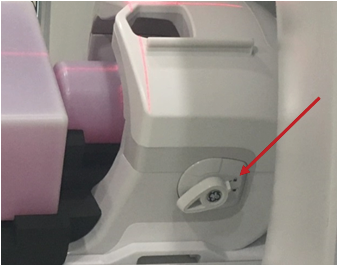
- Connect the anterior coil to port P1 on the table.Note: Do not allow cable to loop on itself or contact any other cables.
Figure 4. Connection of 48-channel head coil anterior and posterior units 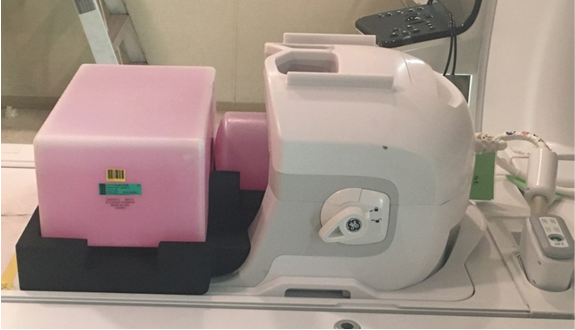
- Landmark the coil at the crosshair mark and press Advance to Scan.
Figure 5. Landmarking coil 
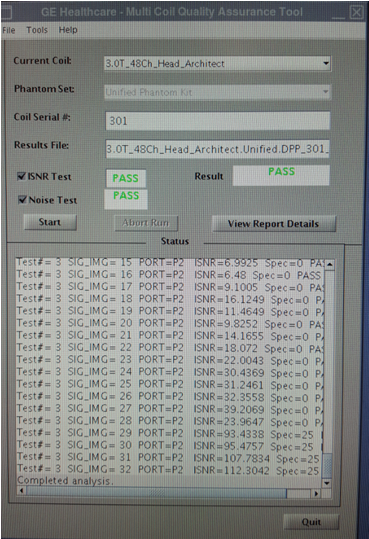
- Run the MCQA check.Note: Select 3.0T_48Ch_HEAD_by_GE (or equivalent platform option) in the Current Coil field.
Figure 6. MCQA tool menu