- SIGNA™ Hero 3.0T Service Methods
- 5852800-8EN Revision 1.0
- 00000018WIA30F50110GYZ
- id_20033053.1
- Oct 22, 2021 4:09:57 PM
Doing an ISC coolant warm up scan
Do this before starting RF Amp or UPM calibration if the ICC/CCU temperature is below 29°C. Repeat scan as needed.
Prerequisites
| Personnel requirements | |||
|---|---|---|---|
| Required persons | Preliminary requirements | Procedure | Finalization |
| 1 | - | 15 minutes | - |
| Tools and test equipment | |||
|---|---|---|---|
| Item | Quantity | Part number | Manufacturer |
| DQA III Phantom | 1 | 2321556 | - |
| DQA Phantom Positioner | 1 | 5554497 | - |
| Safety |
|---|
|
Before working in any GE Healthcare MR suite or performing any GE Healthcare service procedure, you must:
If you have any safety concerns at any time, do not begin work or immediately stop work and move to a safe location. Immediately contact your supervisor or site safety officer for instructions on how to proceed. |
About this task
| Notice | |
|---|---|
Note: Repeat the scan as needed until the temperature is within the required range.
Procedure
- Follow the steps below to place the DQA III phantom on the table.
Figure 1. Phantom positioning on table 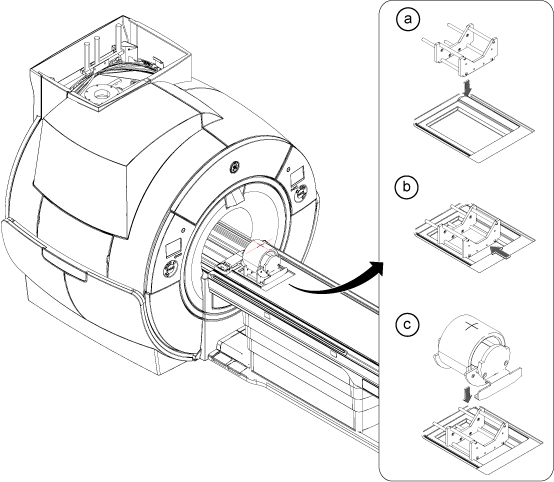 Note: This image is a representative example. Actual systems may vary.
- Place the phantom positioner onto the hollow for HNU. R/L direction will be fit to the hollow.
- Push the phantom positioner toward the magnet until the two bottom bars reach the end of the hollow.
- Place the phantom onto the positioner and verify it is level and not rotated.
- Click the New Worklist icon.
Figure 2. New worklist icon 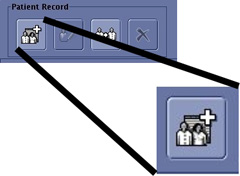
- Select geservice for Patient ID.
Figure 3. Entering a new worklist 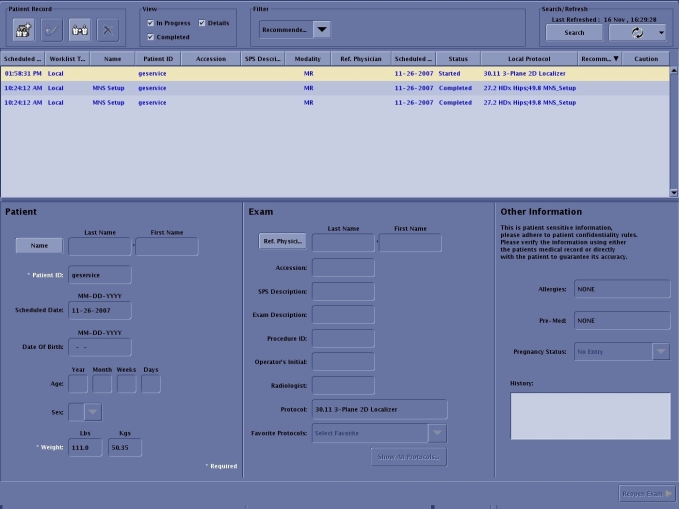
- Select the Protocol Library: GE.
Figure 4. Setting protocols 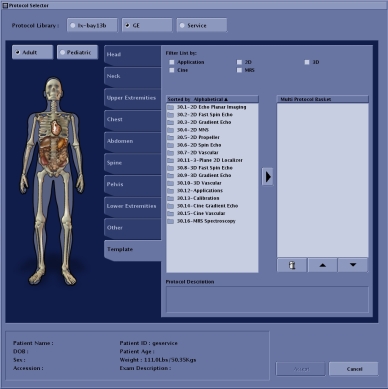
- Select 3 - Plane 2D Localizer and click the arrow to move the selection to the box on the right.
Figure 5. Protocol selected 
- Enter the following image parameters.
Figure 6. Image parameters 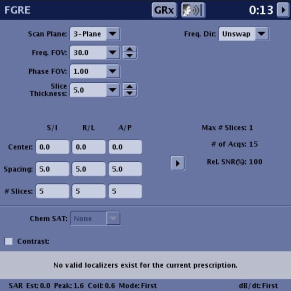
Option Description Frequency field of view (FOV) (Freq. FOV) 30.0 Phase FOV 1.00 Slice Thickness 5.0 - Select Body Coil.
Figure 7. Coil selection 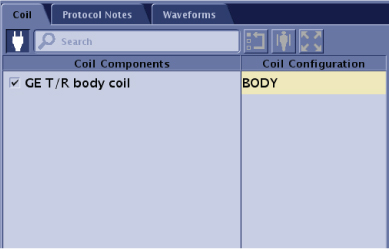
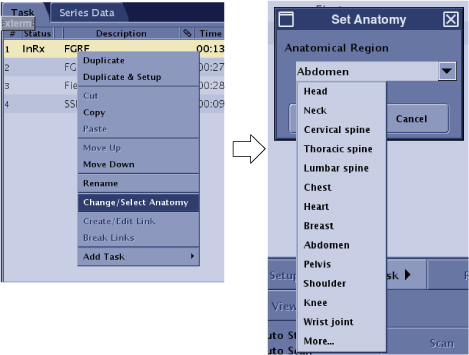
- Click Accept.
Figure 8. Anatomical region