- SIGNA™ Hero 3.0T Service Methods
- 5852800-8EN Revision 1.0
- 00000018WIA306E7E70GYZ
- id_20332341.11
- Jan 26, 2022 12:36:54 PM
Setting the patient table scan range configuration
Set the patient table scan range configuration.
Procedure
- Remove the hard stop support block from the 1-piece bridge. Loosen the three M6 screws securing the hard stop support block to the base plate and slide the hard stop support block out of the opening. Do not remove the base plate.
Figure 1. Removing the hard stop support block 
1 Base plate (do not remove) 2 M6 screws 3 Hard stop support block - Slowly move the cradle all the way into the bore.
CAUTION 
- Measure the distance from the service end of the cradle to the wall.
- If the distance is 1 inch (25 mm) or less, the hard stop support block should be installed/reinstalled. The scan range should be set for short.
- If the distance is greater than 1 inch (25 mm), the hard stop support block should not be installed. The scan range should be set for long.
Figure 2. Gap measurement 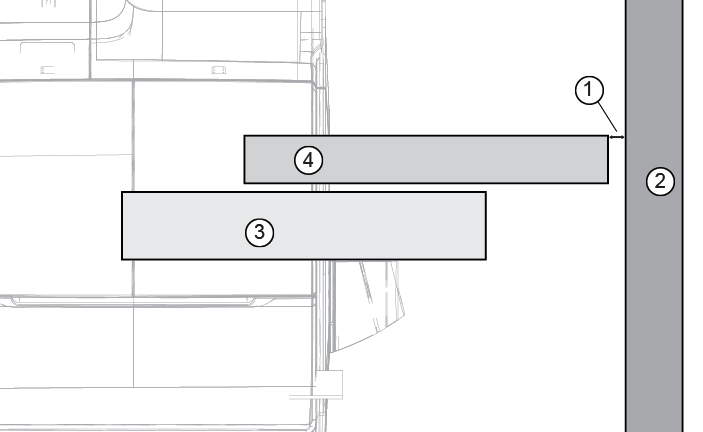
1 Gap 2 Scan room wall 3 1-piece bridge 4 Cradle (fully extended) - If needed, reinstall the hard stop support block. Slide the hard stop support block into place over the base plate and secure with three M6 screws. Note: For replacement procedures, if the hard stop support block is installed on the 1-piece bridge being replaced, it should not be removed from the replacement bridge.
Figure 3. Stop installation 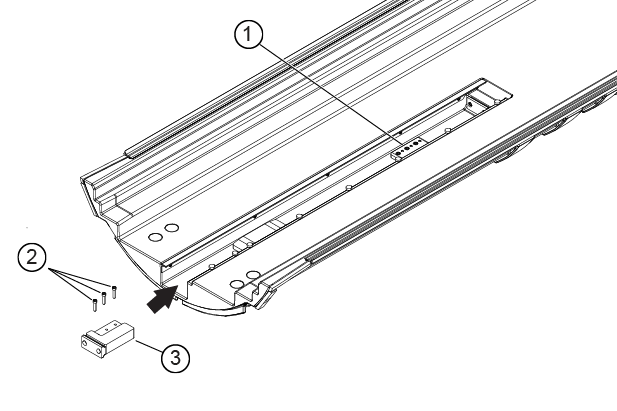
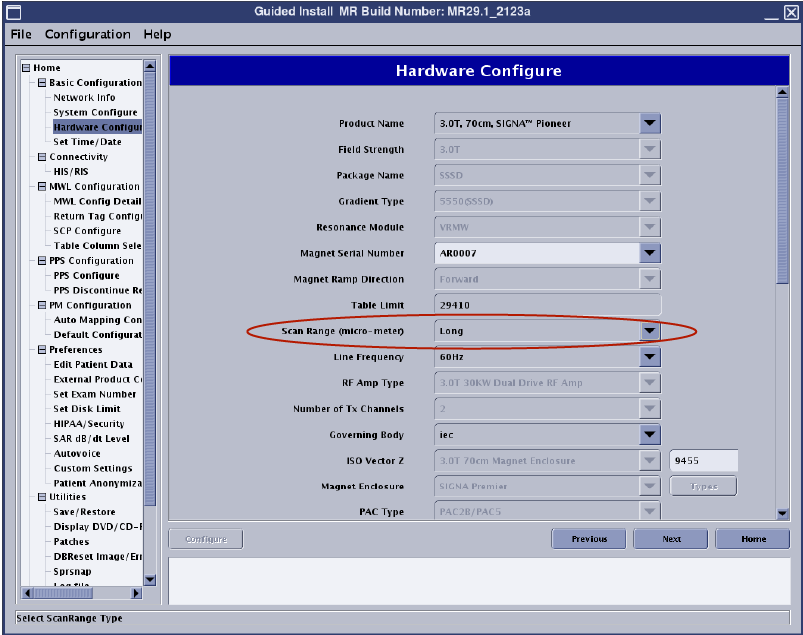
1 Base plate (do not remove) 2 M6 screws 3 Hard stop support block - Configure Guided Install scan range.
- Open .
- Set Product Name to SIGNA Hero.
- Set Scan Range value to Short or Long as determined in Step 3. Refer to Accessing Guided Install.
Note: Make sure the Product Name field is populated with the correct system.Figure 4. Setting the scan range