
- SIGNA™ Hero 3.0T Service Methods
- 5852800-8EN Revision 1.0
- 00000018WIA30021E20GYZ
- id_131061773.0
- Aug 29, 2019 1:39:51 AM
Bird 5000-XT setup for RF Head Calibration
Prerequisites
| Required persons | Preliminary requirements | Procedure | Finalization |
|---|---|---|---|
| 1 | Not Applicable | Part of parent procedure minutes | Not Applicable |
Setting up RF Coupler for Head Calibration
Procedure
- Insert the 5 kW element into the Forward sensor port, (blue
4300A374-6). Make sure the arrow on the element points in the direction
of the arrow (from Input to Output) on the sensor. Lock the element
in place using the locking tab on the sensor.
Figure 1. RF Coupler Setup for Head Mode 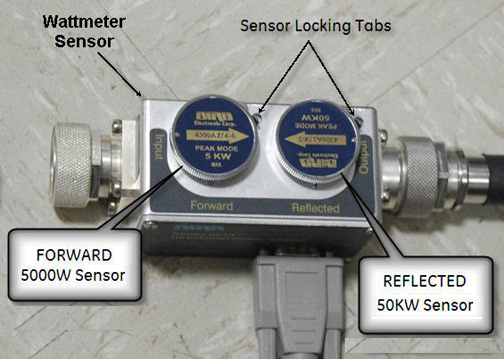
Wattmeter and Dummy Load Setup for Head Mode
Procedure
- Setup the hardware per following steps.
- Disconnect the head output cable from J3 on the front of the RF amplifier.
- Connect the input of the coupler to J3 on the RF amplifier.
Figure 2. Connection of RF Coupler to Head Output 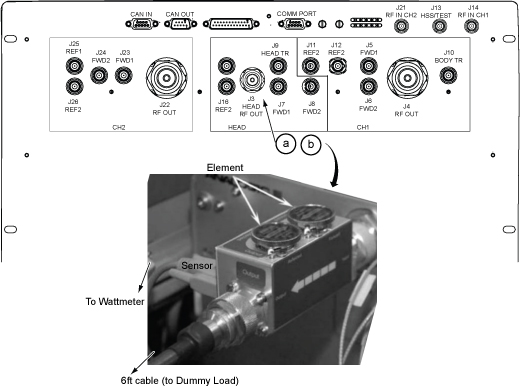
Connect the RF coupler output to the dummy load.Warning Figure 3. Complete Head Output Test Setup 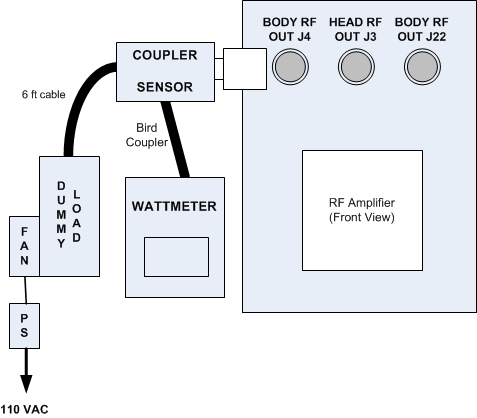
Setting up Bird 5000-XT Wattmeter to Measure Forward Head Maximum Power
About this task
This procedure is for the Bird 5000-XT.
Procedure
- Verify that the wattmeter display reads 43. If not, type 43 and then press OK.
Figure 4. Wattmeter Display Set to Read 
- Some kits require an offset to ensure accurate measurement.
Locate the Element Offset Factors card in the kit.
Find the offset for “3T DVMR Head Output”, “4500 W”.
Figure 5. Example Element Offset Factors Card 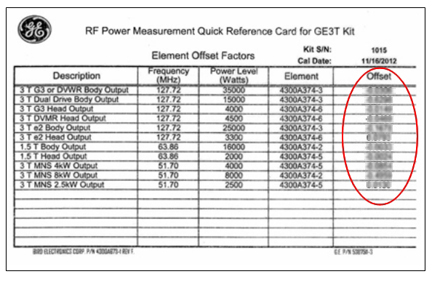
- Press ◄ to return to measurement mode.
Figure 6. Wattmeter Set to Display Peak Power and Watts 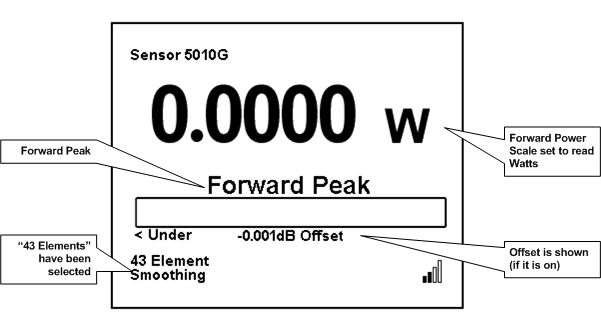
Finalization
Finalization
No finalization steps.