
- Discovery MR750 3.0T System Service Methods
- 5690009-2EN Revision 4
- 00000018WIA3022F970GYZ
- id_20329051.1
- Jul 1, 2021 4:58:28 PM
Replacing the 3.0T NV Latch
Prerequisites
| Personnel requirements | |||
|---|---|---|---|
| Required persons | Preliminary requirements | Procedure | Finalization |
| 1 | NA | 30 minutes | 30 minutes |
| Tools and test equipment | |||
|---|---|---|---|
| Item | Quantity | Part number | Manufacturer |
| Standard tool kit | 1 | - | - |
| Replacement parts | |||
|---|---|---|---|
| Item | Quantity | Part number | Manufacturer |
| 3.0T NV Coil Latch | 1 | 5868026 | - |
| Required conditions |
|---|
|
Note: Observe Anti-Static Precautions. Use a wrist strap and ESD workstation (ESD mat connected to ground and place to connect ESD wrist strap).
Note: Repairs to the coil should take place outside the scan room.
|
Procedure
- Locate the latch that needs replaced and remove the two screws.
Figure 1. Latch Screw Location 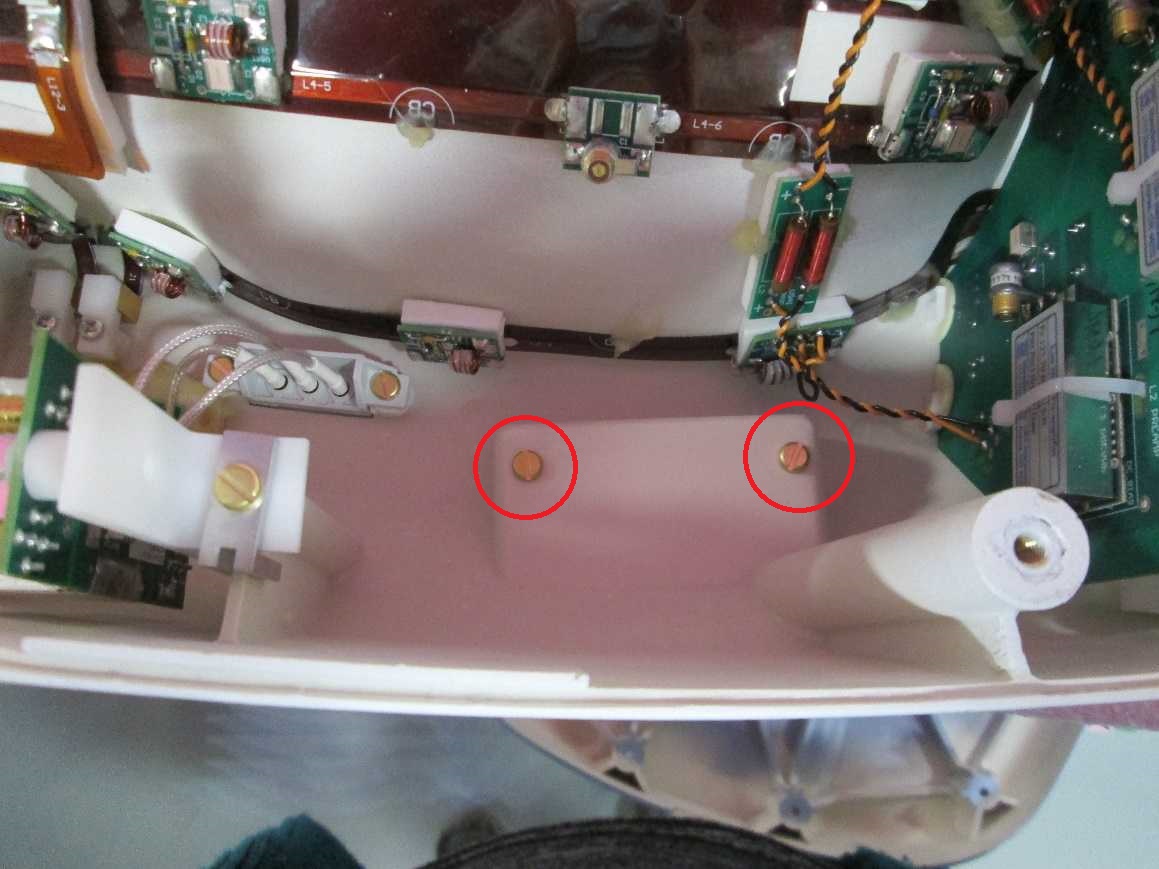
- Place new latch and screws on the coil.
Figure 2. Posterior latch view 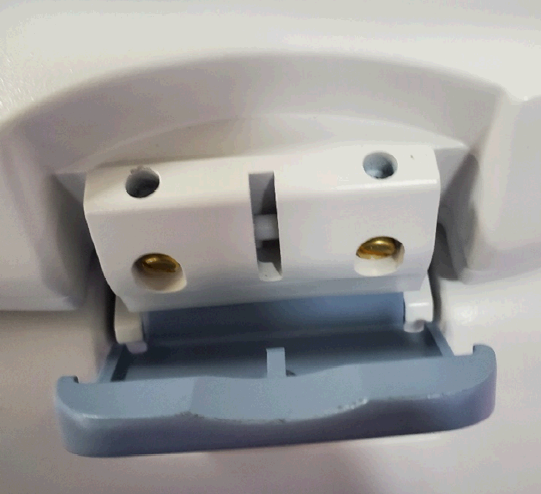
Finalization
Run the Multi-Coil Quality Assurance Tool to verify the NV Coil operates properly. See Doing the Multi-Coil Quality Assurance (MCQA) check.