- Discovery MR750 3.0T System Service Methods
- 5690009-2EN Revision 4
- 00000018WIA30488240GYZ
- id_20133929.6
- Nov 12, 2021 2:59:12 PM
Loading USB host system software
Prerequisites
| Personnel requirements | |||
|---|---|---|---|
| Required persons | Preliminary requirements | Procedure | Finalization |
| 1 | - | 90 minutes | 5 minutes |
| Tools and test equipment | |||
|---|---|---|---|
| Item | Quantity | Part number | Manufacturer |
| USB Software | 1 | - | - |
| Service Pack DVD (if applicable) | 1 | - | - |
| GE Equipment Maintenance Sticker | 1 | 5661793 | - |
| A-Class SSA Soft Key | 1 | - | - |
| Required conditions |
|---|
| System monitor turned on. |
| All USB devices (including service keys) are removed. |
| Any non-OS media is removed. |
| System monitor turned on. |
| Safety |
|---|
|
Before working in any GE Healthcare MR suite or performing any GE Healthcare service procedure, you must:
If you have any safety concerns at any time, do not begin work or immediately stop work and move to a safe location. Immediately contact your supervisor or site safety officer for instructions on how to proceed. |
Procedure
- Insert the USB software device required for this procedure.Note: A USB-3 port is recommended. The port has a blue-colored plug or is labeled on the box.
Figure 1. USB-3 port symbol 
- Setup the correct Firmware on the host PC:
- Press the Power button on the host PC to boot the system.Note: Beginning at DV29.0 the Dell T5820 is the only PC available.
- Press F12 to enter the Boot menu.
- Make sure the Boot mode is set to UEFI. If the Boot mode is set to Legacy, you must change it to UEFI mode. See Changing Boot mode.
Figure 2. UEFI Boot menu 
- Press the Power button on the host PC to boot the system.
- Use the up and down arrows on the keyboard to select the Samsung Flash Drive 1100.
Figure 3. UEFI Boot menu 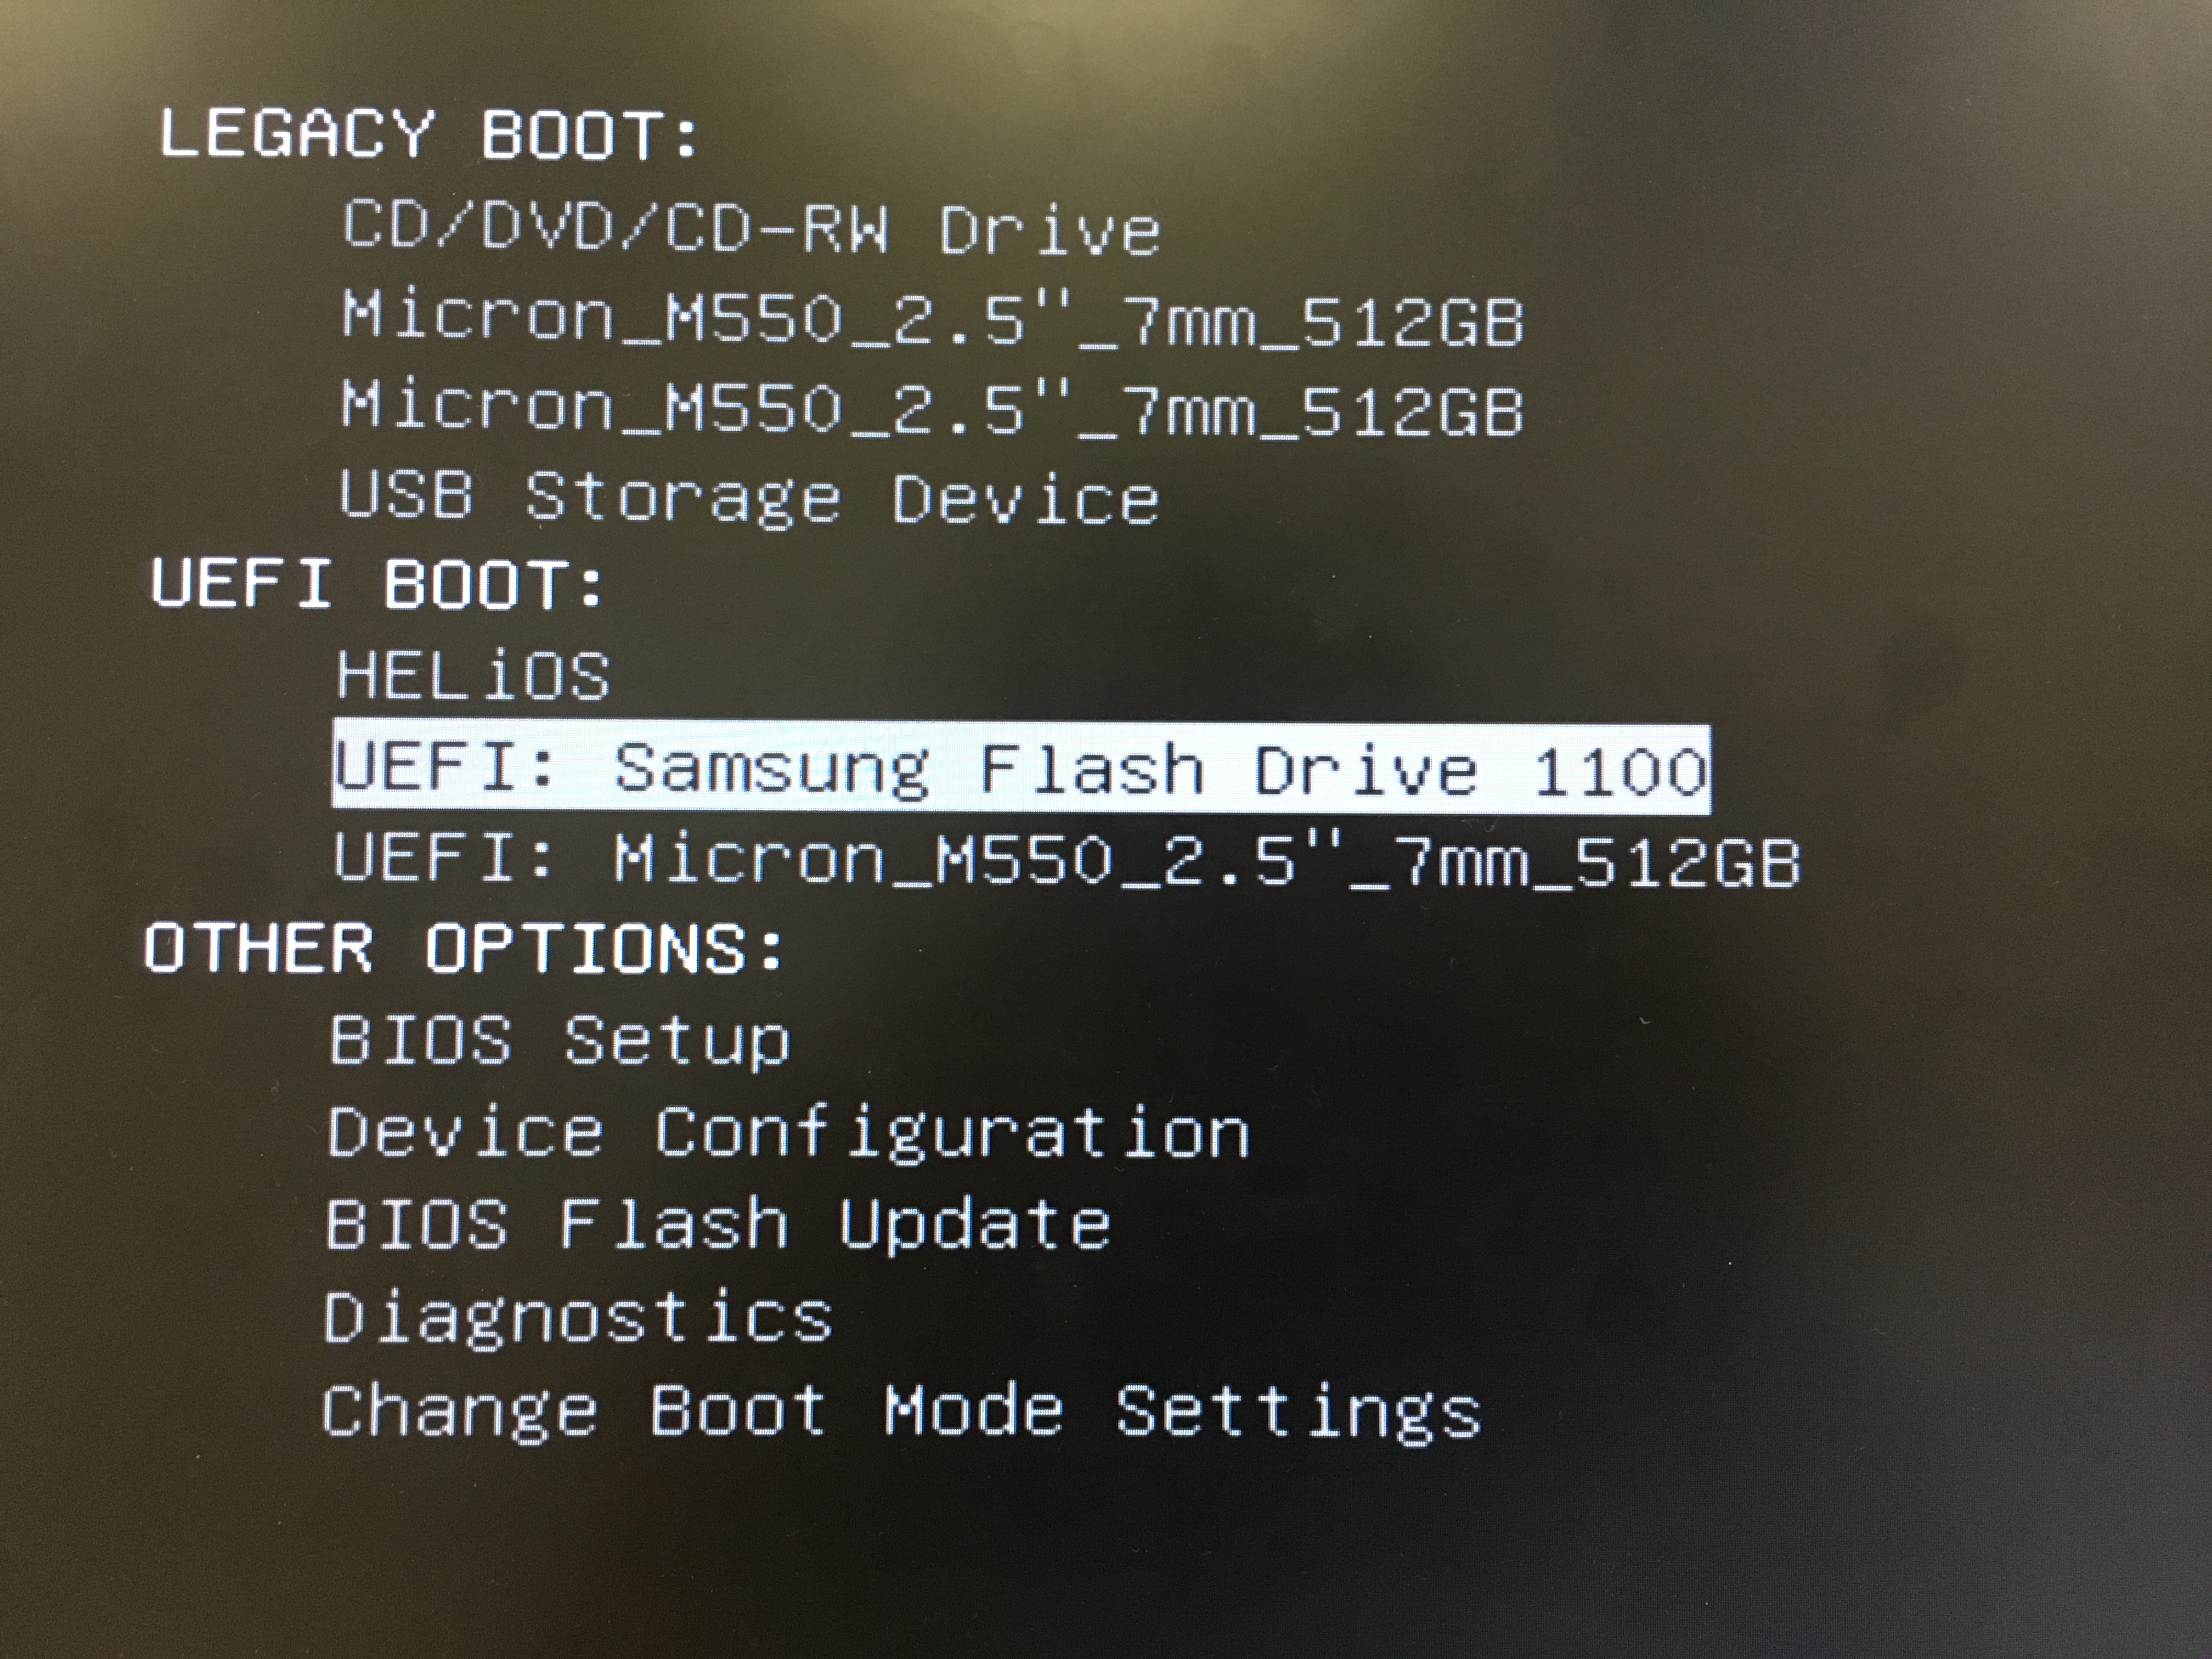
- Select the option displayed in the format [apps]<Apps Software revision> and press Enter.
Figure 4. Sample of software revision to install 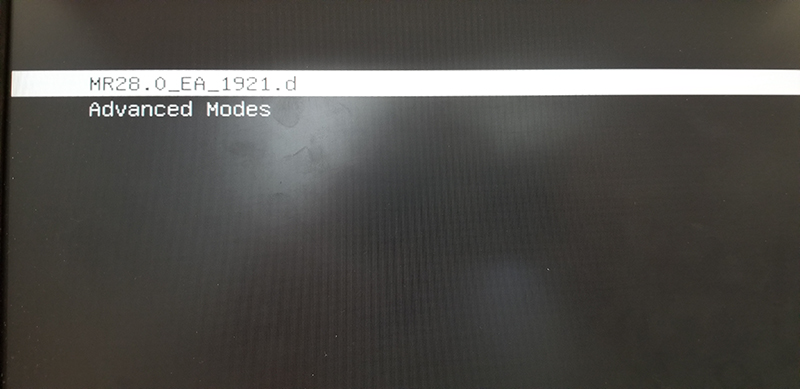
- OS installation:Note: At times during the software load, a blank (frozen) screen may appear due to a known Red Hat bug (bug ID 1432436). If this occurs, you must restart the software load from the beginning. Press Ctrl + Alt + F2 to access the Command prompt screen and restart the software load.
Figure 5. Blank screen due to Red Hat bug 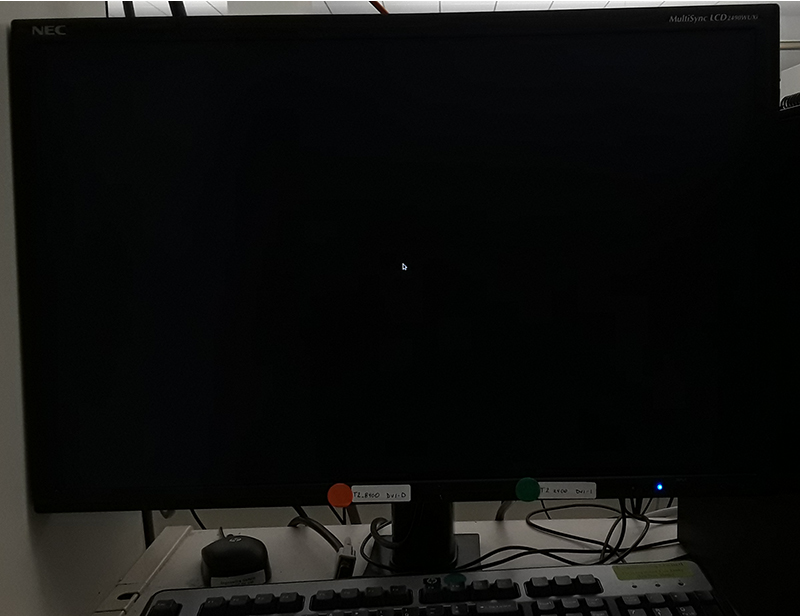
- At the start of OS installation, automated OS configuration takes place and then OS install starts within a few minutes.
Figure 6. OS installation - start 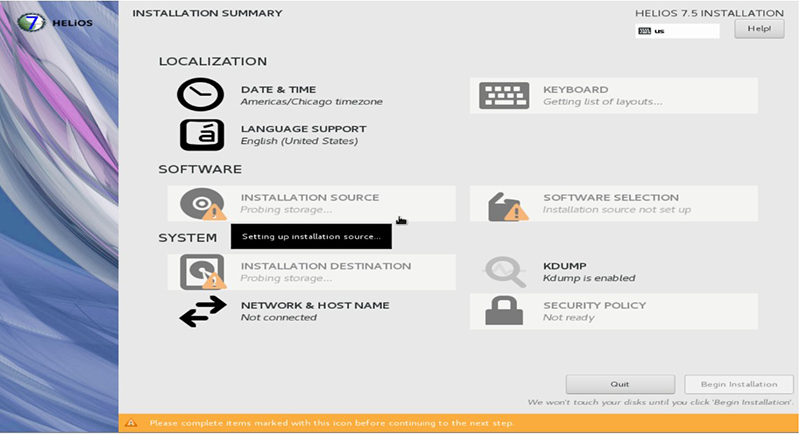
- OS installation continues to completion.
Figure 7. OS installation - completion 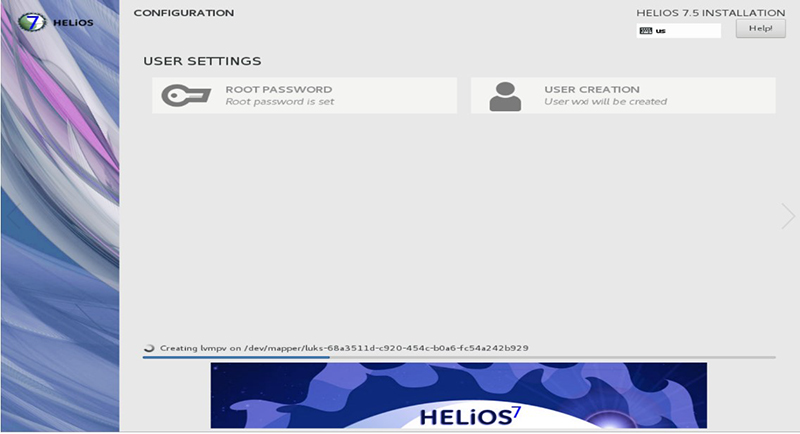
- At the start of OS installation, automated OS configuration takes place and then OS install starts within a few minutes.
- If the OS install fails, remove and re-insert the USB software device, and try the install again.
- If the OS install is successful, the system automatically reboots.
- The applications software load automatically starts.
Figure 8. Applications software load - start 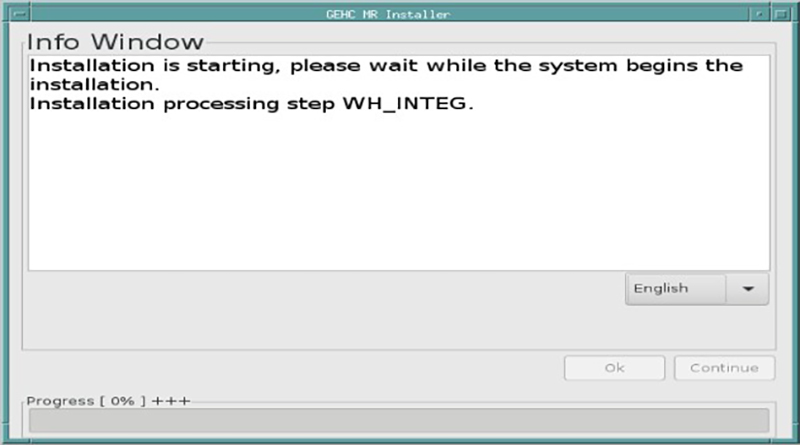
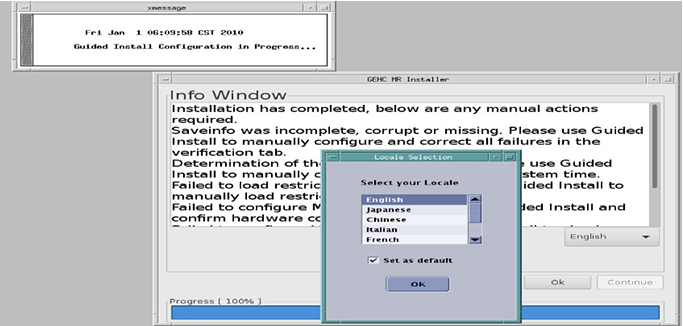
- The language menu can be used to select a different language
- If the applications software install fails for any reason, remove and re-insert the USB software device, and try the install again.Note: For a new installation, Guided Install is not yet configured correctly and the ICN load will fail. Please configure ICN manually after completion of the automated software load and Guided Install configuration. In addition, the USB installer provides a default MGD subnet IP address 3.87.81, which can be used for all sites. If ICN detection fails with this subnet, see Resetting the Image Compute Node (ICN) BMC interface and retry the ICN configuration.
Verify the MGD subnet IP is not conflicting with the local site network. If the subnet IP is conflicting, see Changing the MGD/TPS subnet address.
Note: The Installer Info window appears along with the Locale Selection window.Note: The Info Window lists all the software load actions that have either not been attempted or have failed.Figure 9. Installer info and locale selection