• Discovery MR750 3.0T System Service Methods
  • 5690009-2EN Revision 4
  • Object ID: 00000018WIA30EA6E20GYZ
  • Topic ID: id_13106171 Version: 4.3
  • Date: Oct 11, 2021 6:13:21 PM

Echo Planar Test (EPT)

Prerequisites

Table 1. Personnel requirements
Required personsPreliminary requirementsProcedureFinalization
1Not Applicable2 hours5 minutes
Table 2. Tools and test equipment
ItemQuantityEffectivityPart numberManufacturer
100 mm Sphere Phantom for 3.0T1-

2360034

-
EPI Foam Positioner, Body1-

2170481

-
Table 3. Safety

About this task

The Echo Planar Test (EPT) combines the functionality of the B0 Dither Calibration and Group Delay Calibration into a single tool with a simple user interface. The output is suitable for remote support access, trending, and automatic checking of results against acceptance limits. EPT automatically updates the Echo Planar Image (EPI) calibration files.

Topic ID: id_SL3888111-1046702

Setup

About this task

Procedure

  1. Landmark on the center line of the head coil.
    Note:

    1.5T phantoms are light green.

    3.0T phantoms are pink.

  2. Place an EPI Grafidy foam positioner and a 100 mm sphere in the positioner. Move the table into the bore to 1100 mm from landmark. Slide the Grafidy base plate so the center of the 100 mm sphere is at the axial alignment light, and then press the MOVE TO SCAN button.
    Figure 1. Positioning phantom
Topic ID: id_SL3888117-1046702

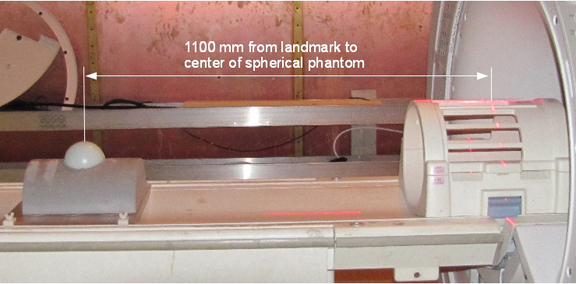
Run EPT calibration tool

Procedure

  1. Start the Echo Planar Test calibration tool:
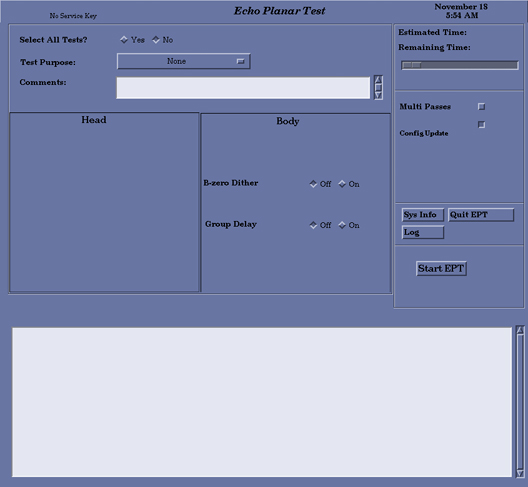
    1. (For non-proprietary service tools) From the Common Service Desktop, select Calibration > Echo Planar Test. Select Click here to start this tool.

      The Echo Planar Test window appears with partial test selection.

      Figure 2. Echo planar test window (without service key)
  2. For calibration, set the Select All Tests? option to Yes.

    The default is No.

    For troubleshooting, select individual tests as desired.

  3. Two lines of Comments: can be entered, if desired. If no comments are entered, the text NO COMMENT is entered into the results file.
  4. Select a Test Purpose from the menu.
  5. For normal operation, the options buttons on the screen are set correctly by default. You can change the options to suit the tests you need to run.
    1. To perform more than one pass of the tests, select Multi Passes and enter a number in the text box.
    2. One or more of the selected tests can automatically update the configuration files with new calibration data if the new data is within specification. Select Config Update before starting EPT.
  6. Select Start EPT. Running all the tests takes about 30 minutes and thoroughly tests the system’s EPI performance.

    While EPT is running, each test is displayed in the message window showing the amount of time the test requires to run.

    Note: For 3.0T systems, B0 Dither is no longer run. Zeros are placed in the B0 Dither calibration files.
Topic ID: id_SL766521-1046702

Test Termination Procedure

Procedure

  1. When the tests are complete, one of the following messages appears:
    • Your tests completed successfully.
    • A serious system problem has been detected. This problem IS expected to impact image quality.
    • EPT was unable to determine PASS/FAIL status of the tests.
  2. If the tests completed successfully, proceed to Finalization below.
  3. If the tests fail, open the Report Manager to view the test results and identify the failing tests.
  4. Select Quit EPT and confirm.
    Note:

    If the EPT process is not shut down in an orderly manner, the service protocol directions may need to be reset. Open a C Shell (click C Shell in the Service Desktop Manager) and enter the following:

    Note: The Shell window can only be launched when the EA3 user is included in the authorized EA3 group. Users not in this EA3 group will not have access to launch the Shell window. If you are not logged on as the proper logon user, log out and then log back on as the correct EA3 user with the authorized permissions.

    /usr/g/bin/ept Enter

    resetept Enter

Topic ID: id_14951956

Finalization

Procedure

  1. Continue with the next calibrations or do a SaveInfo.
  2. Reset TPS to bring the system back into a known state.
  3. Do a Doing a check scan to verify that the scanner is working properly before customer turnover.