- Discovery MR750 3.0T System Service Methods
- 5690009-2EN Revision 4
- 00000018WIA305D7650GYZ
- id_20247231.28
- Jul 14, 2021 11:00:03 PM
Configuring DICOM image transfers to a network node
Configure DICOM image transfers to a network node and check for successful DICOM network node configuration.
Prerequisites
| Personnel requirements | |||
|---|---|---|---|
| Required persons | Preliminary requirements | Procedure | Finalization |
| 1 | - | 10 minutes | - |
About this task
Important: When secure DICOM push is configured in one-way TLS/SSL authentication, DICOM ping will only succeed from MR to the networked node and will fail from the networked node to MR. This is expected because the networked node does not have a trusted certificate from the MR scanner. DICOM ping will succeed both ways in secure mode only when two-way TLS/SSL authentication is configured.
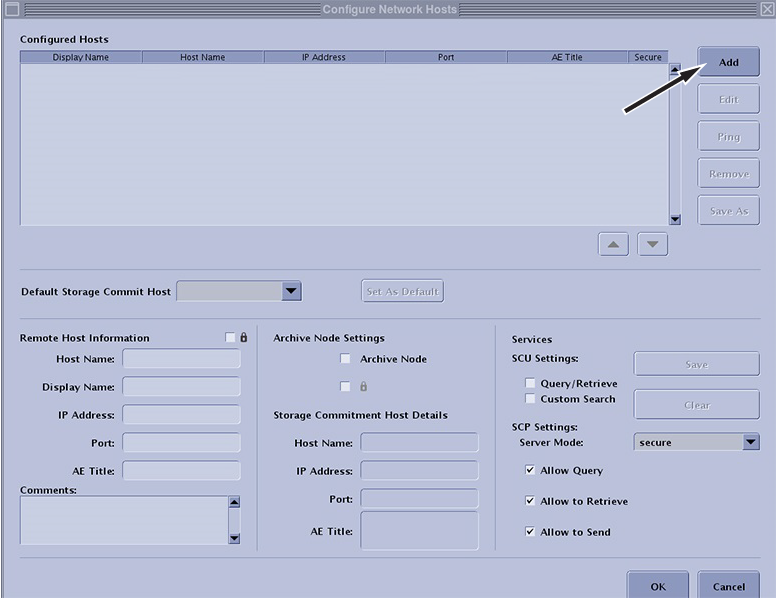
Procedure
- In the Configure Network Hosts window, click Add.
Figure 1. Add a remote host