
- Discovery MR750 3.0T System Service Methods
- 5690009-2EN Revision 4
- 00000018WIA301BED20GYZ
- id_131057813.0
- Aug 29, 2019 1:56:11 AM
3.0T HD Neurovascular Array Setup for MCQA or SNR Test
Prerequisites
| Required persons | Preliminary requirements | Procedure | Finalization |
|---|---|---|---|
| 1 | - | 15 minutes | - |
| Item | Quantity | Effectivity | Part number | Manufacturer |
|---|---|---|---|---|
| Phantom Kit (contains PN 2413435 and 2413436) | 1 | Legacy phantom set |
2414389 | - |
| Phantom Positioner | 1 | Legacy phantom set |
2414812 | - |
| 3T Head TLT Spherical Phantom | 1 | Unified phantom set |
2359877 | - |
| 3T 10 cm Spherical Phantom | 1 | Unified phantom set |
2360034 | - |
| Large Cylindrical Unified Phantom (Si Oil) | 1 | Unified phantom set |
5342679-2 | - |
| Phantom Positioner, NV | 1 | Unified phantom set |
5344806 | - |
| Condition | Reference | Effectivity |
|---|---|---|
|
The following coil configuration names must be installed to run this tool: HDNV Array, HDNV Head, HDNV Spectro, and HDNV UpChest. | - | - |
About this task
Follow this process to set up for the automated MCQA or SNR test using the 3.0T HD Neurovascular (NV) Array by GE/USAI (M1385AT).
Note:
Coils do not ship with phantoms. Phantoms come in a unified phantom set with the MR system.
Legacy Phantom Setup
Procedure
- Locate and release the button on the chest piece, and slide
the chest piece up into the coil. Move the chest piece down onto the
phantom using the handle.
Figure 1. Location of Release Button and Chest Piece 
- Secure the phantom in the coil with the Velcro straps.
Figure 2. Securing Phantom 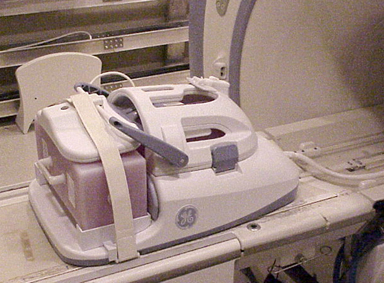
- Landmark the coil using the positioning mark.
Figure 3. Landmarking Coil 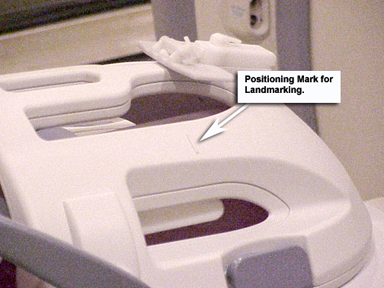
Unified Phantom Setup
Procedure
- Place the base of the NV array coil on the patient table and
latch it to the table.
Figure 4. Coil Placement 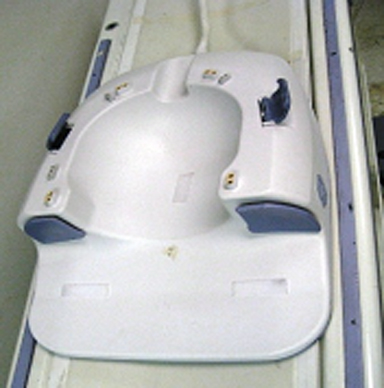
- Place the phantom positioner in the coil.
Figure 5. Positioner Placed in Coil 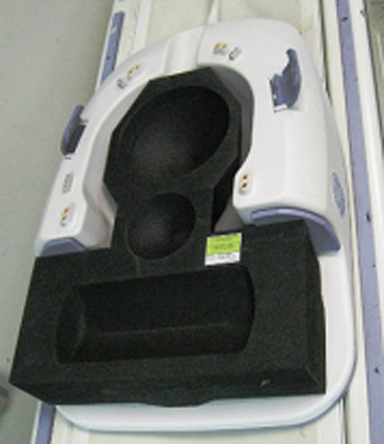
- Place the phantoms in the positioner.
Figure 6. Phantoms Placed in Positioner 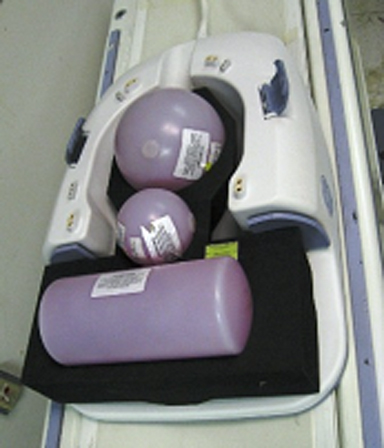
- Carefully align the connector pins on the base of the coil with
the top part of the coil, and latch both the coil sections into place.
The scanner will not operate if the coil sections are not latched
correctly.
Figure 7. Coil Sections Latched 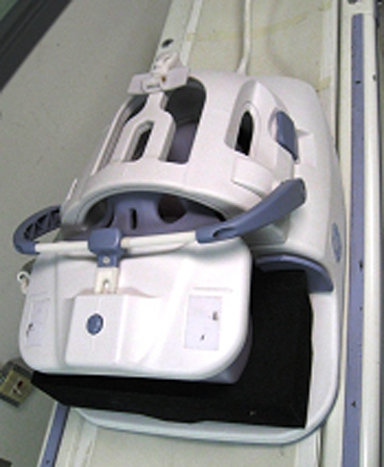
- Connect the coil to the appropriate port of the system LPCA.
Landmark the coil at the markings. Advance to scan.
Figure 8. Landmark Coil 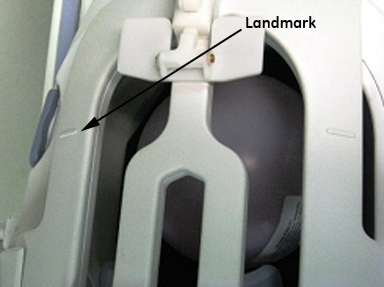
Finalization
Finalization
No finalization steps.