Signa Table Arm Board Bumper Field Repair/Replacement Procedure
Prerequisites
Overview
The creation of this procedure is the result of work done by Everest Castillo, Thomas Hulscher, Rick Neckerman, Kevin O’Connell, Robert Ralko, members of FIELD SERVICE SIX SIGMA GREEN BELT TEAM. (* Prices are approximant and given in USA dollars.)
Procedure
- Remove table from magnetic field to a ventilated location.
- Remove partially attached bumper(s) (if present).
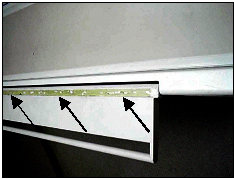
- Clean arm board bumper channel(s) completely with alcohol and/or
adhesive remover, putty knife and towel/rag. See Figure 1.
Figure 1. ARM BOARD BUMPER CHANNEL
- Clean old glue off bumper(s) with alcohol or adhesive remover/clean. Or if installing new bumpers, clean new bumper(s) with alcohol.
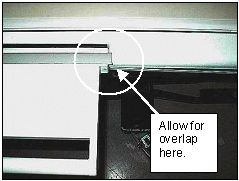
- Apply adhesive to bumper channel and bumper surface per manufacturer
directions (use gloves and brush). Install bumper in channel with
some over lap at each end. Apply pressure to entire bumper to insure
good adhesion. Repeat on second bumper if necessary. See Figure 2.
Figure 2. BUMPER INSTALLED WITH OVERLAP
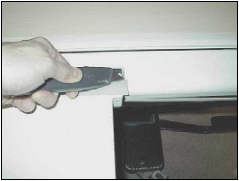
- Cut bumper ends at ~45 degree angles to match arm board edges.
This will prevent catching on sheets, patients etc. See Figure 3.
Figure 3. CUT BUMPER ENDS
- Reduce surface friction by applying the rubber protector (Armor All if available) to bumper surface(s).
- Return table to customer for use.
1 Finalization
Procedure
- Verify that Arm Board moves safely.
- Verify that all of the parts and the screws are installed.
- Verify that there is no wound or dirt on the Table, Cradle, Pad, and Patient Strap.