Printer Configuration for Flexi Filmer
Prerequisites
The DICOM/Post Script Print feature allows configuration of the filming function to accommodate filming to paper or film printer that is networked to the workstation through a DICOM/Post Script printer.
1 Go through Printer Configuration
Procedure
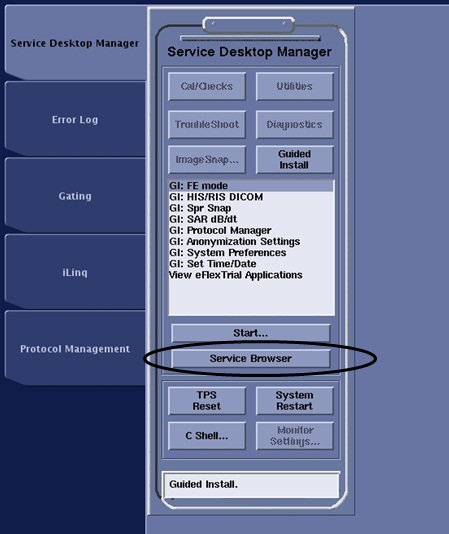
- Select Service Browser from the service desktop.
Figure 1. Service Desktop Manager
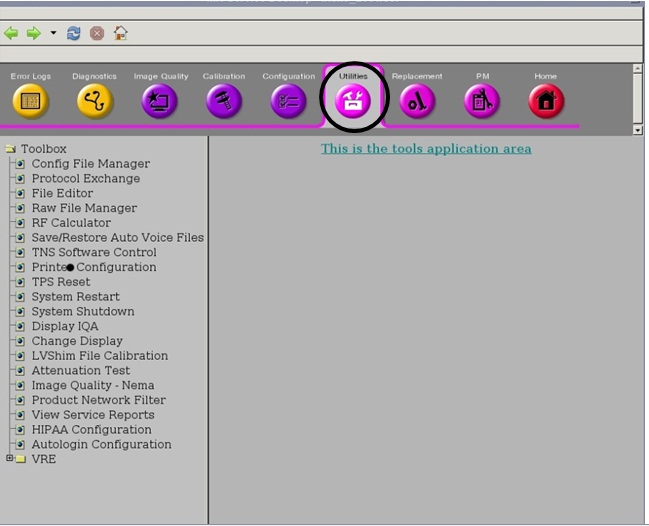
- From Service Browser Select Utilities Tab.
Figure 2. Utilities Tab
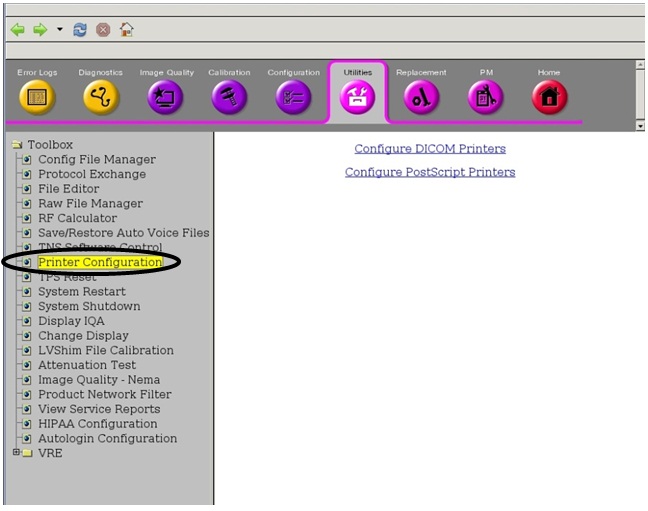
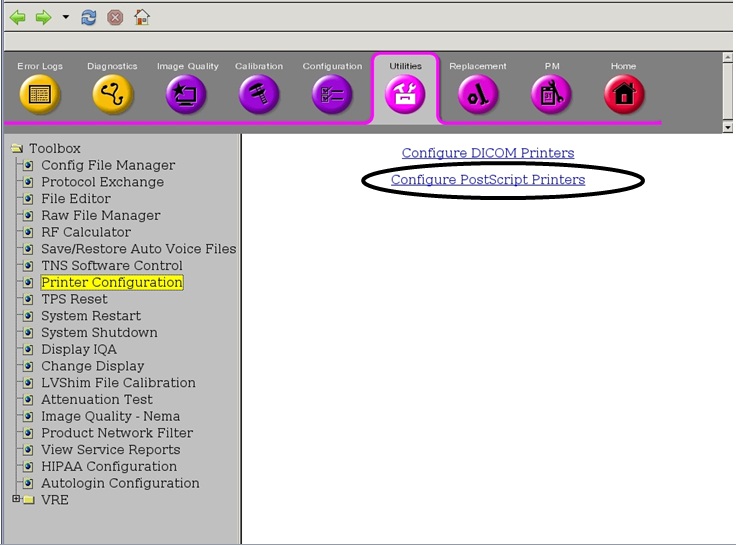
- Select Printer Configuration from the options available.
Figure 3. Configuration Printer
2 DICOM Printer Addition
Procedure
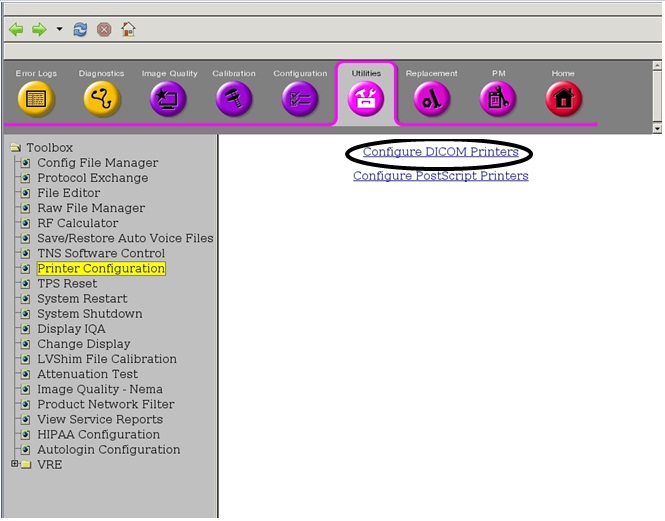
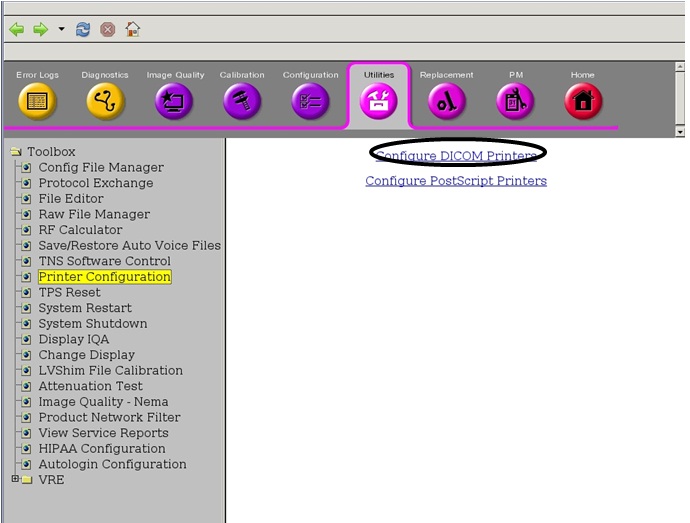
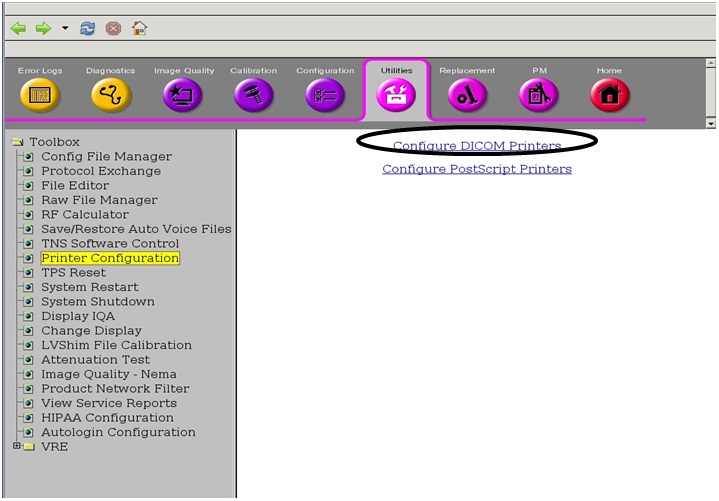
- Select Configure DICOM Printers.
Figure 4. Configure DICOM Printers
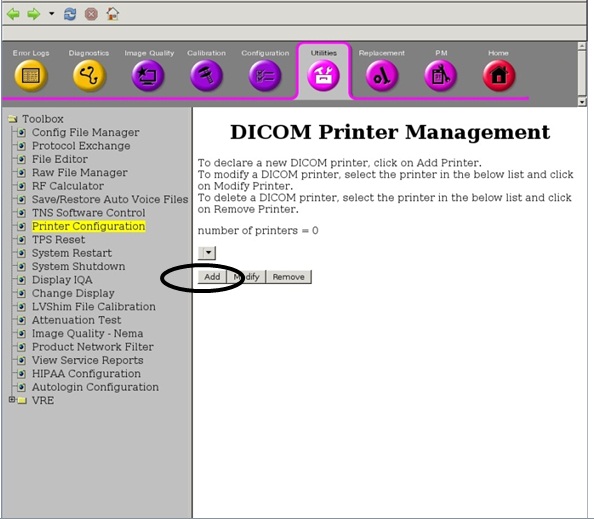
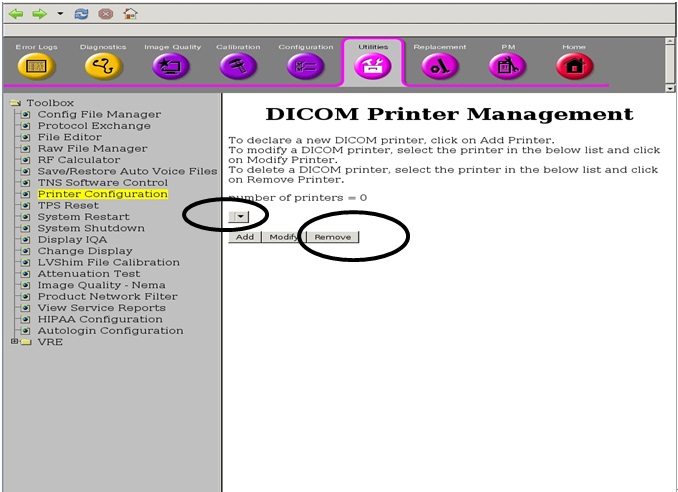
- Select Add button.
Figure 5. Add button
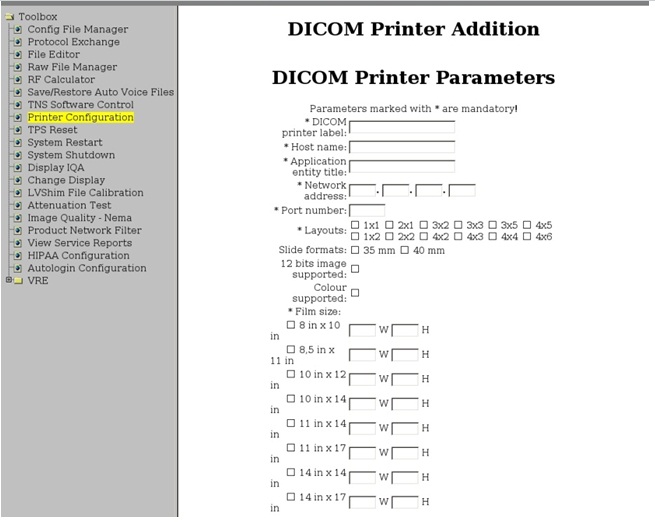
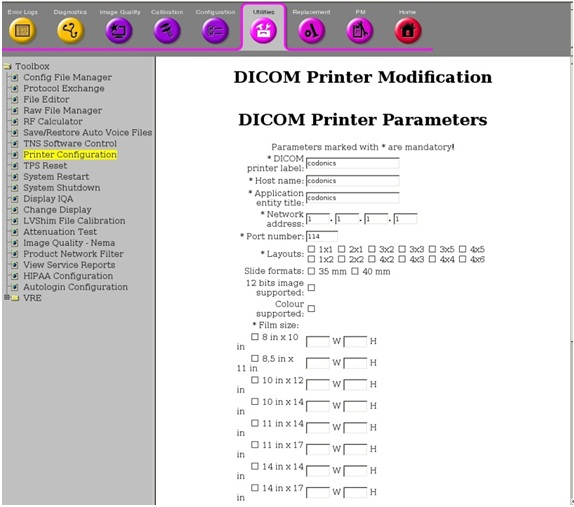
- Configure the Printer.
Figure 6. Configure the Printer
-
Layouts: For a printer to be configured Layouts specify the different layouts a user can use while printing through that printer. For eg. for a printer dummyFlexiFilmer if the layout specified is 1x1 and 2x2 then the user can use only these two layouts when trying to print any film using the printer dummyFlexiFilmer through FlexiFilmer.
How to validate the chosen layouts: Please note this is only applicable when the user has selected the Grid layout mode in FlexiFilmer. Trying to use any layout other than the ones specified during configuration for a printer, printing will not be allowed and the user will be shown an error message.
-
Film size: For a printer to be configured Film size specifies the size of the film as supported by the printer. The film size as seen in the FlexiFilmer UI will change according to the selected film size for the selected printer.
How to validate the chosen film size: The user can specify one or more film sizes supported by the printer and can choose one of them while actual printing using the FlexiFilmer UI. The same is explained through the screen shots attached with the mail. If there is only one film size specified then the same will be displayed (and locked for change) in the FlexiFilmer UI.
-
3 DICOM Printer Configuration Modifications
Procedure
- Select Configure DICOM Printers.
Figure 7. Configure DICOM Printers
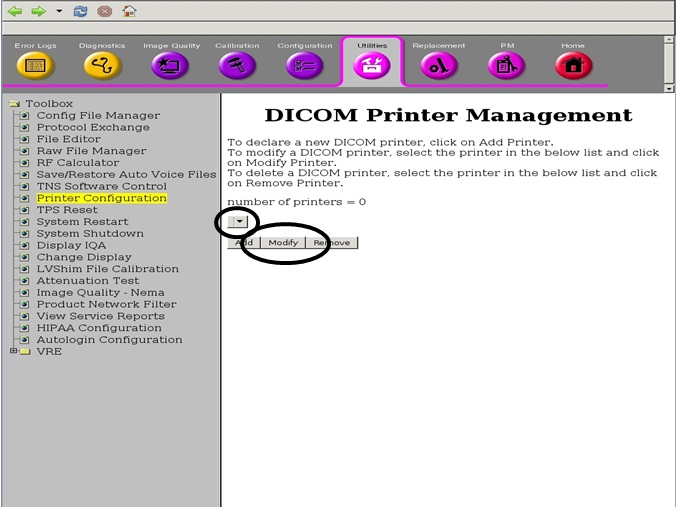
- Select the Printer Already configured.
- Select Modify Button.
Figure 8. Modify Button
- Modify the Printer Configurations.
Figure 9. Modify the Printer Configurations
4 DICOM Printer Removal
Procedure
- Select Configure DICOM Printers.
Figure 10. Configure DICOM Printers
- Select the Printer already configured.
- Select the remove Button.
Figure 11. Remove Button
5 Post Script Printer Addition
Procedure
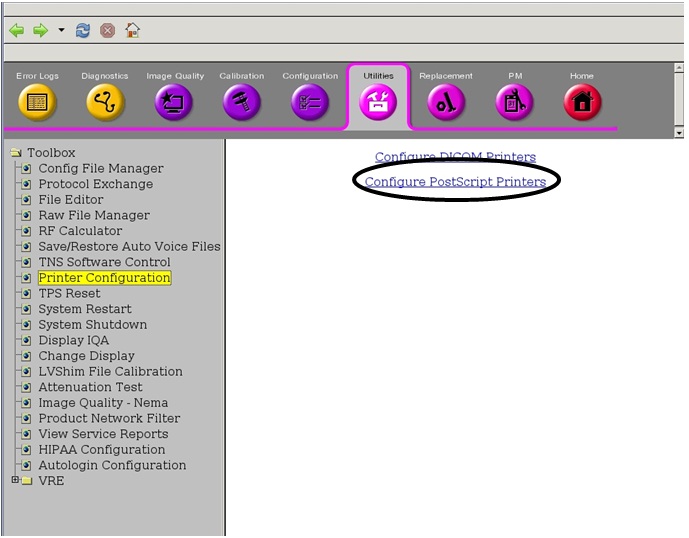
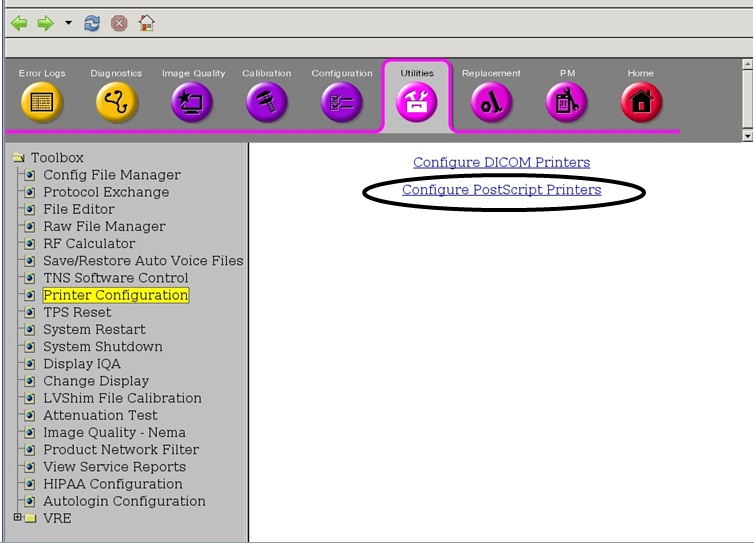
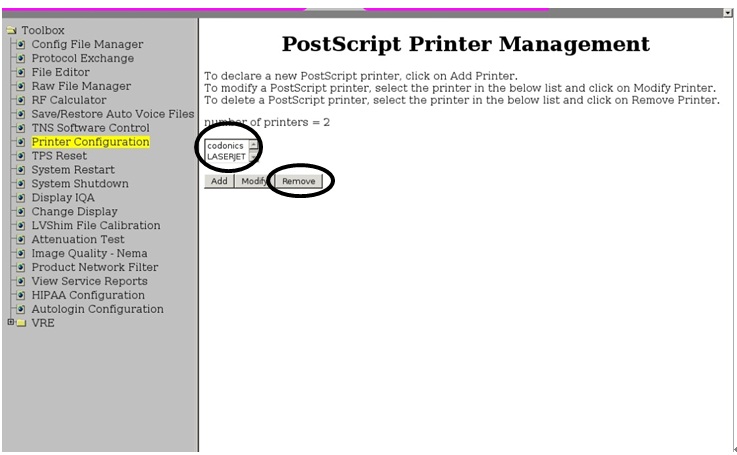
- Select Configure Post Script Printers.
Figure 12. Configure Post Script Printers
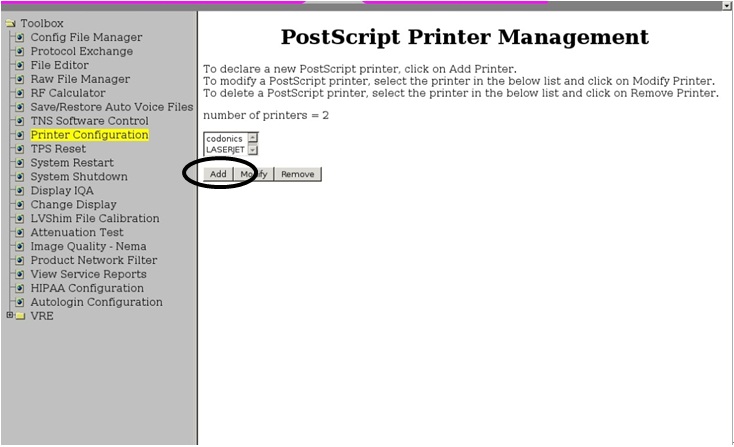
- Select Add Button.
Figure 13. Add Button
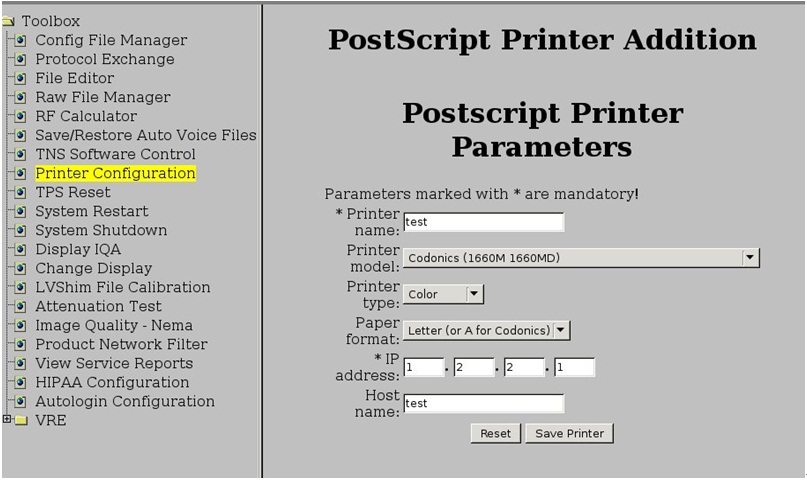
- Configure the Printer from the UI presented.
Figure 14. Configure the Printer from the UI presented
6 Post Script Printer Modifications
Procedure
- Select Configure Post Script Printers.
Figure 15. Configure Post Script Printers
- Select the Printer to modify.
- Select Modify Button.
Figure 16. Modify Button

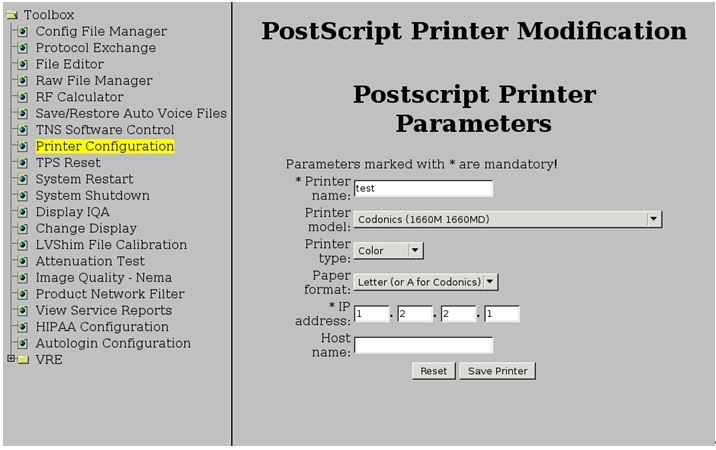
- Modify the printer from the UI.
Figure 17. Modify the printer from the UI
7 Post Script Removal
Procedure
- Select Configure Post Script Printers.
Figure 18. Configure Post Script Printers
- Select the Printer to Remove.
- Select Remove Button.
Figure 19. Remove Button
8 Finalization
Procedure
- Systems need to be restarted for the changes to take effect.
- After printer configuration, create a test film.
- Ensure the system is working before turning over to customer.