Printer Configuration for Film Composer
Prerequisites
The DICOM Print feature allows configuration of the filming function to accommodate filming to any paper or film printer that is networked to the workstation through a DICOM printer.
When upgrading from Release 8.2.5 to 8.3, some vendor DICOM print equipment will need to be reconfigured to accept the new DICOM print AETitle. The old AETitle was Print_SCU; the new AETitle is hostname_DCP where hostname_DCP is the hostname of the computer (e.g., a hostname of signa has an AETitle of signa_DCP). This information must be given to the camera vendor to input the new AETitle name for cameras like the Kodak/Imation 8410 that require that the AETitle be pre-configured.
With HDMR 12.0 and all subsequent product releases, the Film Composer supports DICOM Color printing. If your paper printer supports DICOM Color, you will want to use DICOM as opposed to Postscript format. The setup for DICOM greyscale and color paper is identical—the printer and scanner will determine if the image is color or grayscale and set elements in the DICOM header appropriately. In the Film Composer setup, you need to select the appropriate media type (paper) and film size. There is no explicit configuration for color versus grayscale.
1 Configuring a DICOM printer for Film Composer
Procedure
- Boot system to Application level.
- Start the Mini-Viewer and select Film Composer from the menu.
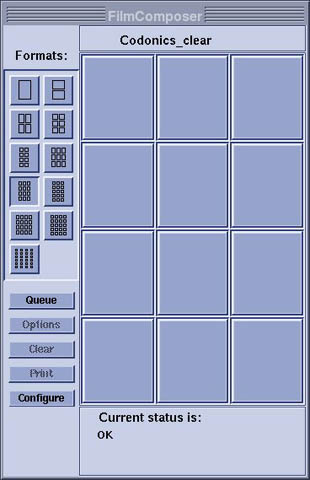
- Select Configure option on the Film Composer
GUI. See Figure 1,
Figure 1. Film Composer GUI
- Click Add.
- A new GUI will appear called “Type of Laser Camera”. Click DICOM..
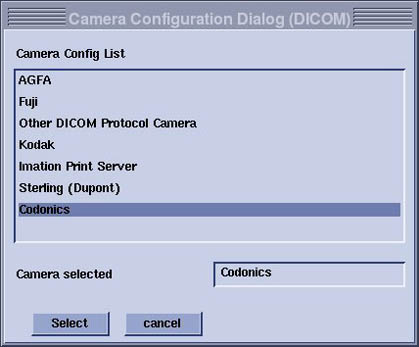
- A list of possible printers will appear. Select the printer
being used. See Figure 2.
Figure 2. Camera Configuration
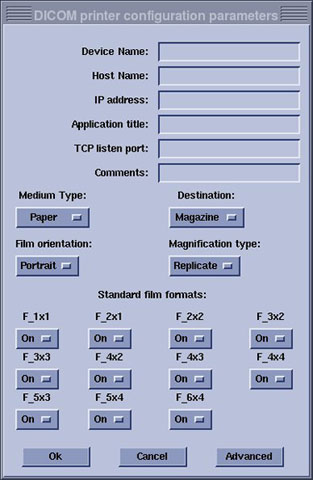
- After selecting the camera, the Configuration GUI will appear. Fill in necessary information. When done, click OK to configure the printer. For the Codonics Printer
see Table 2. Also see Figure 3.note:
Contact camera vendors for other printer types.
Figure 3. Codonics Printer Parameters
 note:
note:Paper size can be selected by clicking on the “Advanced” option.
2 Configuring Postscript Printer for Film Composer
Procedure
- Boot Signa to Application level.
- Start the Mini-Viewer and select Film Composer from the menu.
- Select Configure option on the Film Composer GUI. See Figure 1.
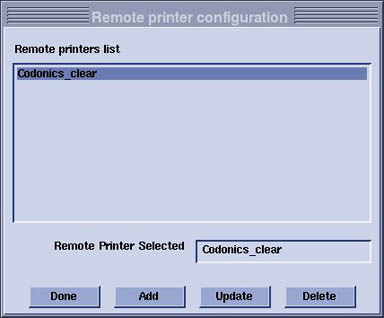
- Click Add option from the Remote printer
configuration GUI. See Figure 4.
Figure 4. Remote Printer Configuration
- Then select Postscript camera to be configured.
- Enter the applicable information in the PS printer configuration
parameters GUI. See Figure 5.
Figure 5. Printer Configuration Parameters
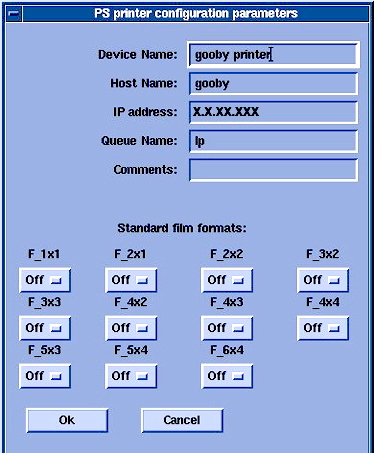
- Click OK to complete the printer configuration.
3 Finalization
Procedure
- After camera configuration, create a test film.
- Ensure the system is working before turning over to customer.