PROCEDURE TO TAKE TABLE OUT FROM THE MAGNET ROOM
Prerequisites
While servicing the table it may be required to disconnect the table from Gantry and required to take out from the magnet room. This instruction provides procedure to take out the table out from the Magnet Room
Procedure
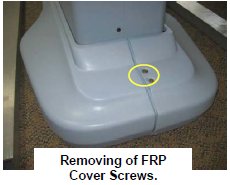
- Remove FRP bottom covers of Fixed Table.
- Remove the Rubber cap and then screws of the FRP bottom cover
on the near the Gantry end of the Table.
Figure 1. FRP Cover1

- Similarly remove the cap and screws of the FRP bottom cover
on the rear end of the Table.
Figure 2. FRP Cover2
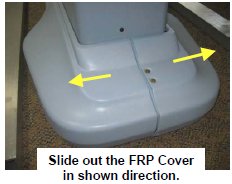
- Remove the right Bottom FRP Cover. Similarly remove the left
Bottom FRP cover on the other side
Figure 3. FRP Cover3
- Now remove the Dock FRP Cover Locking screws and then the Dock
FRP cover carefully.note: There are cable below the FRP cover. Be careful not to damage them.
Figure 4. FRP Cover4

- Keep both Bottom FRP Covers and Dock FRP covers aside safely.
- Remove the Rubber cap and then screws of the FRP bottom cover
on the near the Gantry end of the Table.
- Disconnect cables.
- Disconnect the Sensor cable and Actuator Power supply cable
from the Power supply extension cable from Control box.
Figure 5. Disconnect cable 1
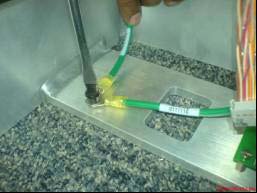
- Disconnect the Earthing cables from the Dock Frame.
Figure 6. Disconnect cable 2
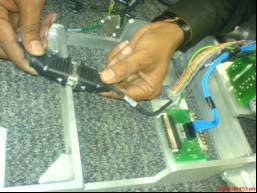
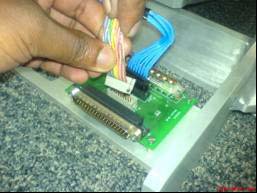
- Disconnect the Control Board Cable-2 (TEB Cable) Assembly from
the connector box.
Figure 7. Disconnect cable 3
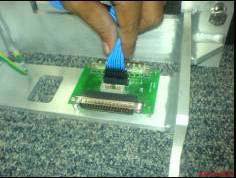
- Disconnect the Control Board Cable (TEB Cable) Assembly from
the connector box.
Figure 8. Disconnect cable 4
- Disconnect the Sensor cable and Actuator Power supply cable
from the Power supply extension cable from Control box.
- Remove the screws and nuts connecting the Table and the Dock
frame.
Figure 9. Dock Frame

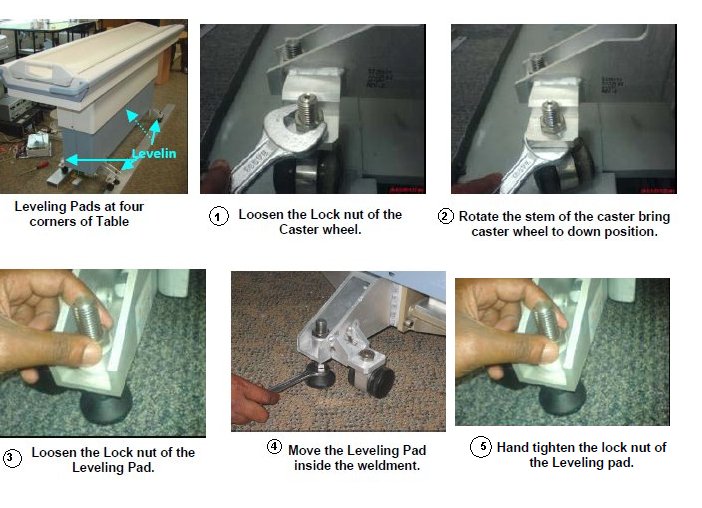
- Mark the position of the 4 pads so that it can be restored later.
- Loosen four Leveling pads.
Figure 10. Loosen four Leveling pads
- Move the Table out from Magnet Room.
Finalization
No finalization steps.