Host PC CPU Fan
Prerequisites
Procedure
- Shutdown the system software and Lockout/Tagout the power to the Simple OC before beginning the replacement.
- Wear the static electricity prevention band to the wrist.
- Spread the static electricity prevention sheet for replacement
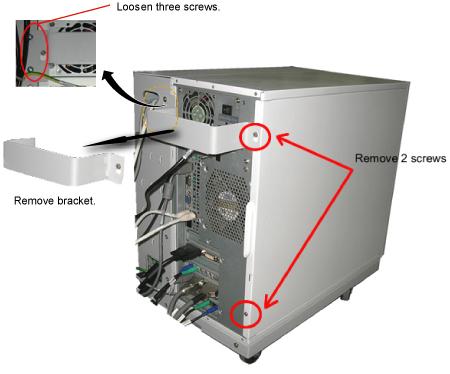
- Loosen the four screws that is fixing the bracket on the PC
rear panel and take the bracket away.note:
A seal might be attached at the PC rear panel which describes "Warranty void if this seal removed". Please do not care about description of the label and remove it for panel removal.
- Remove the left panel of the PC by remove 2 bolts.
Figure 1. Removing the Left Panel of PC
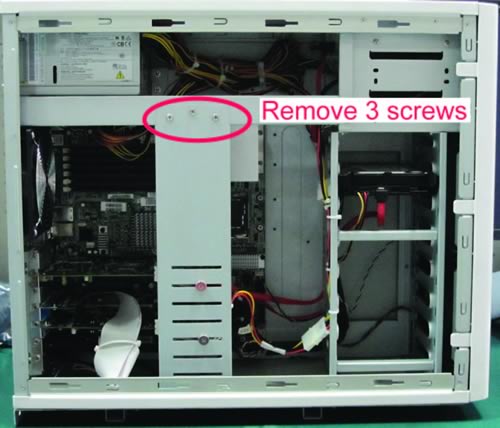
- Remove the bracket (Show inFigure 2Figure 3),
Figure 2. Loosen the two screws
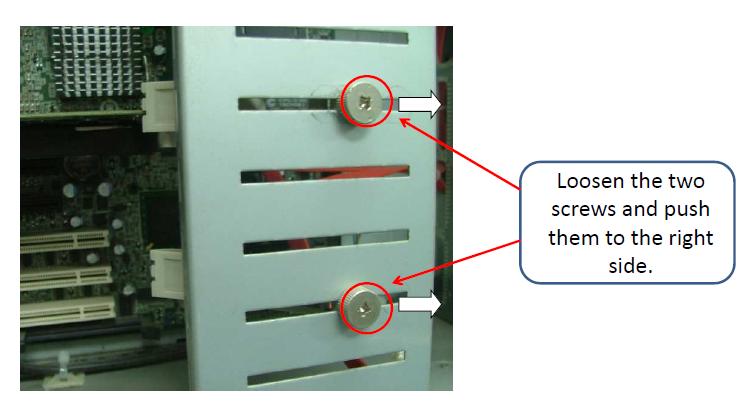
Figure 3. Removing the 3 screws
 note:
note:Use Anti-static wrist strap to discharge before CPU FAN replacement. One end clipped onto a metal object, in this case a metal cabinet, the other end strapped onto your wrist.
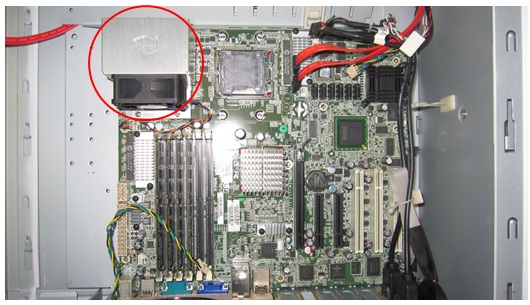
- Find the CPU fan on the motherboard.
Figure 4. Find the CPU fan
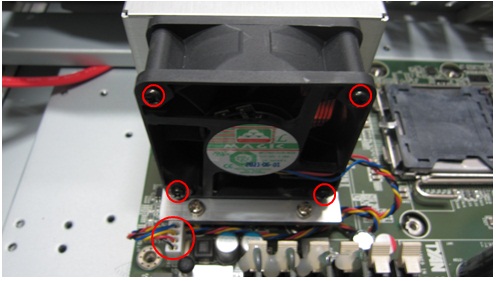
- Remove the four fasten screws on CPU fan.
Figure 5. Remove the four fasten screws

- Remove the power connector of fan and then the fan can be removed.
Figure 6. Remove the power connector

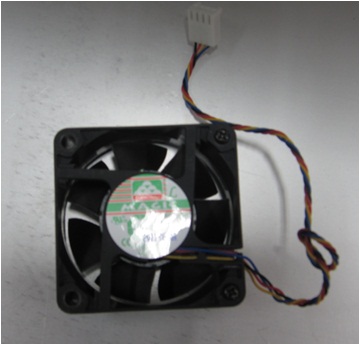
- Find a new CPU fan, remove the heatsink on it.
Figure 7. remove the heatsink
- Insert the fan power connector to the socket in the motherboard
and then fasten the four screws on it.Pay attention to the power pin
direction.
Figure 8. Insert the fan power connector
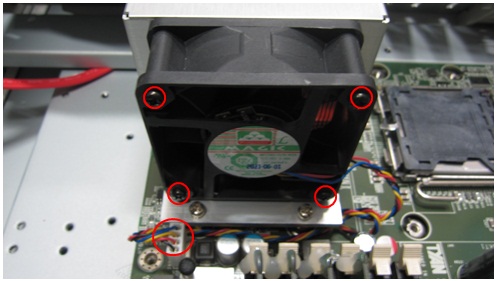
- Confirm the four screws fasten well and power connector connected
well
Figure 9. Confirm install well
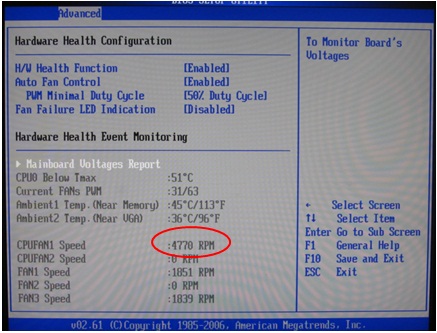
- After finish replacement, power on the host PC and check the
CPU fan1 speed in BIOS. It should be around 3000~8000RPM.
Figure 10. check the CPU fan1 speed in BIOS
Finalization
- After the replacement is done, re-install the bracket, left panel, and restore the system.
- Turn the system power on. Verify system boot up without any problem.
- Perform one body or head scan.