First Image
Prerequisites
Procedure for obtaining the first image after the system installation.
Procedure
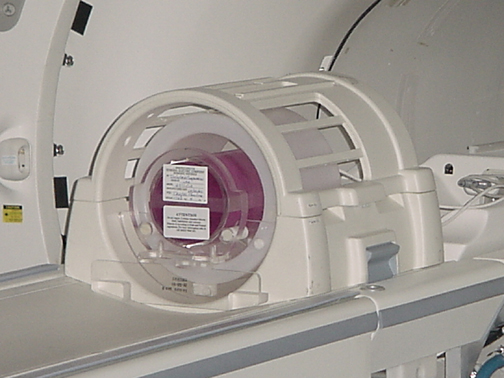
- Place the DQA phantom in the head coil. Positioning the fill plugs up
and toward the rear of the magnet. See Figure 1.
Figure 1. DQA PHANTOM POSITIONING

- Landmark at the landmark lines of the phantom.
- At the keypad on the front of the magnet enclosure, press LANDMARK
and MOVE TO SCAN. note:
Exact location of isocenter will be found in a later procedure. The DQA should now be approximately centered longitudinally in body coil assembly. A good first estimate is about 32 inches behind front edge of body coil assembly.
- At the operator work space, prepare the system for a “First Image”
scan using the scan protocol shown in the Service Protocols procedure located
on the service methods CD-ROM, or for the alternate proprietary procedure,
see Table 5.
- Select Scan (system Auto Prescans first).
- For TwinSpeed, repeat Step 4 and Step 5 with GradMode=ZOOM.
- DISPLAY IMAGE
Verify that the images on the monitor correspond with Figure 2. Do not be concerned with image quality at this time; it will be addressed during the Performance Checks.
Figure 2. DQA PHANTOM GEOMETRY FOR "FIRST IMAGE"
Finalization
No finalization steps.